Hiking the Breathtaking W Trek in Torres del Paine – The Ultimate Guide (5-Day Itinerary, Booking info & Tips)
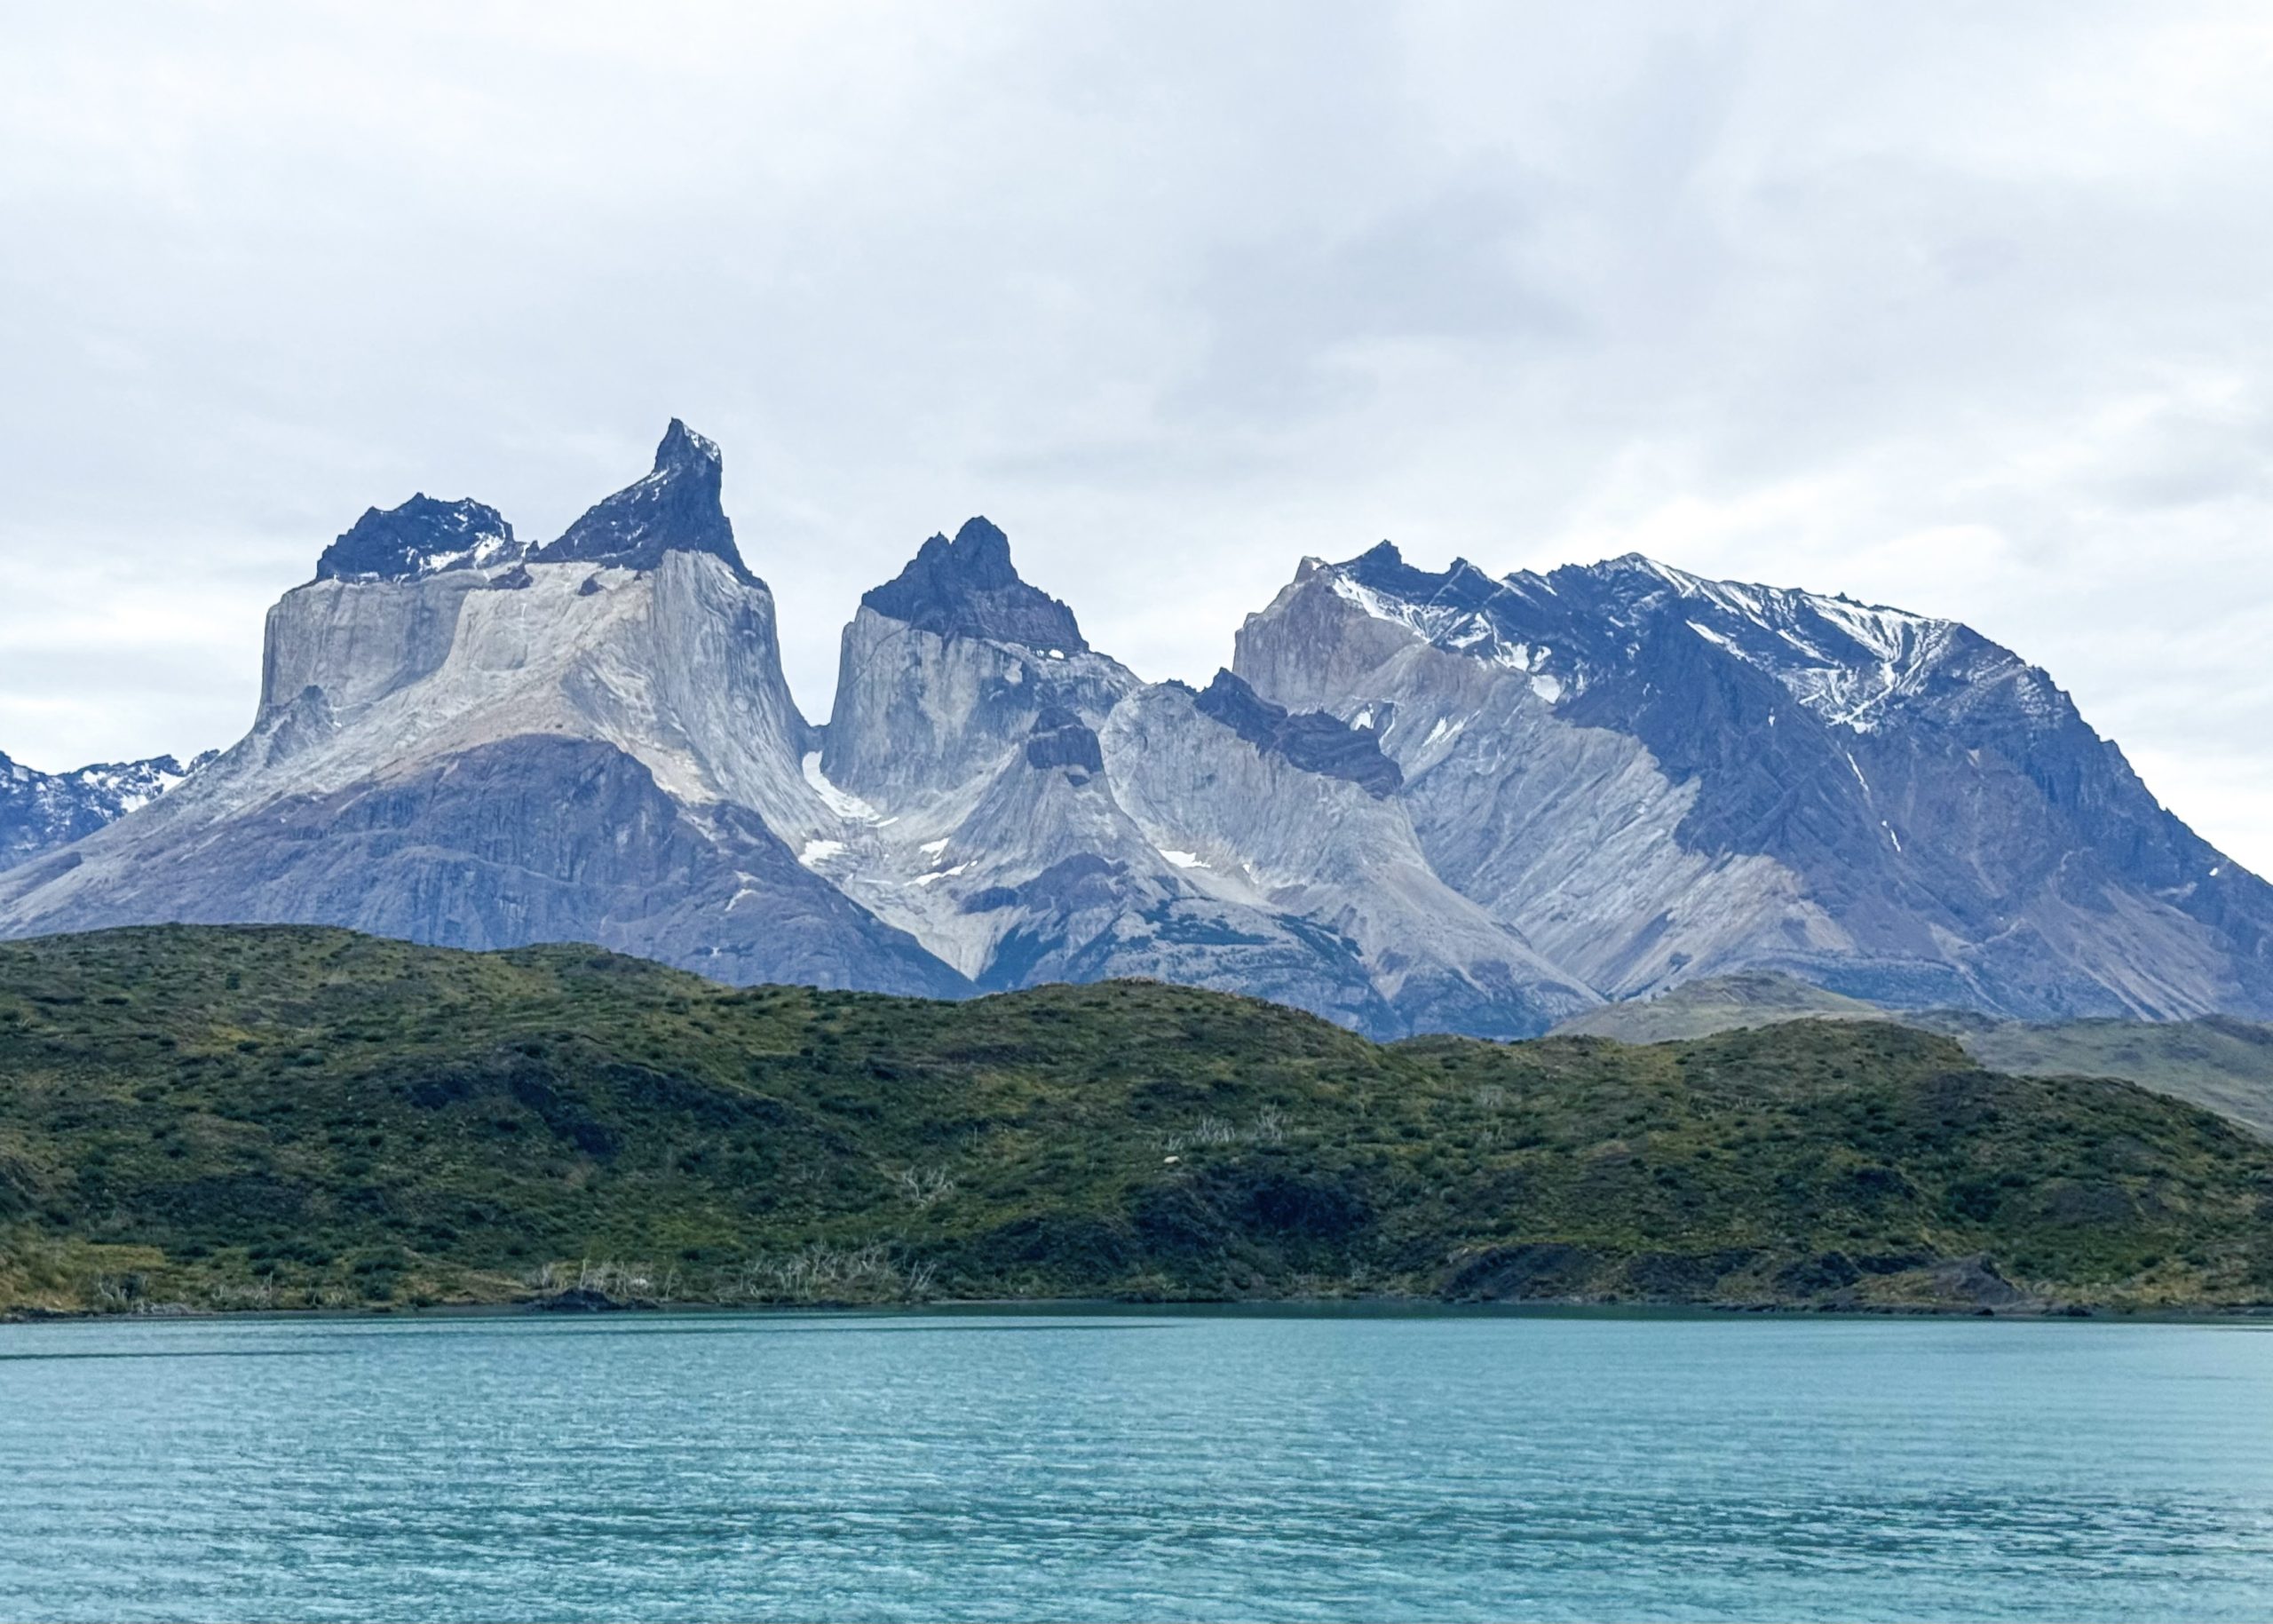
The W Trek or the W Circuit in Torres del Paine is one of the most popular — and most stunning — backpacking routes on the planet. It’s the kind of trail that every backpacker dreams of doing one day, with its dramatic mountain peaks, turquoise lakes, and ever-changing Patagonian skies.
It had been on our bucket list for years. But to be honest, it always felt a little scary. It’s a multi-day trek — about 50 miles (80 kilometers) long — where you carry everything on your back, hike through unpredictable weather, and spend days out in the wild. We kept wondering, Are we really ready for something like this?
One day, we just decided to go for it. We figured we were as fit as we were ever going to be, and once we started planning, the nerves turned into excitement. Every detail we uncovered — from the glaciers to the granite towers — made us more in awe of Patagonia.
Now that we’ve done it, I can say this: it was hands down the hardest backpacking trip we’ve ever done. It tested our stamina, our legs, and honestly, our patience. But it was also one of the most breathtaking and rewarding experiences we’ve had in nature. If you’ve ever dreamed of hiking in Patagonia, the W Circuit is the trip to do — the views are out of this world, and every mile is worth it.
Since it was our first time flying to Chile, we knew we had to be extra prepared. We started planning months in advance and kept a running spreadsheet to keep track of it all — campsites, refugios, buses, gear lists, town stays… you name it. I remember wishing there was just one simple checklist to follow. So in this post, I’m sharing everything we did and learned along the way — from what we booked and packed to where we stayed and all the little tips that helped us out. I hope it makes your planning a whole lot easier and your trip just as unforgettable.
Table of Contents
When is the best time to backpack the W-circuit?
When it comes to hiking the W Circuit, two big factors will determine when you go: refugio availability and weather.
Refugios
Refugios are the mountain lodges and campsites along the trail — think shared dorms, tent platforms, meal services, and even hot showers in some places. They’re managed by a couple different companies, and most hikers reserve beds or campsites well in advance. The earlier you start planning, the more flexibility you’ll have in choosing your dates and piecing together your ideal itinerary. That said, even with early planning, expect availability to be a bit of a puzzle — spots fill up fast, especially in the most popular months.
Weather
The W Circuit is open for hiking from late October to early April, during Patagonia’s spring, summer, and early fall. Within that window, the best time to go depends on what kind of experience you’re looking for — and how well you handle unpredictable weather.
Peak season is December to February, with the longest days, warmer temperatures, and the biggest crowds. If you’re hoping to go during this window, start booking at least 6-8 months in advance (earlier if possible!).
Shoulder season — October to early December, and March to early April — means fewer people, more last-minute openings, and a slightly higher chance of wild weather. Some services start winding down on the edges of the season, so check what’s open before finalizing your plans.
Here’s the thing: Patagonian weather is famously chaotic, no matter when you visit. One minute you’re hiking under clear blue skies, and the next, you’re pulling out your rain jacket in sideways wind. We’re not exaggerating when we say you could get all four seasons in one day.
The good news? Each refugio posts hour-by-hour weather and visibility charts, so you can try to time your hikes around clearer skies.
Our Experience and Tips
We started planning in October, hoping for a February trip, but the Refugios were already nearly full. The soonest we could stitch together a complete route was early March, and honestly, it turned out to be pretty good — you really can’t go wrong when you visit a gorgeous place like this.
We also wanted to catch the tail end of penguin season, which usually wraps up around this time, and squeeze in a visit to see them after our hike (they were a total highlight!).
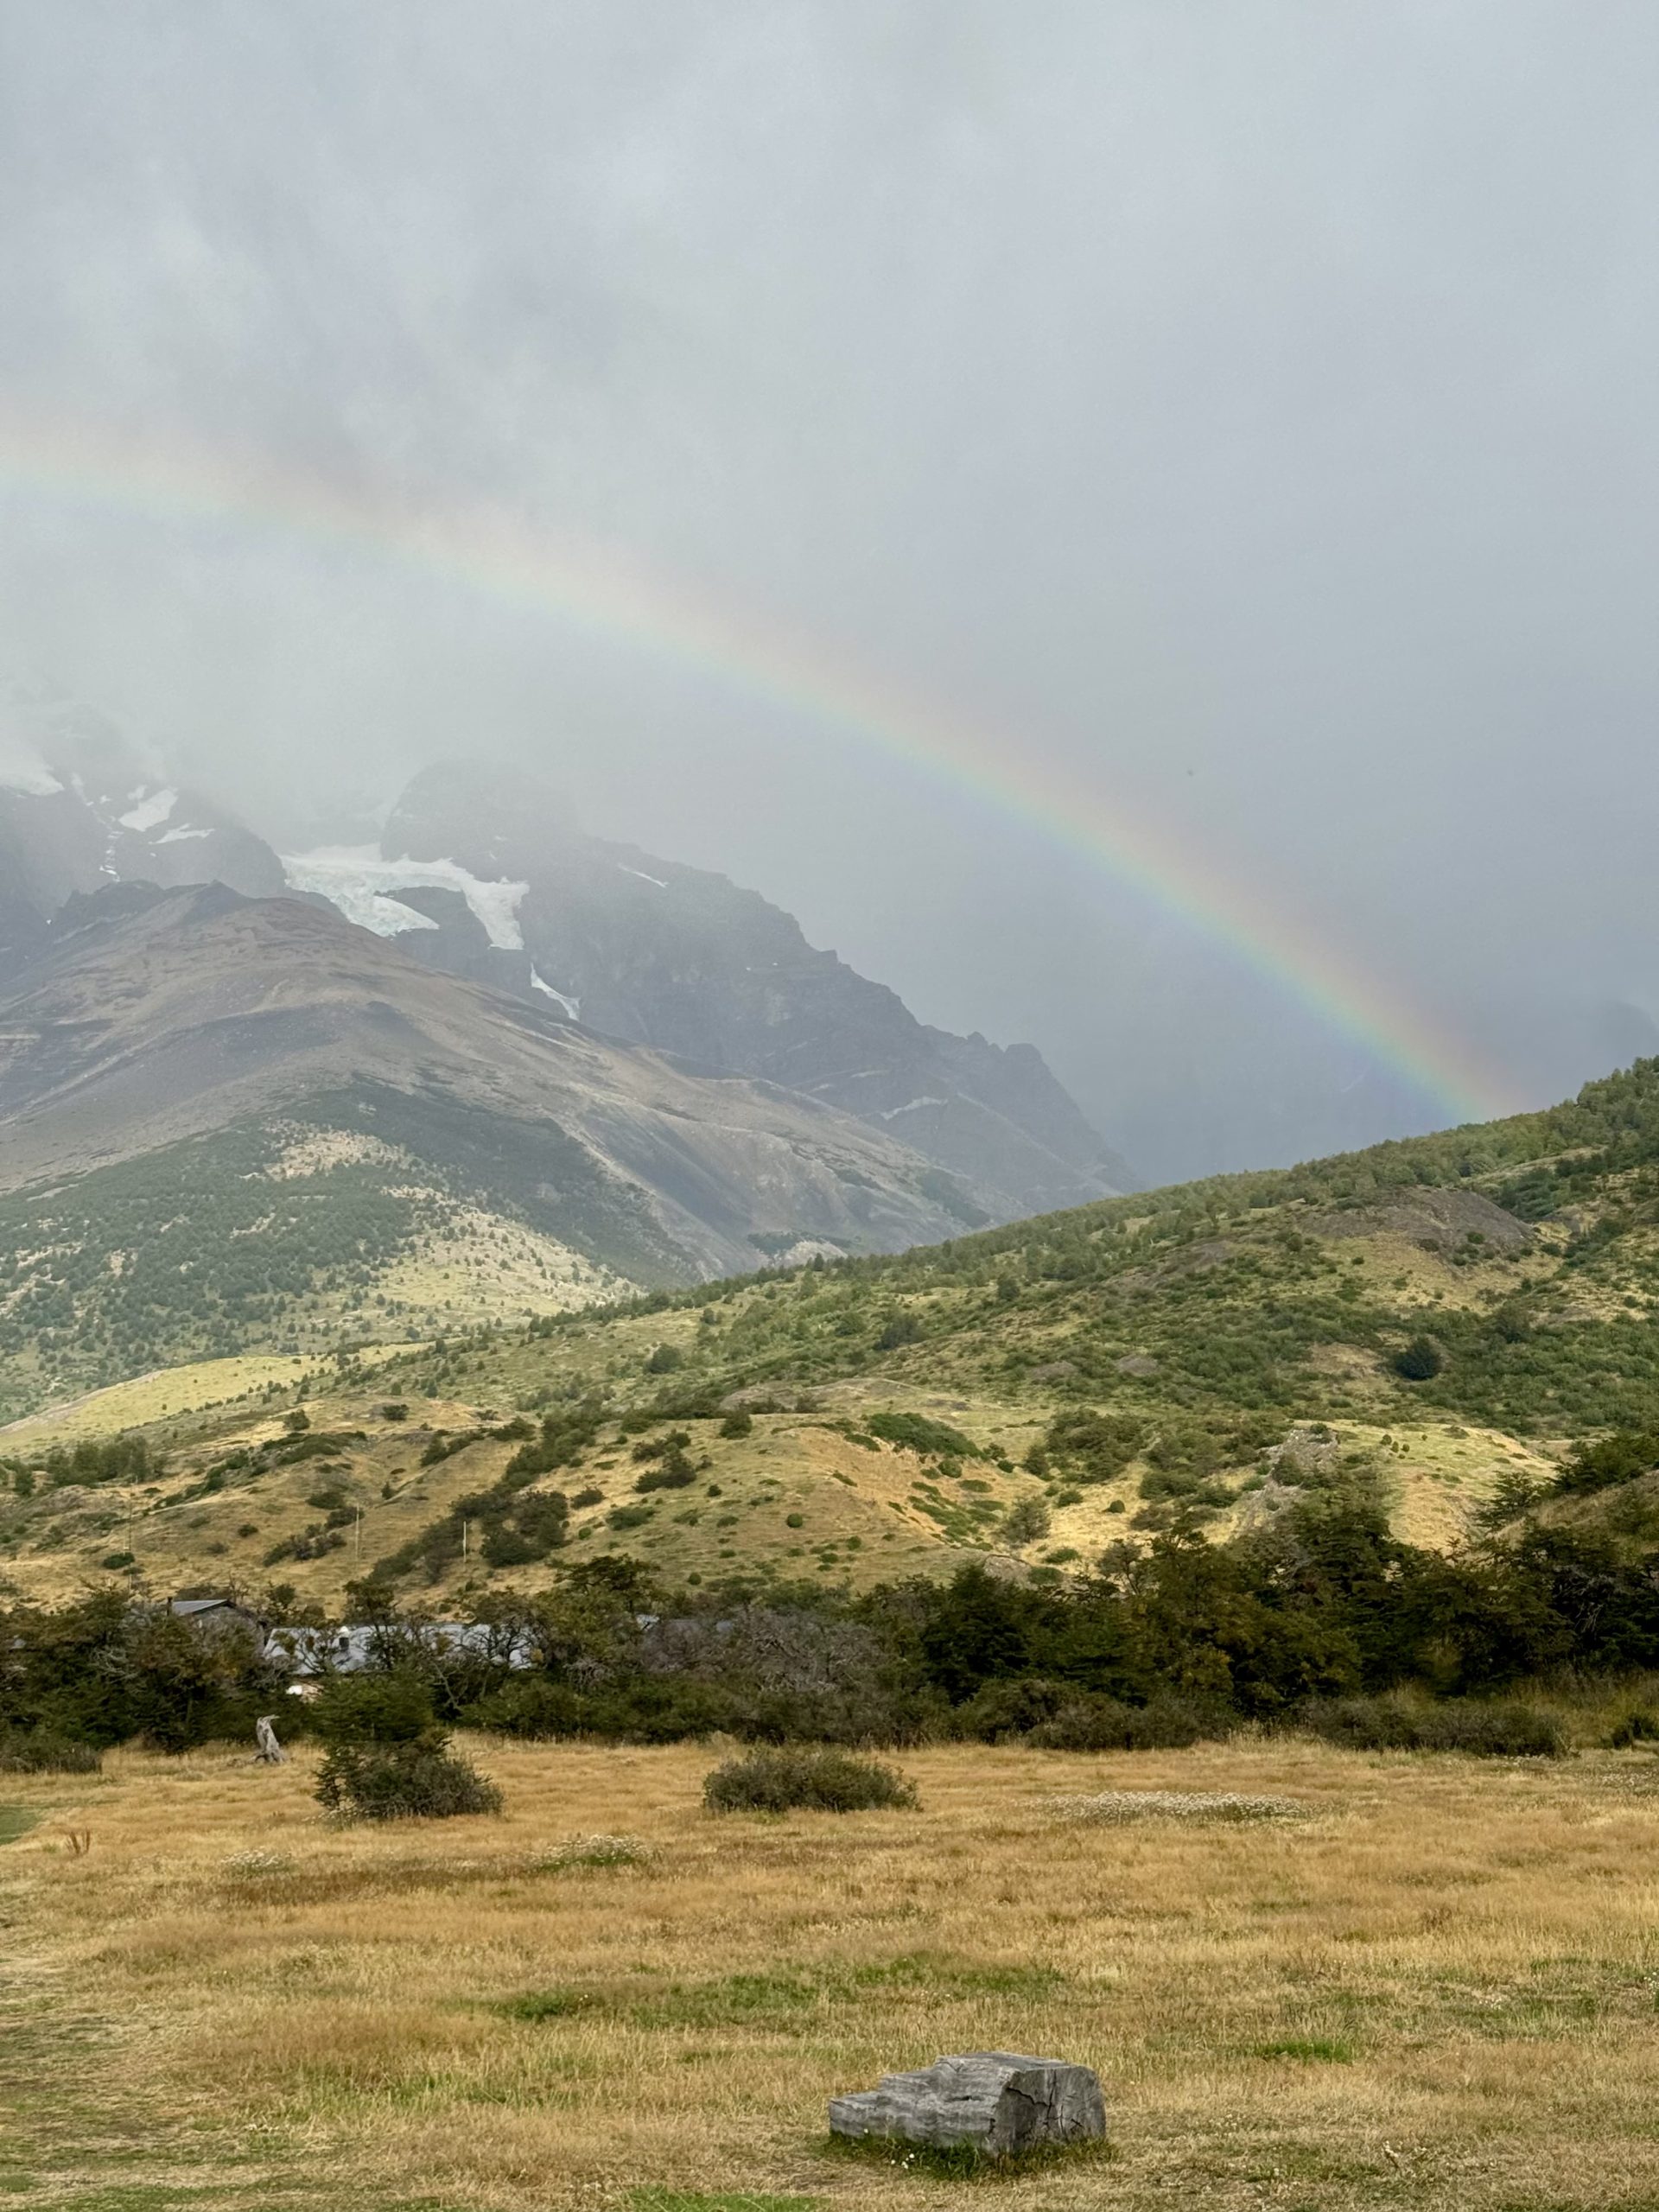
As for the weather? It was a total mixed bag. We had some cloudy and rainy days where the famous views stayed hidden — and some gorgeous, sunny days that made it all worth it. But the real magic? Rainbows. So many rainbows. Clouds would part, the sun would peek out, and boom — a rainbow would stretch across a lake or glacier. Truly surreal.
Tip: If we learned one thing, it’s this: build in some buffer days. Having an extra day or two gives you the flexibility to shuffle your hikes around based on the forecast and maximize your chances of catching those bucket-list views.
Should you choose a guided tour for your hike?
One of the first decisions you’ll need to make is whether to go with a guided tour or plan a self-guided adventure — and there’s no one-size-fits-all answer.
We personally chose to go self-guided because we wanted the freedom to hike at our own pace, stop for long breaks (or rainbows!), and build our own itinerary. Plus, it was a lot more budget-friendly. We also genuinely enjoy the planning process — figuring out the route, booking each place to stay, and putting together packing lists. Honestly, it added to the excitement and made the whole experience feel even more rewarding.
That said, guided tours are a great option — especially if you’re traveling solo and want the comfort of company, or if you just want to show up and not worry about any of the logistics. Most guided tours will take care of everything for you, from booking refugios to organizing transportation and meals. It’s more expensive, but if you’ve got the budget and prefer ease over spreadsheets, it could be a solid way to go.
If you’re leaning toward self-guided, don’t worry — the W Circuit is totally doable on your own. The trails are well-marked, the route is popular, and you’ll see plenty of hikers along the way and at the refugios. That said, it’s important to train, plan and prepare well — both for safety and comfort.

Booking Accommodations on the W Trek (a.k.a. the hardest part of the whole trip)
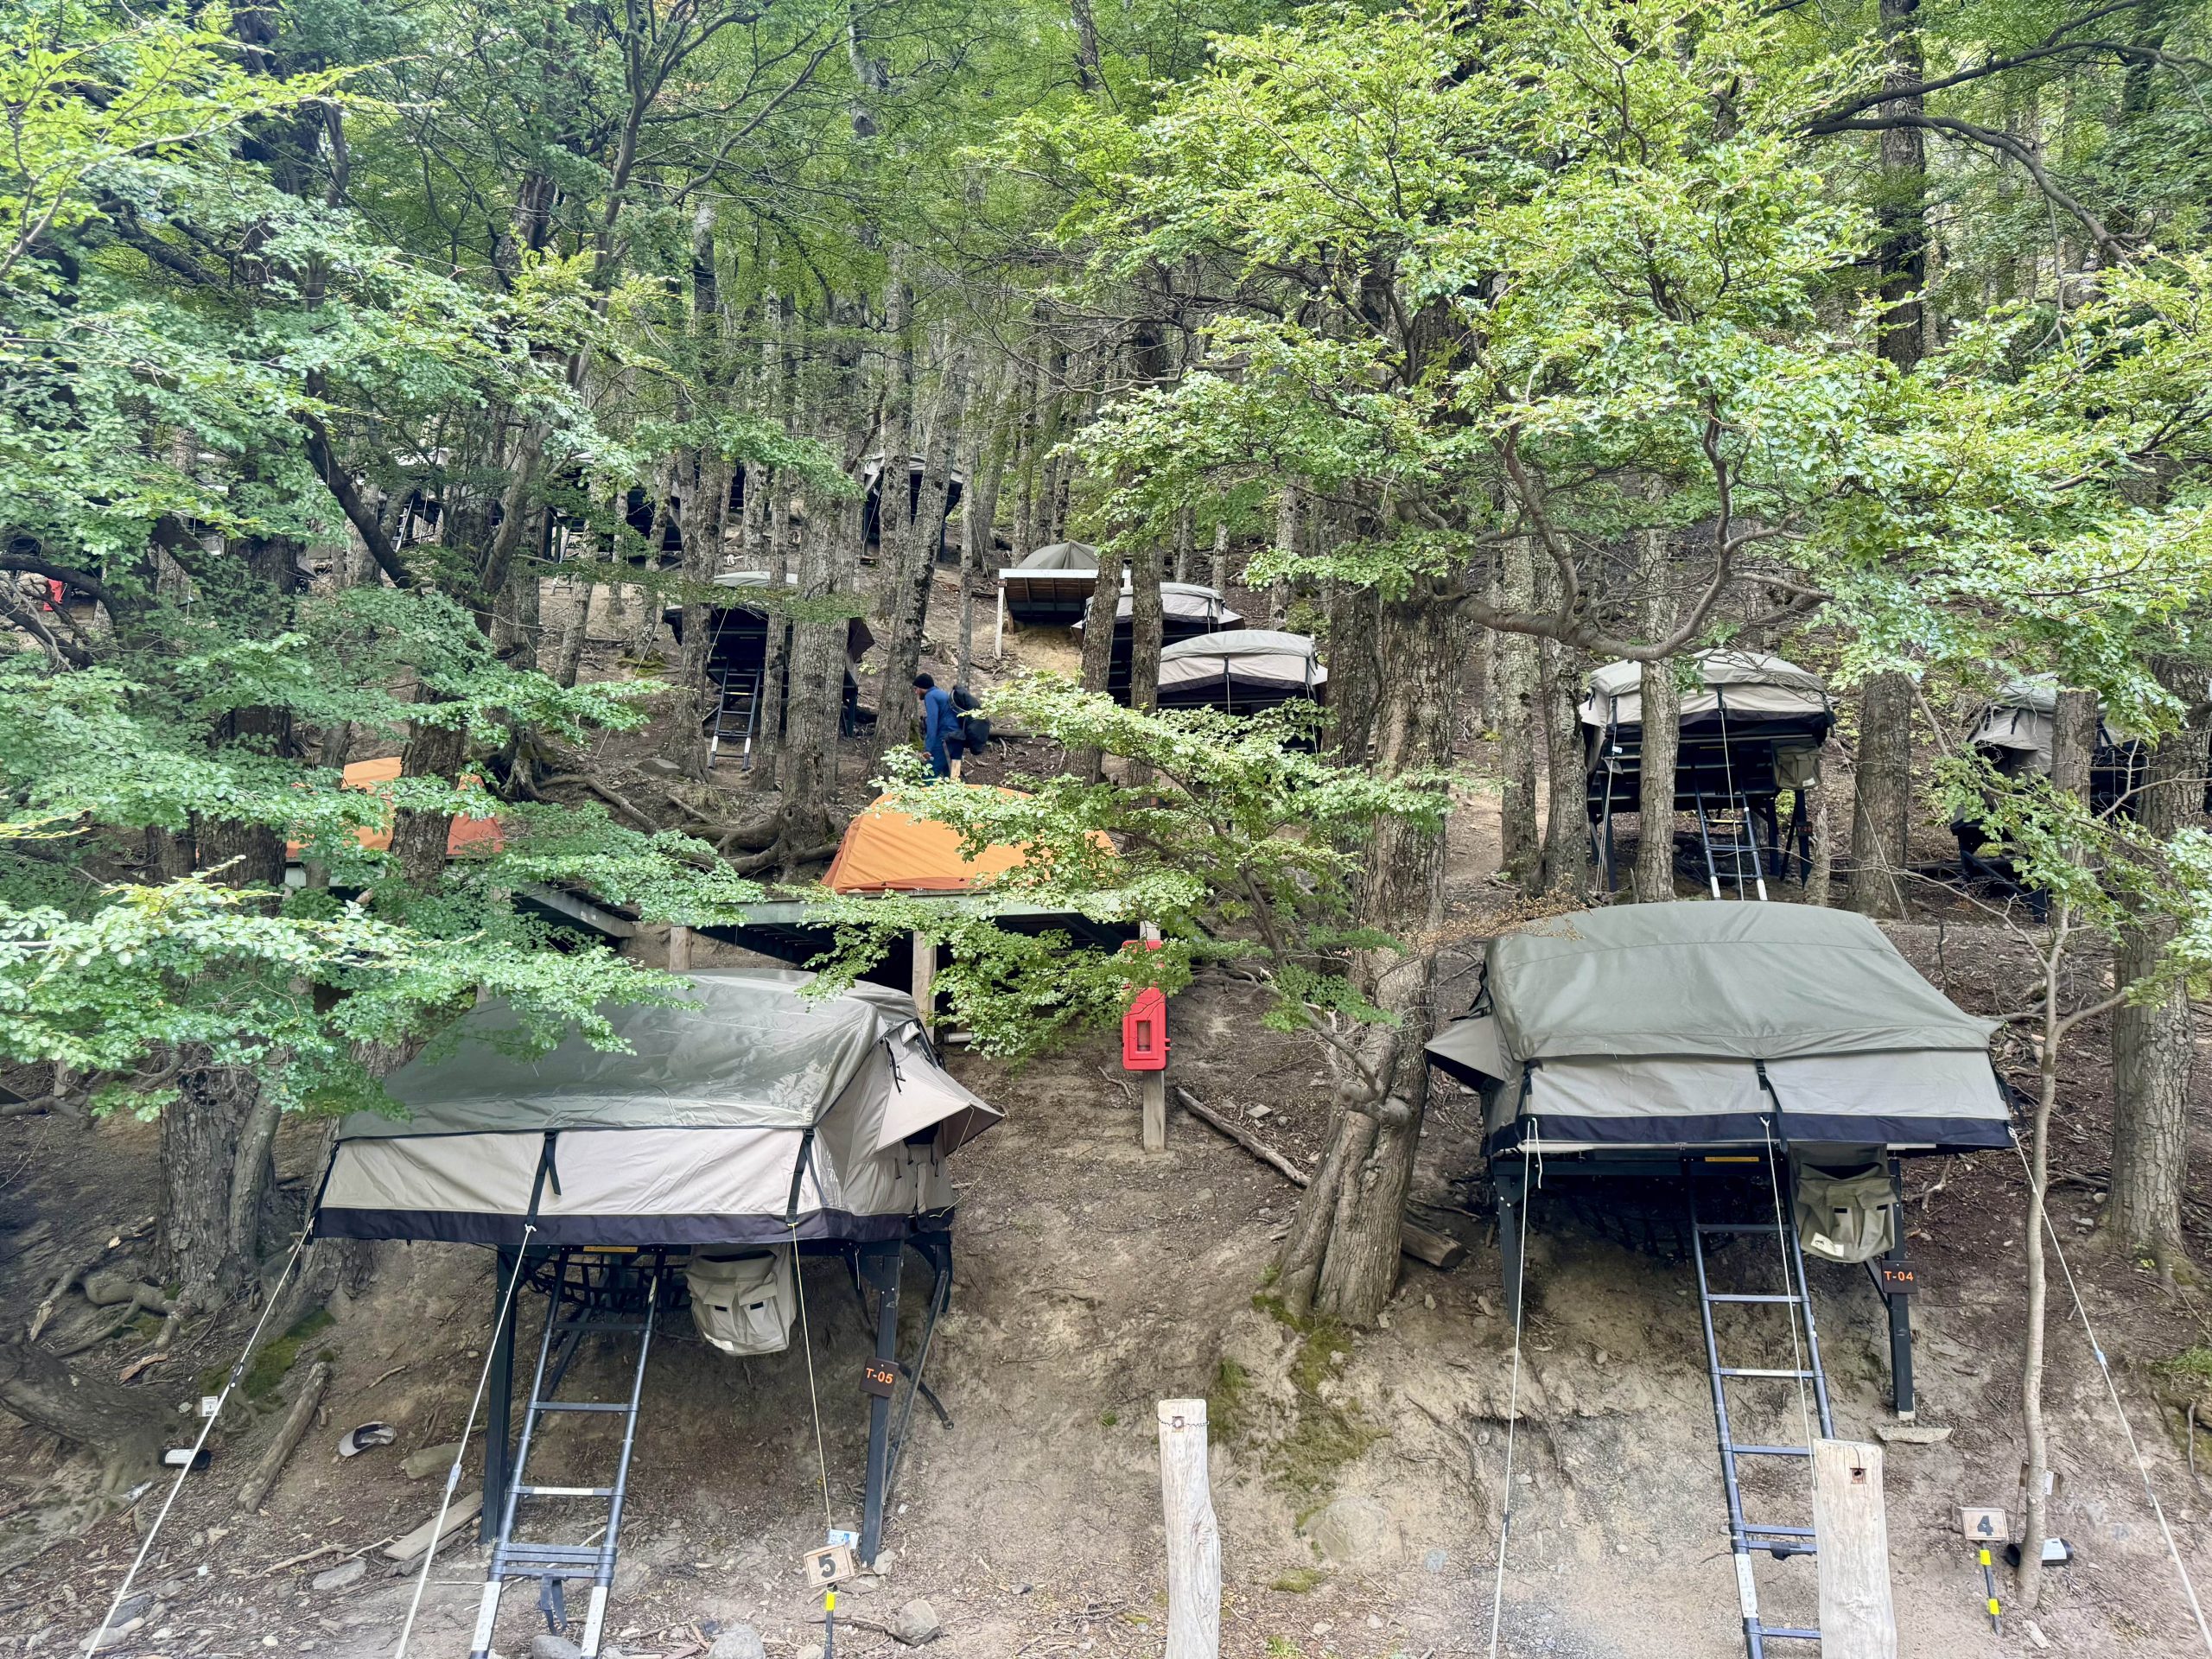
One of the best things about the W Trek is that you don’t need to carry your own tent — unless you want to, of course. The trail is dotted with cozy refugios that offer everything from pre-set tents (our choice!) to cabins and lodge-style rooms if you want a little more comfort (and don’t mind the price tag).
Going the Refugio route made our backpacks so much lighter and the trek way more enjoyable — no tent setup, no carrying extra gear, just roll into camp and check in. Plus, every Refugio has bathrooms, hot showers, and a restaurant, which makes this backcountry experience surprisingly comfy.
But here’s the truth: booking these accommodations? A whole trek of its own.
If you ask me what the hardest part of the entire trip was — it wasn’t the 16-mile Day 3 hike, or the wind that made us walk like sideways crabs — it was figuring out the bookings.
The websites are confusing. The dates won’t line up perfectly. The availability checker sometimes breaks your spirit. But listen — don’t give up! With a little patience, you can absolutely book it yourself and save hundreds of dollars compared to booking a guided tour. Here’s what you need to know:
- Refugio Chileno, Cuernos, and Frances are managed by Las Torres
👉 https://lastorres.com/donde-alojar/refugios/ - Paine Grande and Refugio Grey are managed by Vertice Patagonia
👉 https://www.vertice.travel/alojamientos-torres-del-paine/
Pro tips
- Try booking as early as possible (like, 6+ months in advance if you’re aiming for peak season).
- Use a calendar and map to figure out your ideal route, then plug and play dates across both websites until you land a working itinerary.
- Be flexible — you might need to adjust the direction or length of your trek depending on what’s available.
I promise, once you crack the booking puzzle, the rest of the trip is a breeze. And the moment you’re sipping hot chocolate at a refugio while the mountains glow in sunset light — you’ll know it was all worth it.
5 Day Self-Guided itinerary
Before we get into all the logistics — what to book, what to pack, how to prep — let’s start with the fun part: the itinerary!
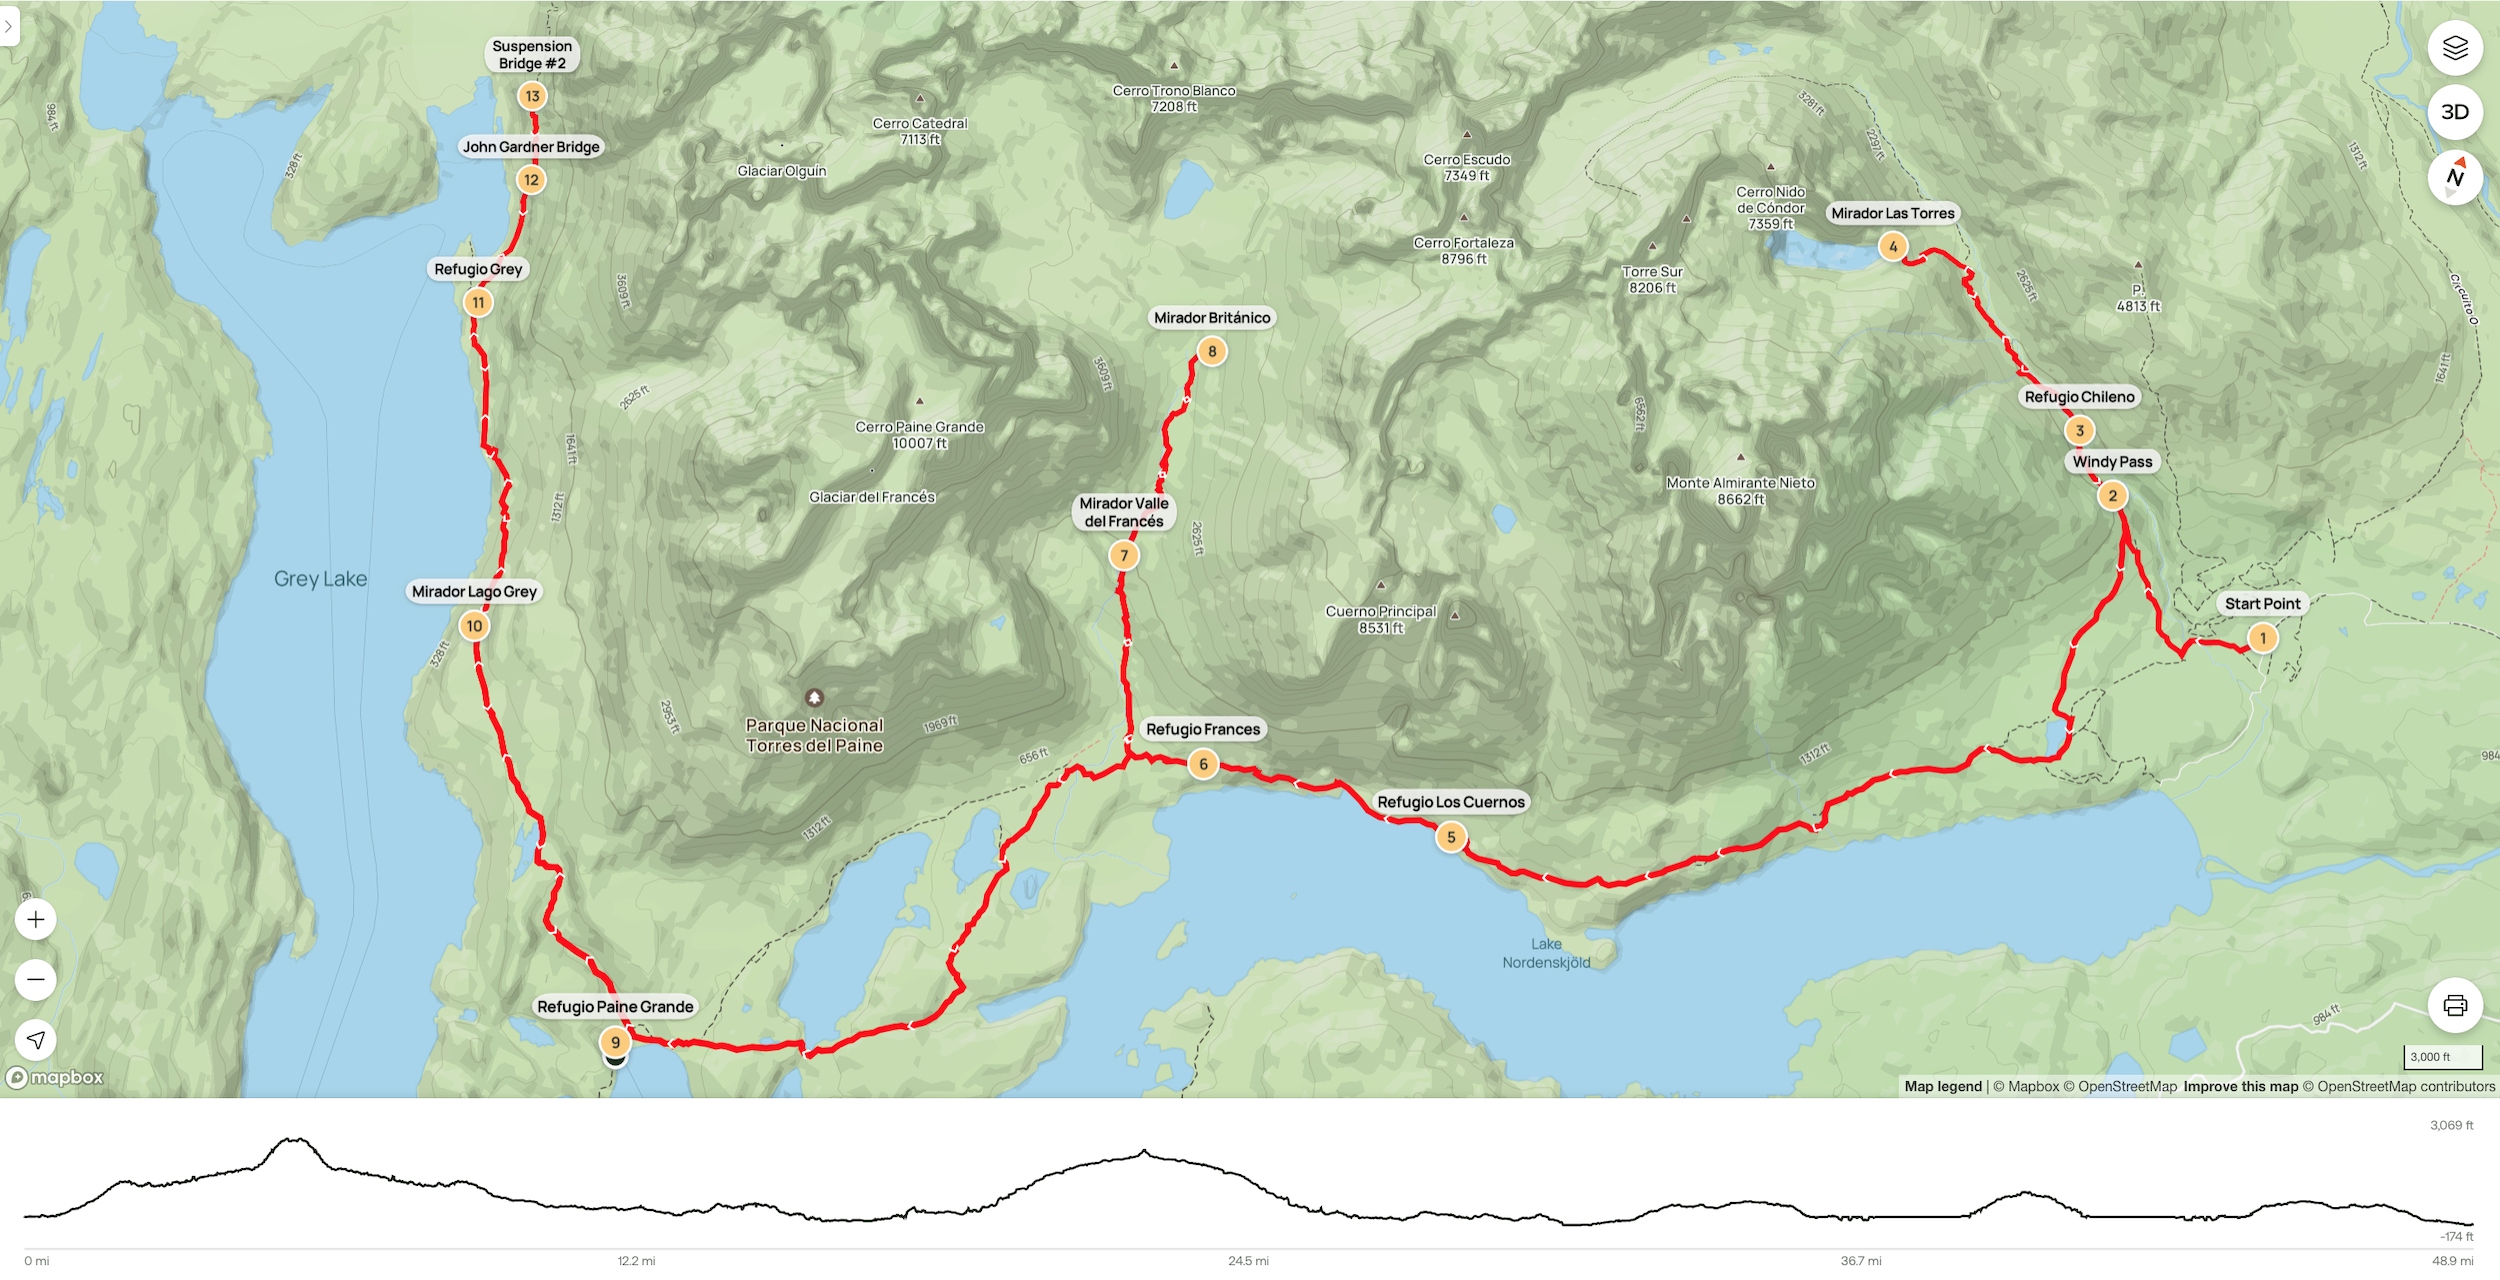
The route you take determines everything else, so it’s helpful to lock that down first. And when it comes to the W Circuit, there are two big decisions to make upfront:
How many days do you want to hike?
Most people hike the W in 4 to 6 days. We did it in 5, and it felt like the perfect sweet spot — not rushed, not too slow, and it gave us enough buffer for snack breaks, unexpected weather, and all the oohs and aahs along the way.
Which direction do you want to go?
You can either
- Start at Paine Grande and work your way toward the Towers, or
- Start at the Las Torres side (Chileno) and end near Grey Glacier
We started from the Las Torres side, mainly because that’s what we could find availability for when we booked — but honestly, I think whichever direction you pick, you’re going to love being on this trail! We liked the idea of doing the Towers hike on Day 1, while we still had all our energy and motivation. It’s one of the hardest and most iconic parts of the circuit, and we figured if we needed to slow down later or cut anything short (which we didn’t!), at least we’d already ticked off the big one.
Okay, now that you’ve got the lay of the land, here’s how our 5-day adventure played out — what we hiked each day, where we stayed, and all the beautiful chaos in between. Let’s go! 🏔️🎒✨
Day 0: Arrive in Puerto Natales
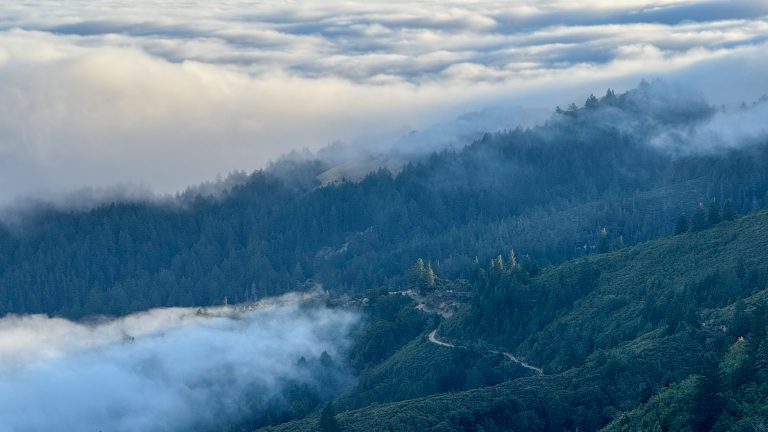
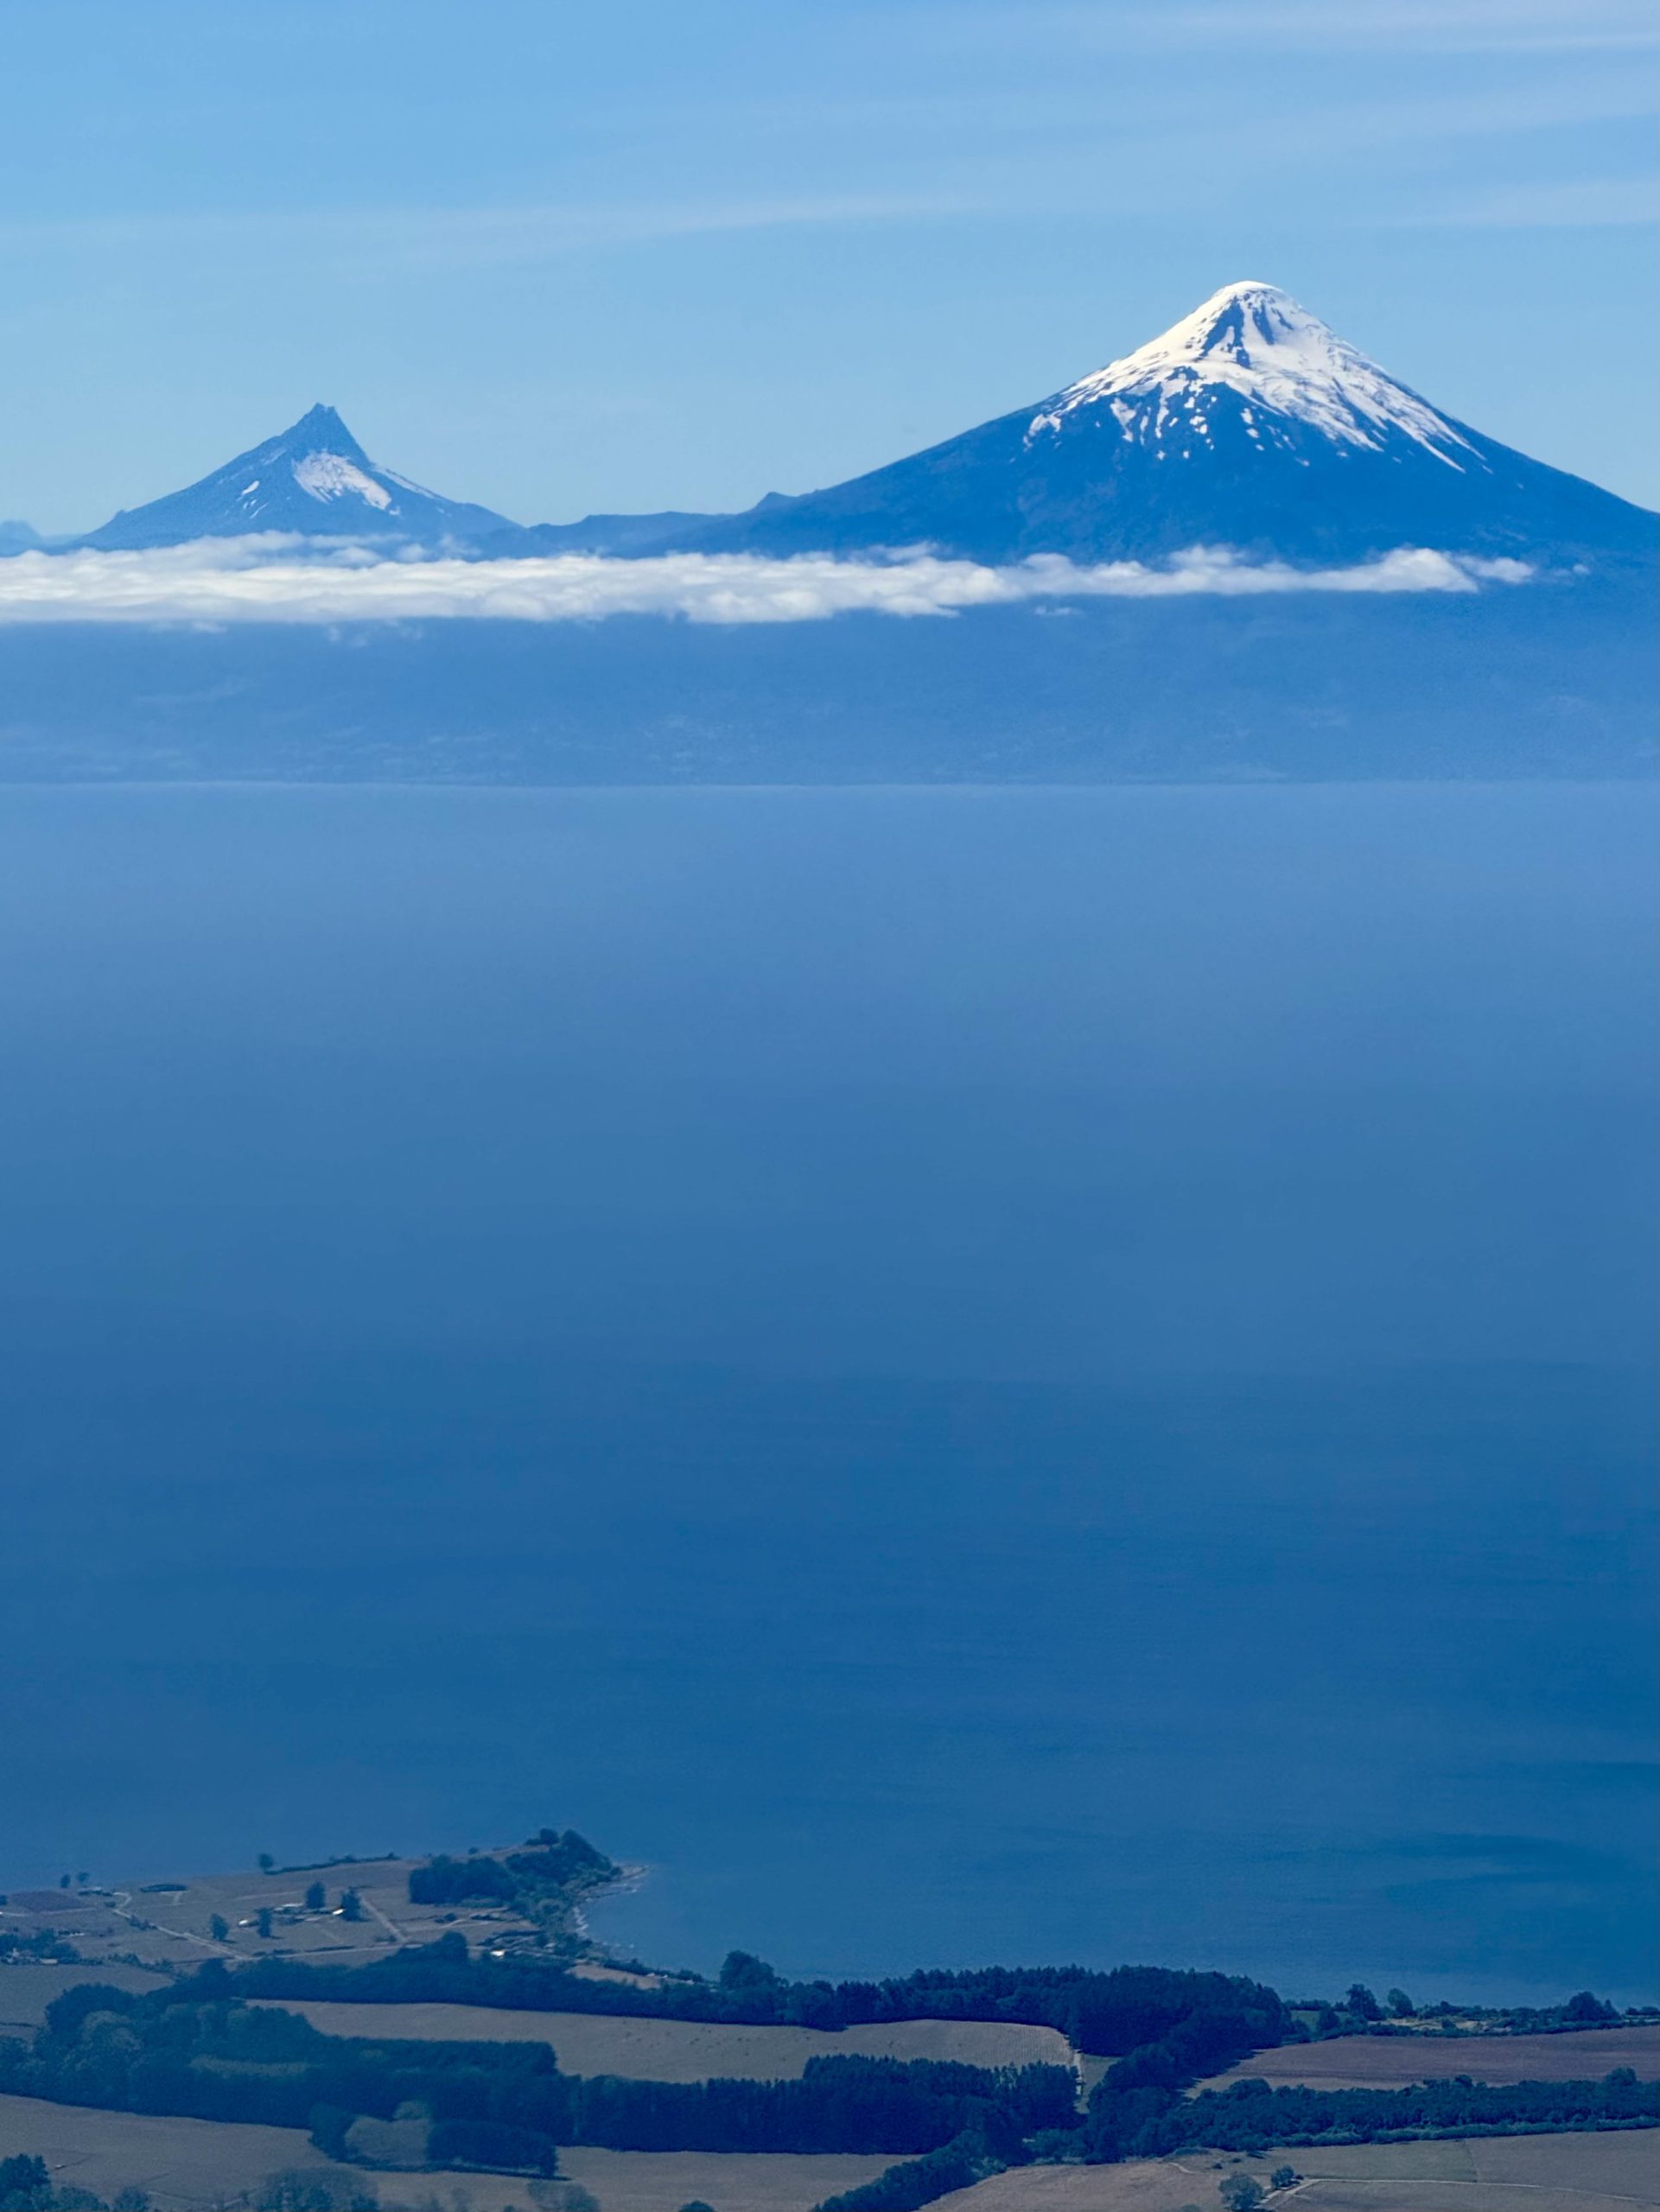
Our adventure started all the way back in San Francisco, where we boarded a flight to Santiago, the capital of Chile, and from there, hopped on a connecting flight to Puerto Natales — the little gateway town to Torres del Paine.
That second flight? Easily one of the prettiest flights we’ve ever taken. As we flew over dramatic mountains and winding rivers, we actually spotted Las Torres from the window! It was surreal to think we’d be hiking right into those views the very next day. The excitement was very, very real.

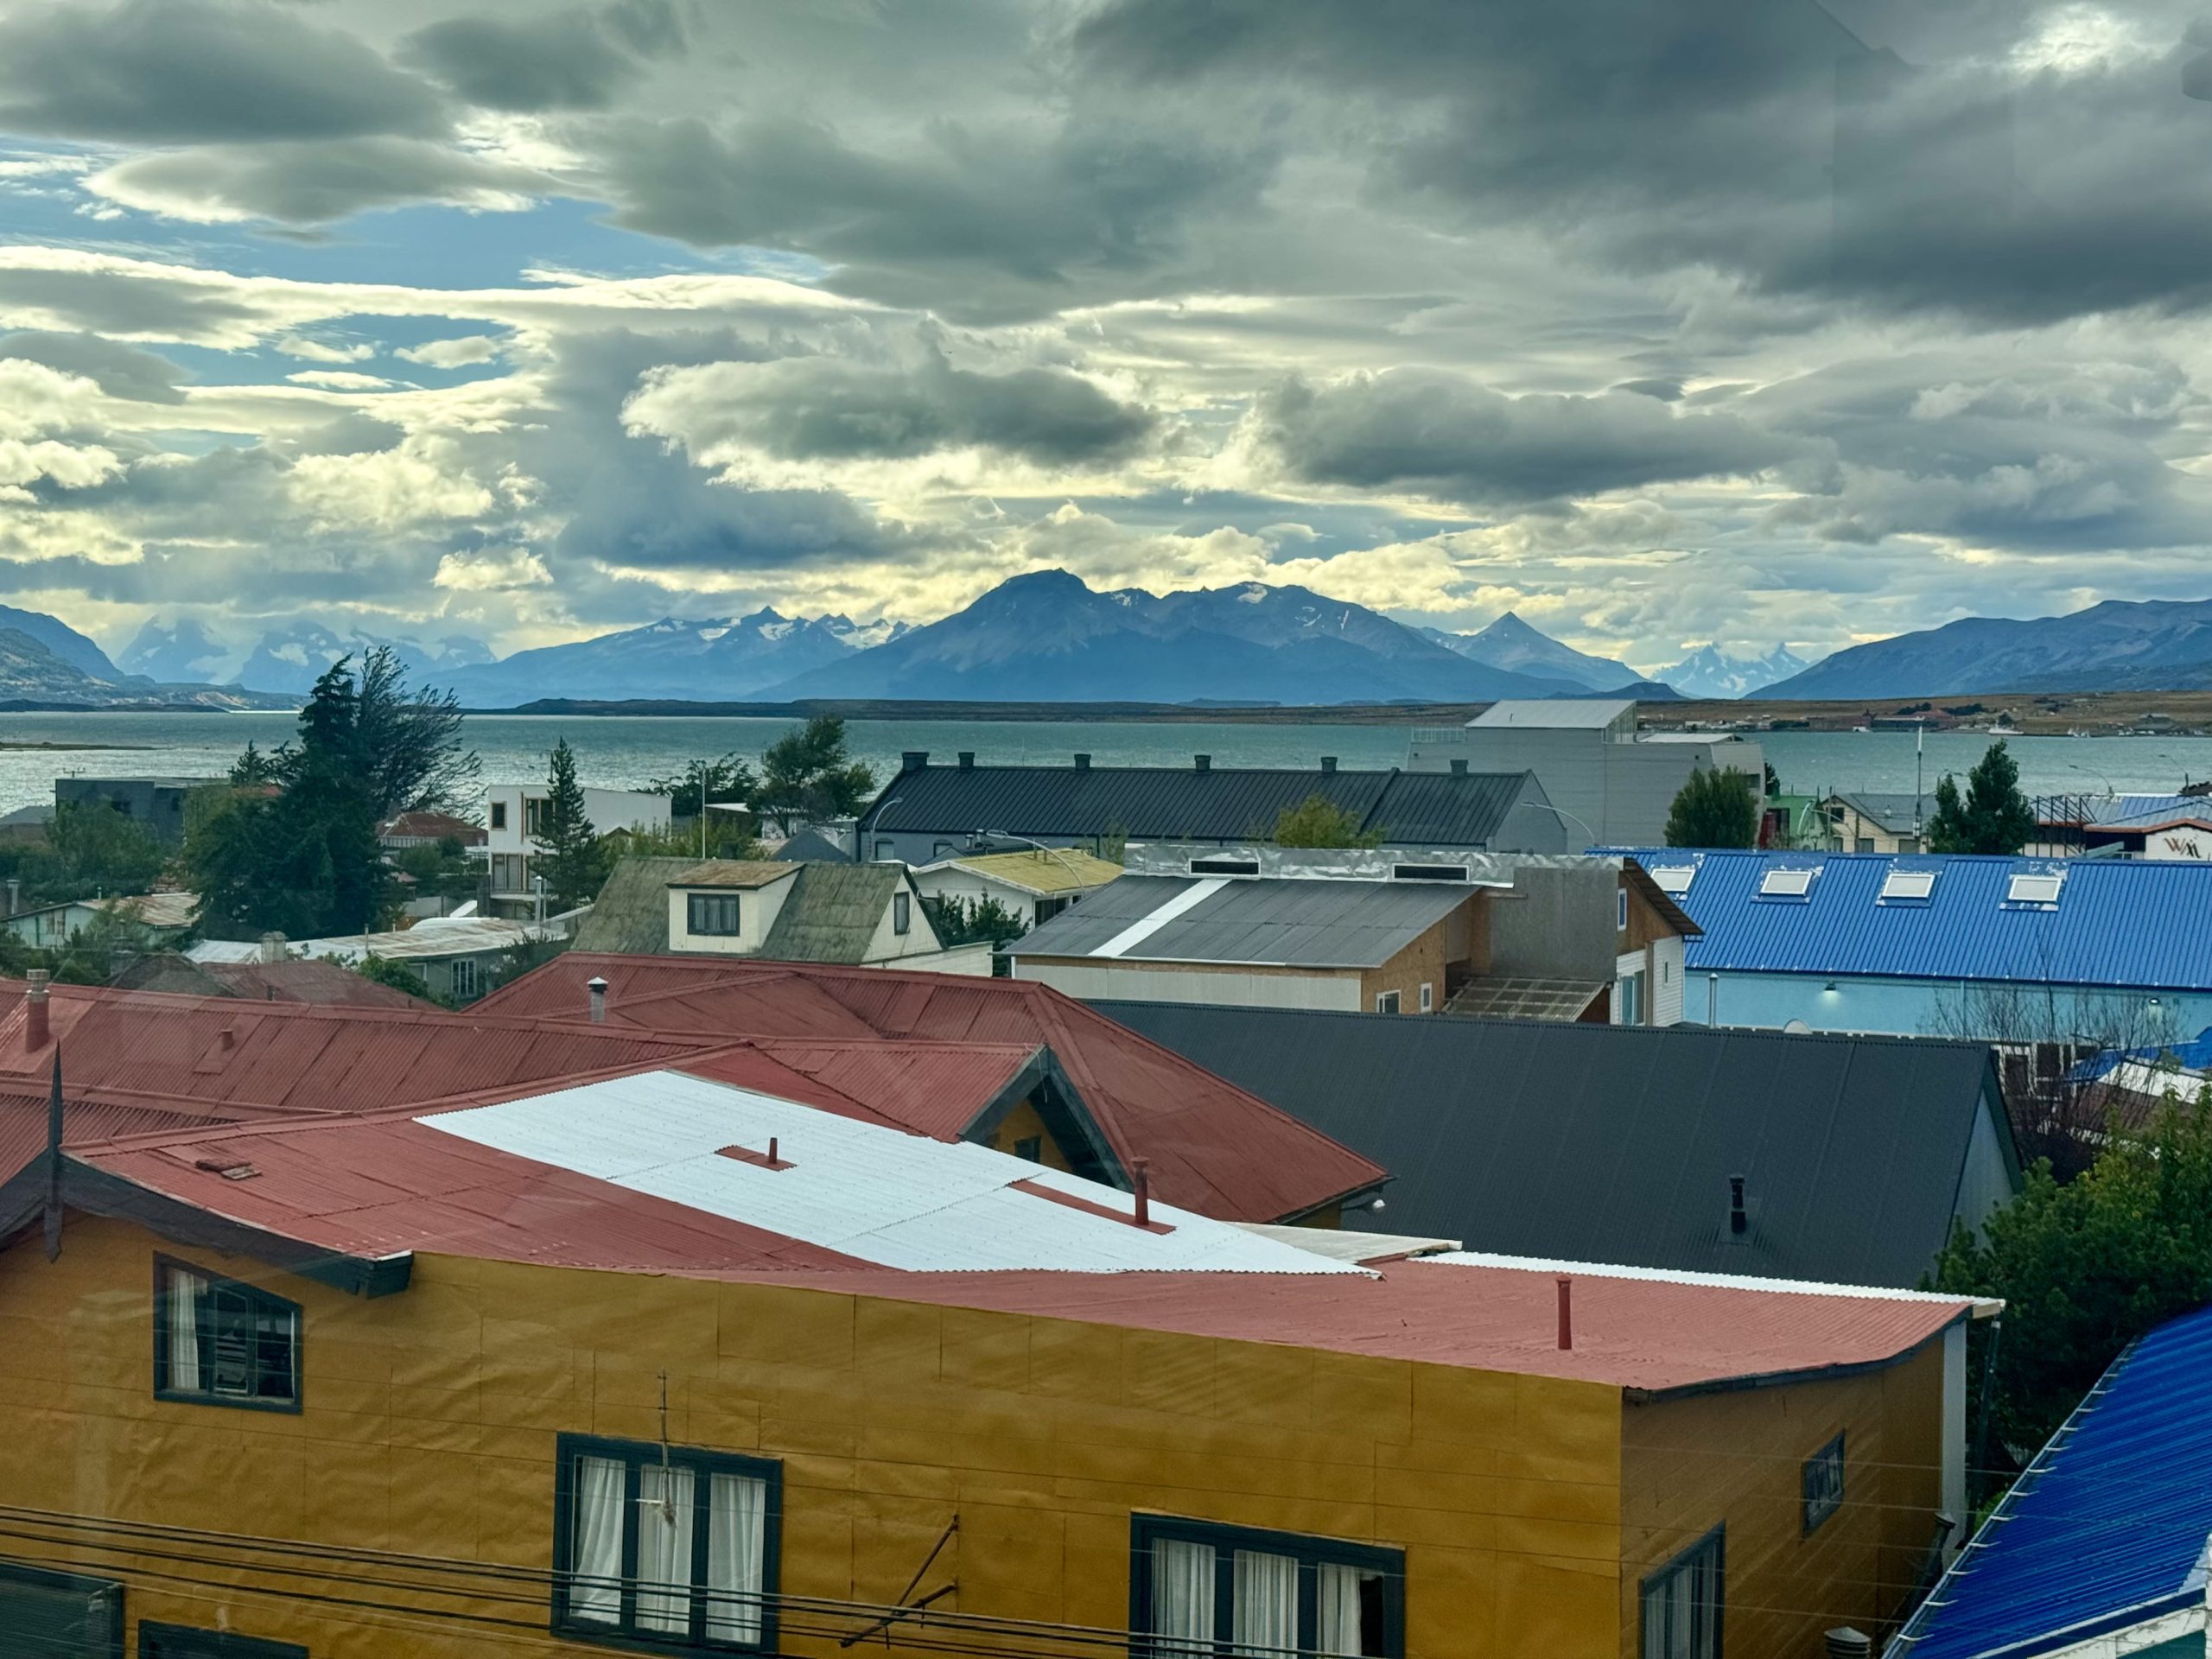
Puerto Natales is a small, charming town that lives and breathes backpacking energy. Just about everyone here is either about to start the W Trek or has just finished it — there’s this unspoken camaraderie in the air. We were surrounded by other travelers from all over the world, and even though we didn’t speak Spanish, we got by just fine — most people we met spoke English and were incredibly friendly.
We landed at the Puerto Natales airport around 4:30 PM, which, by the way, is tiny. We grabbed a taxi into town (paid in cash) and checked into our hotel — Hotel Vendaval, which we really liked. It had a warm vibe and the rooftop bar with a view was the perfect place to grab a welcome-to-Patagonia Pisco Sour and toast the start of our trek.
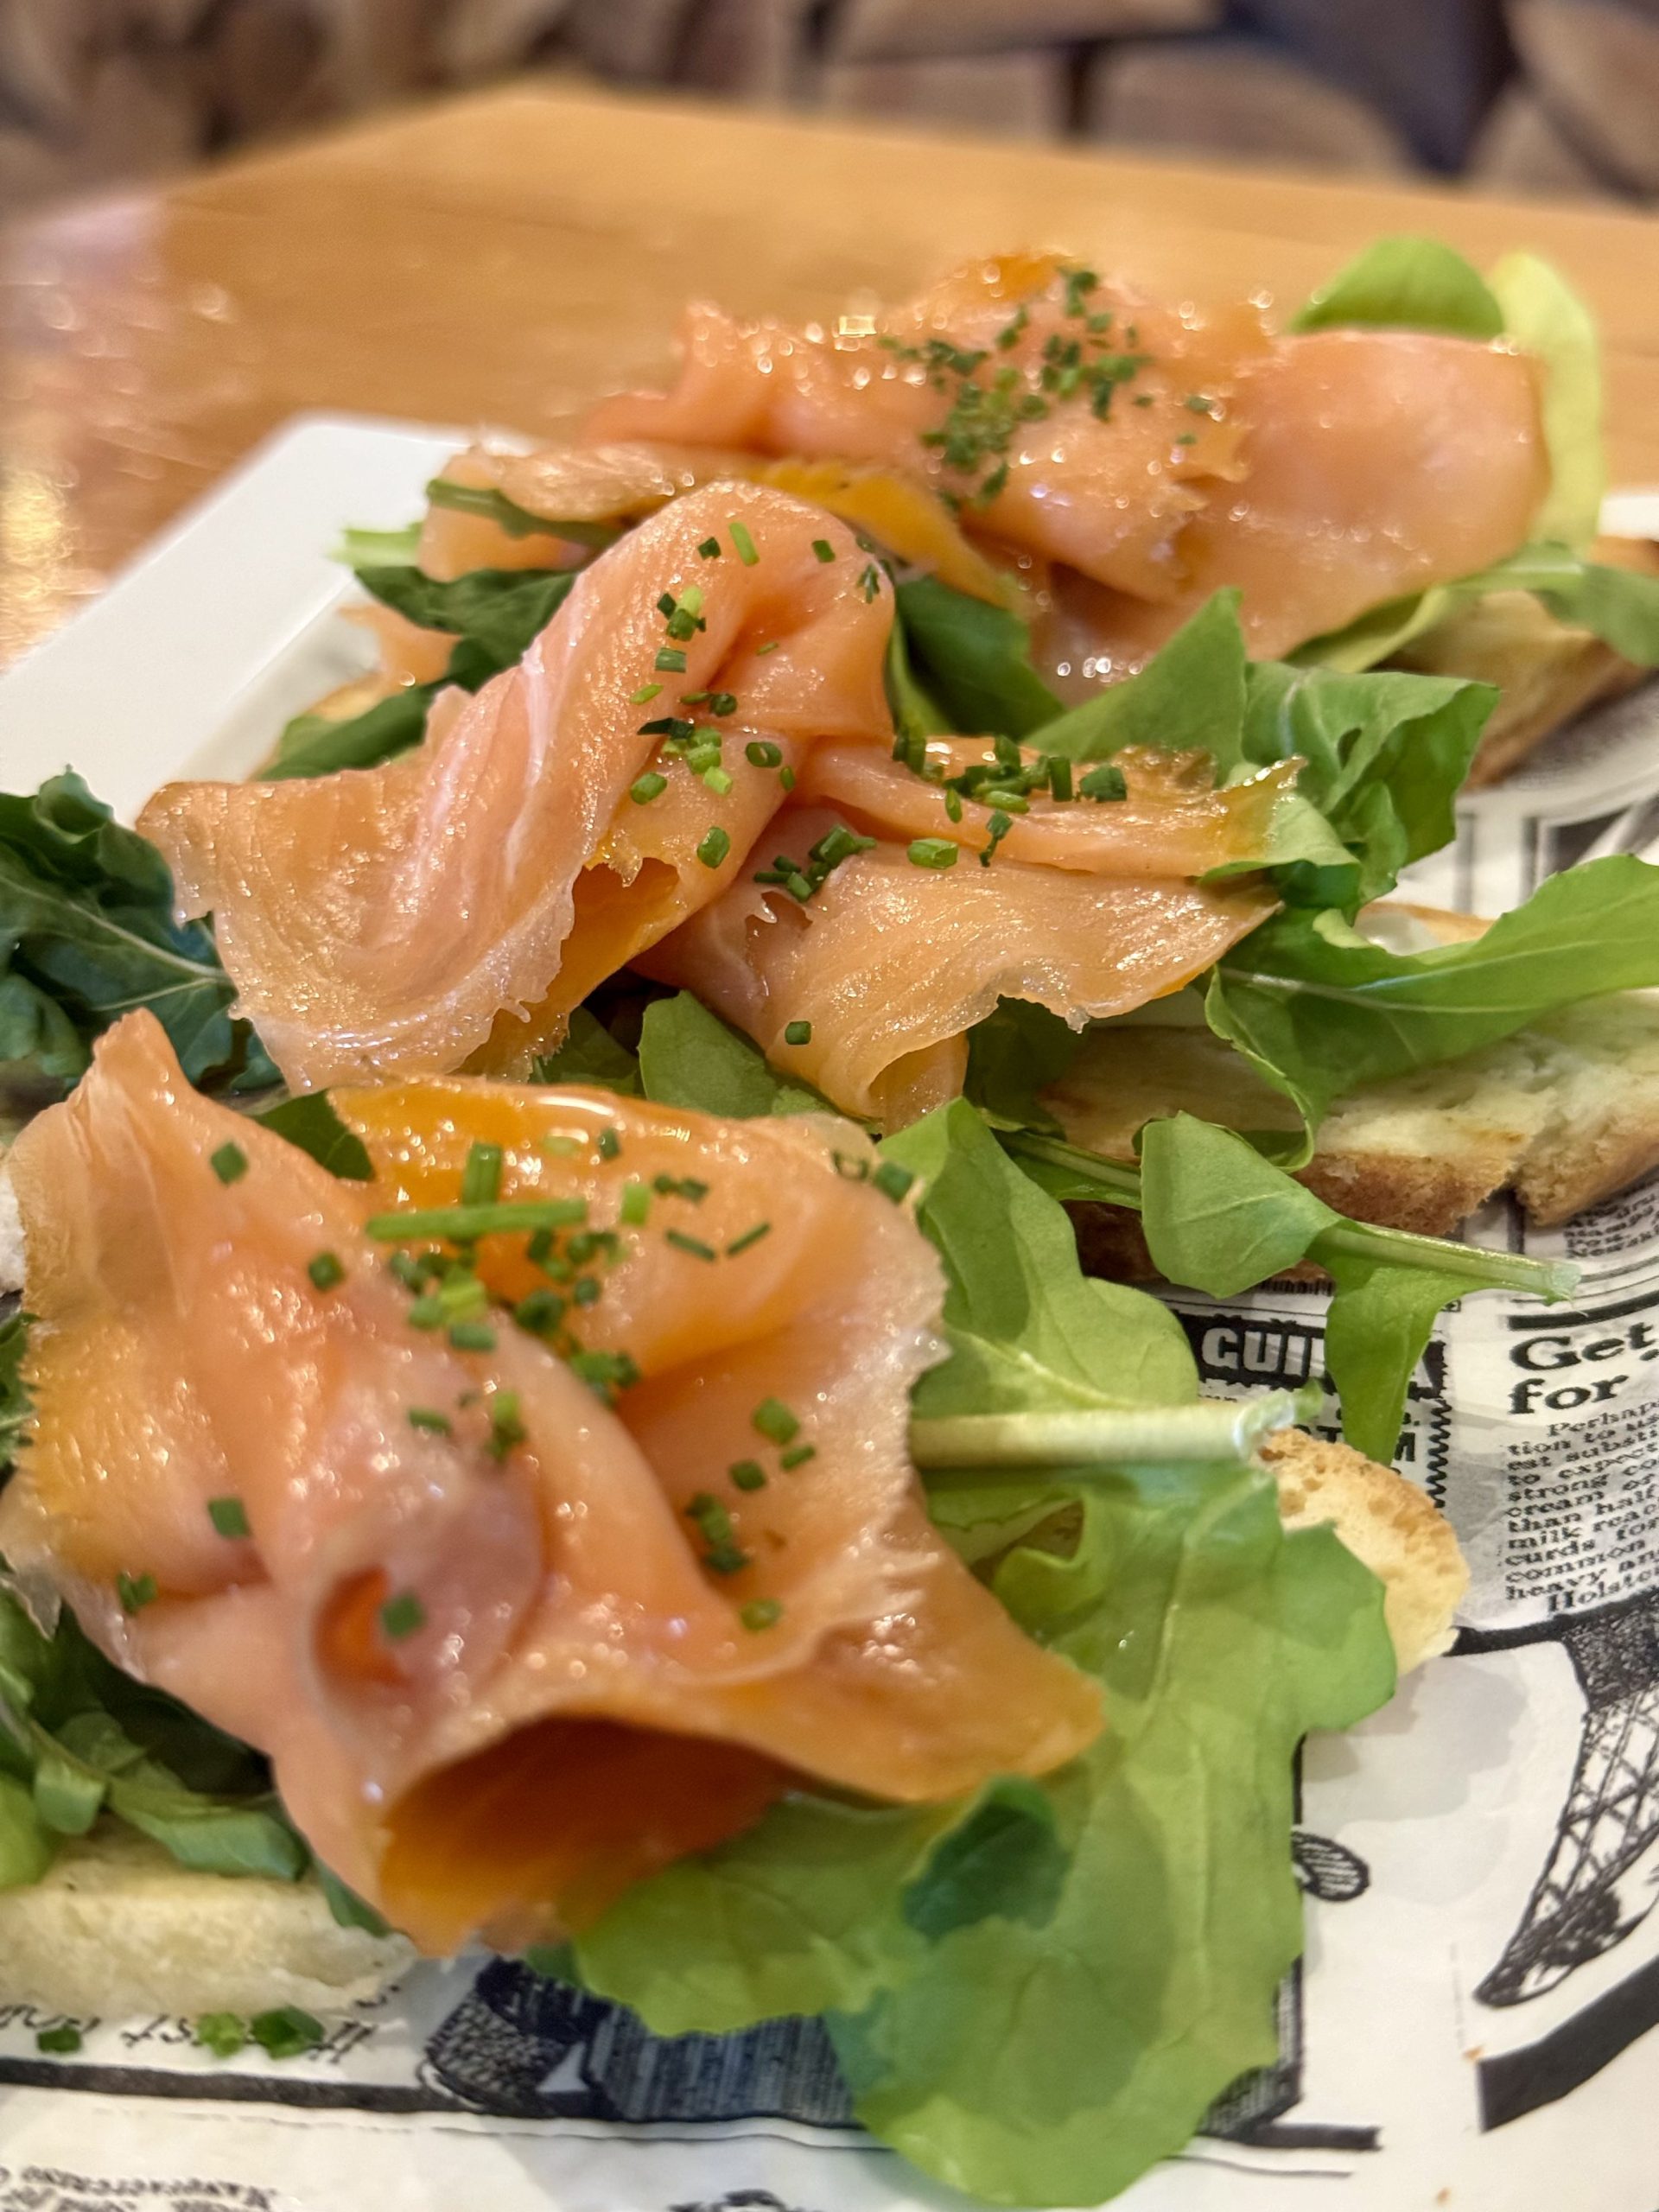
That evening, we did a quick gear check. We hadn’t packed hiking poles in our luggage, so we rented some from a nearby outdoor shop in town (super easy to do). Then we wandered around for a cloudy sunset stroll, soaking in the energy of the town, and grabbed dinner at La Guanaca (so good!). The food was delicious, the vibe was relaxed and buzzy, and we couldn’t wait for our big adventure to begin the next morning.
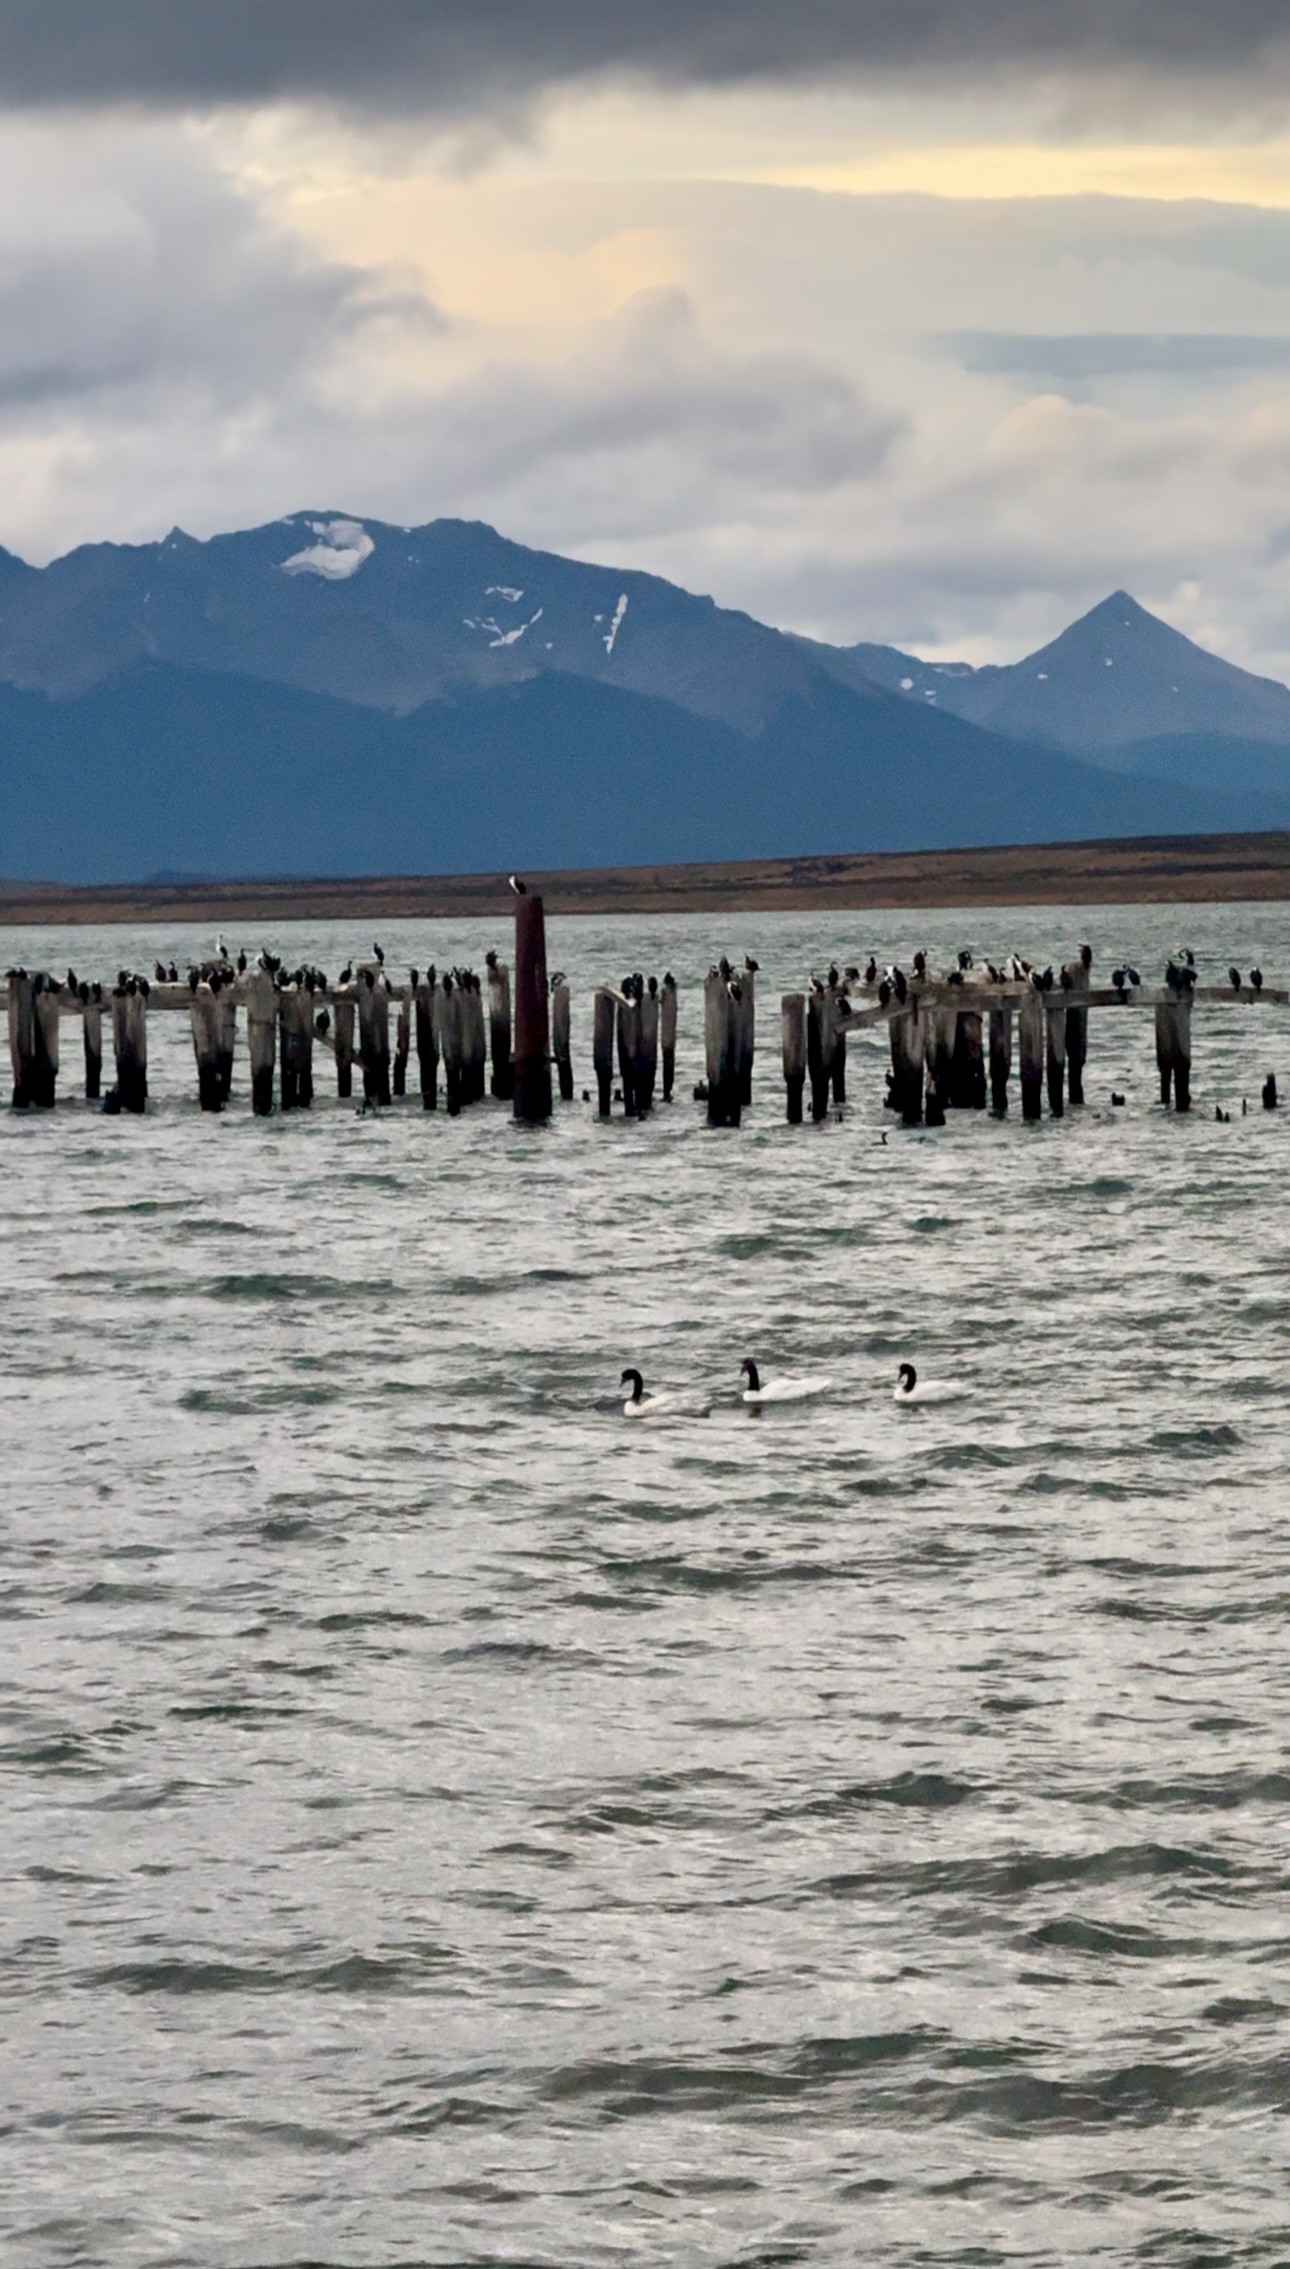
Some places you can visit if you have a few hours in the town – Muelle Historico, La Mano, Kau – Café & Lounge, Muelle Viejo, Chocolatería Patagonia Dulce.
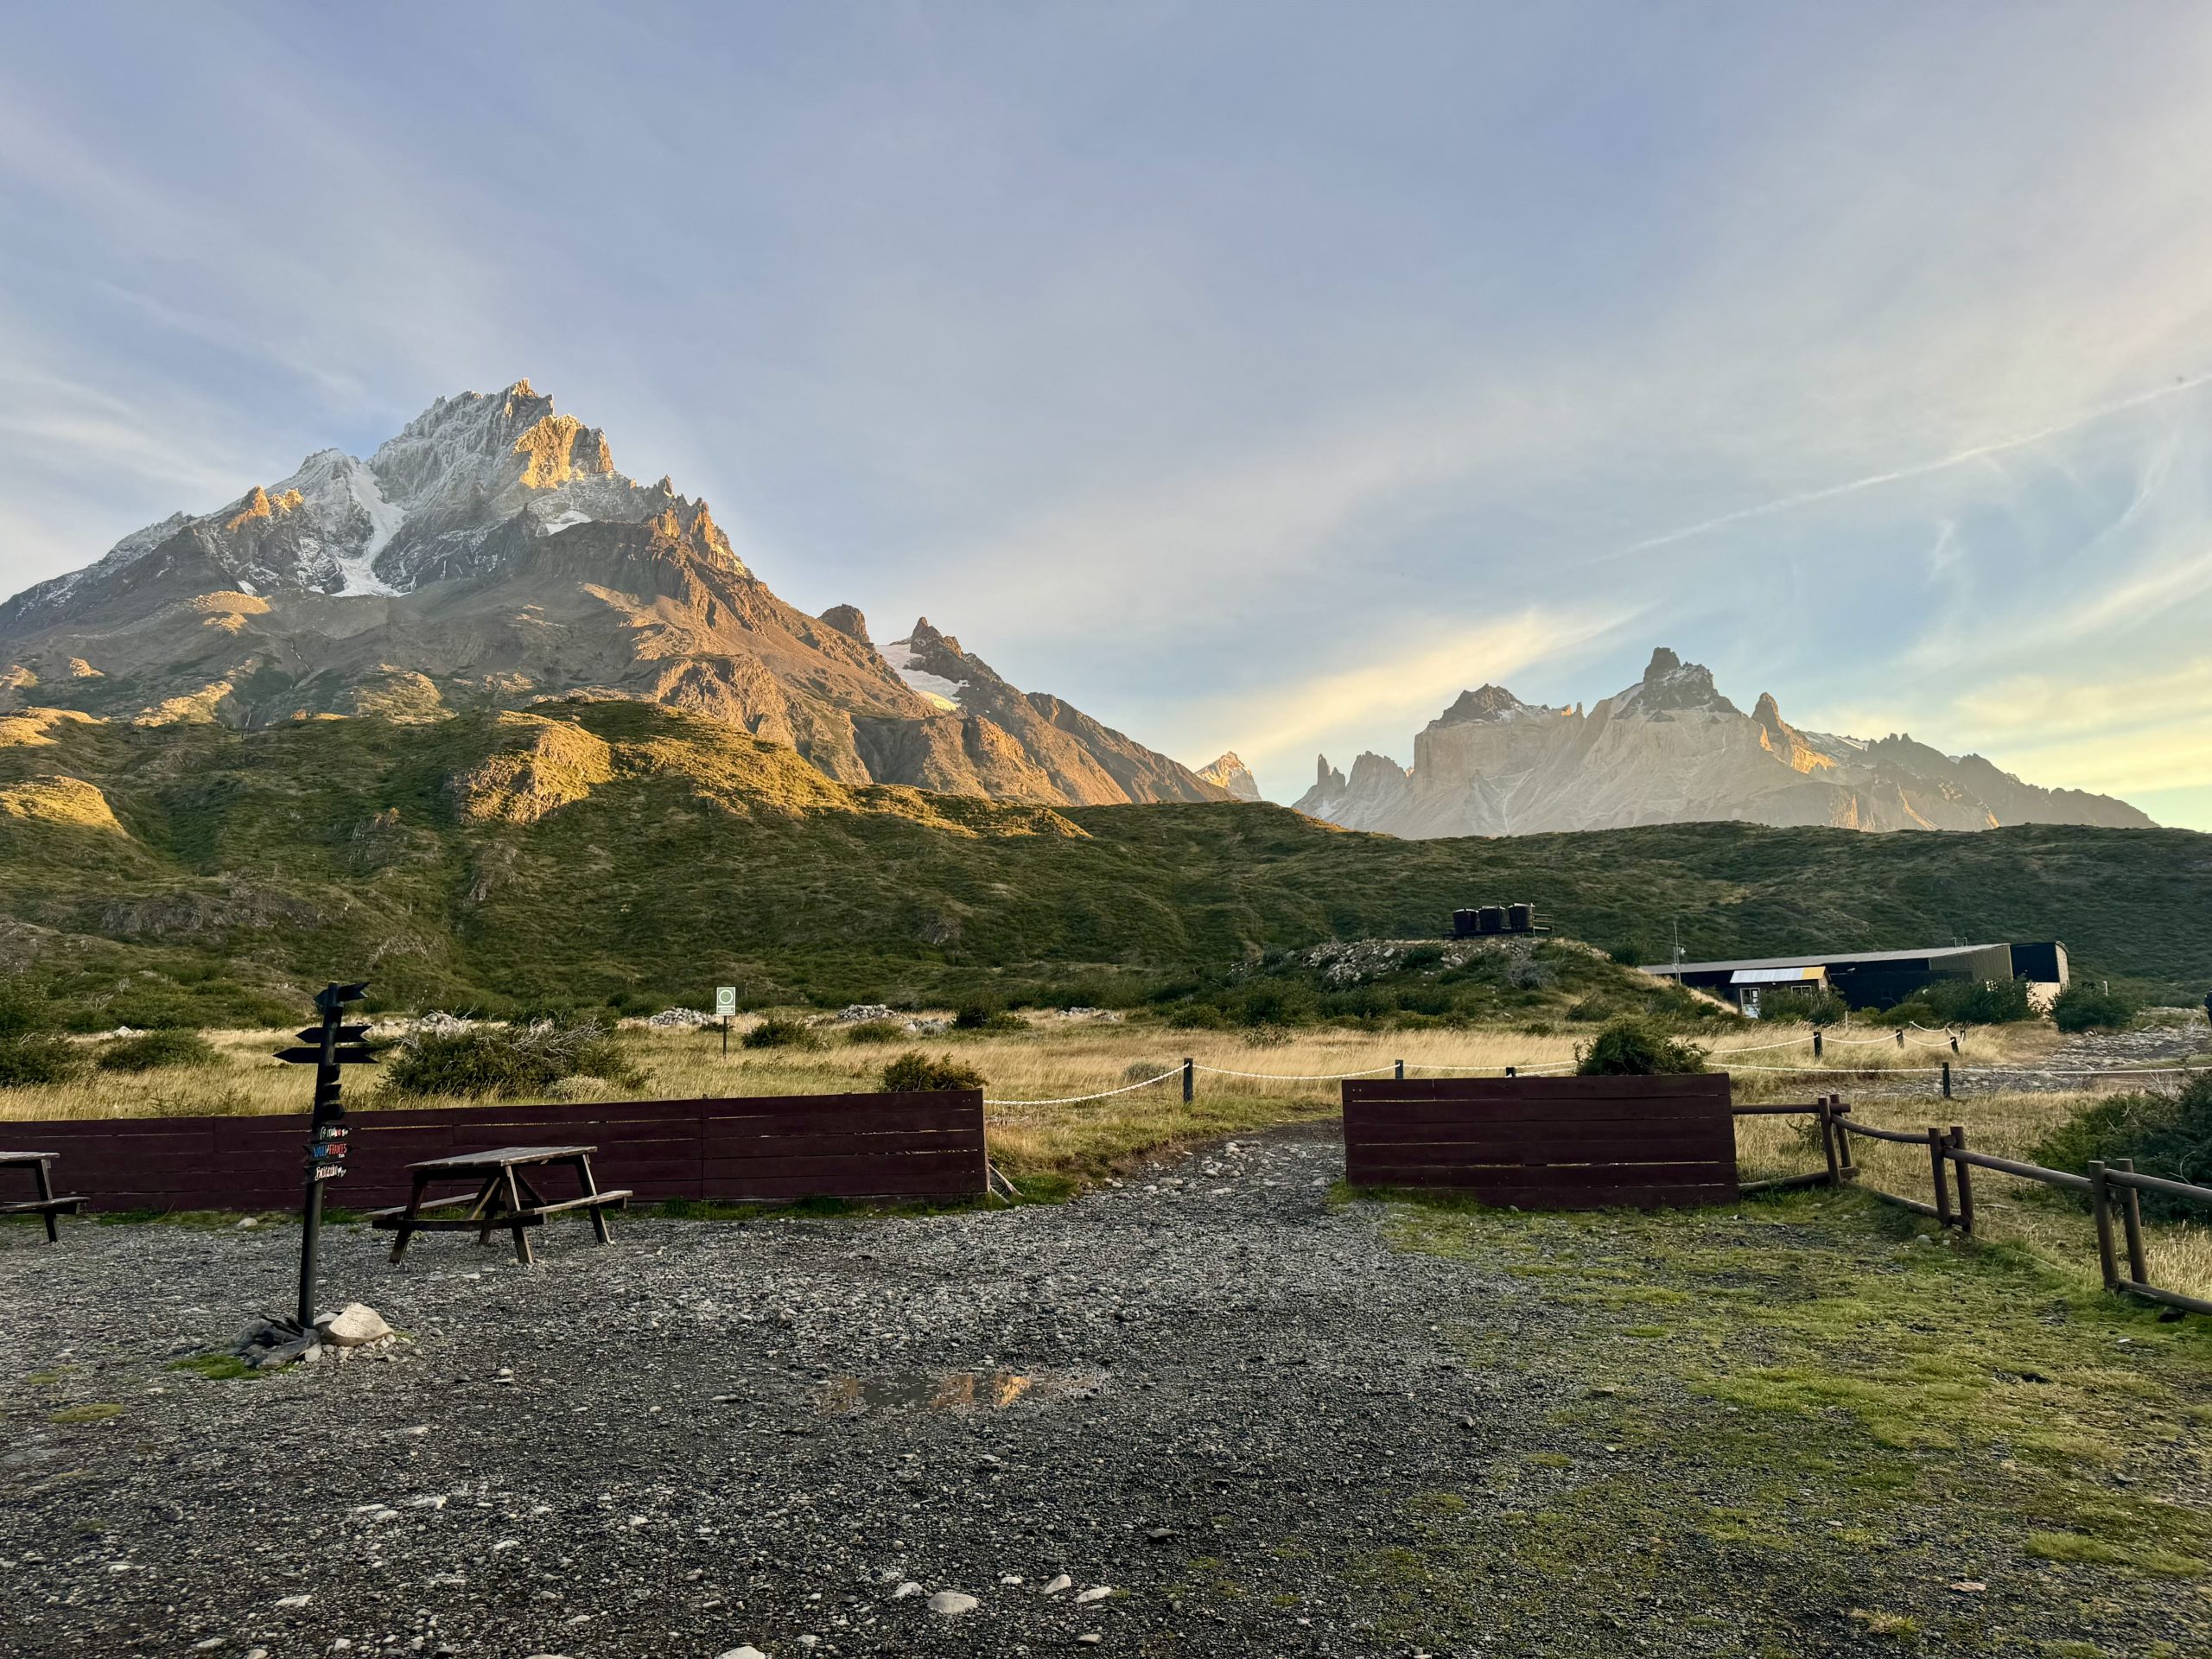
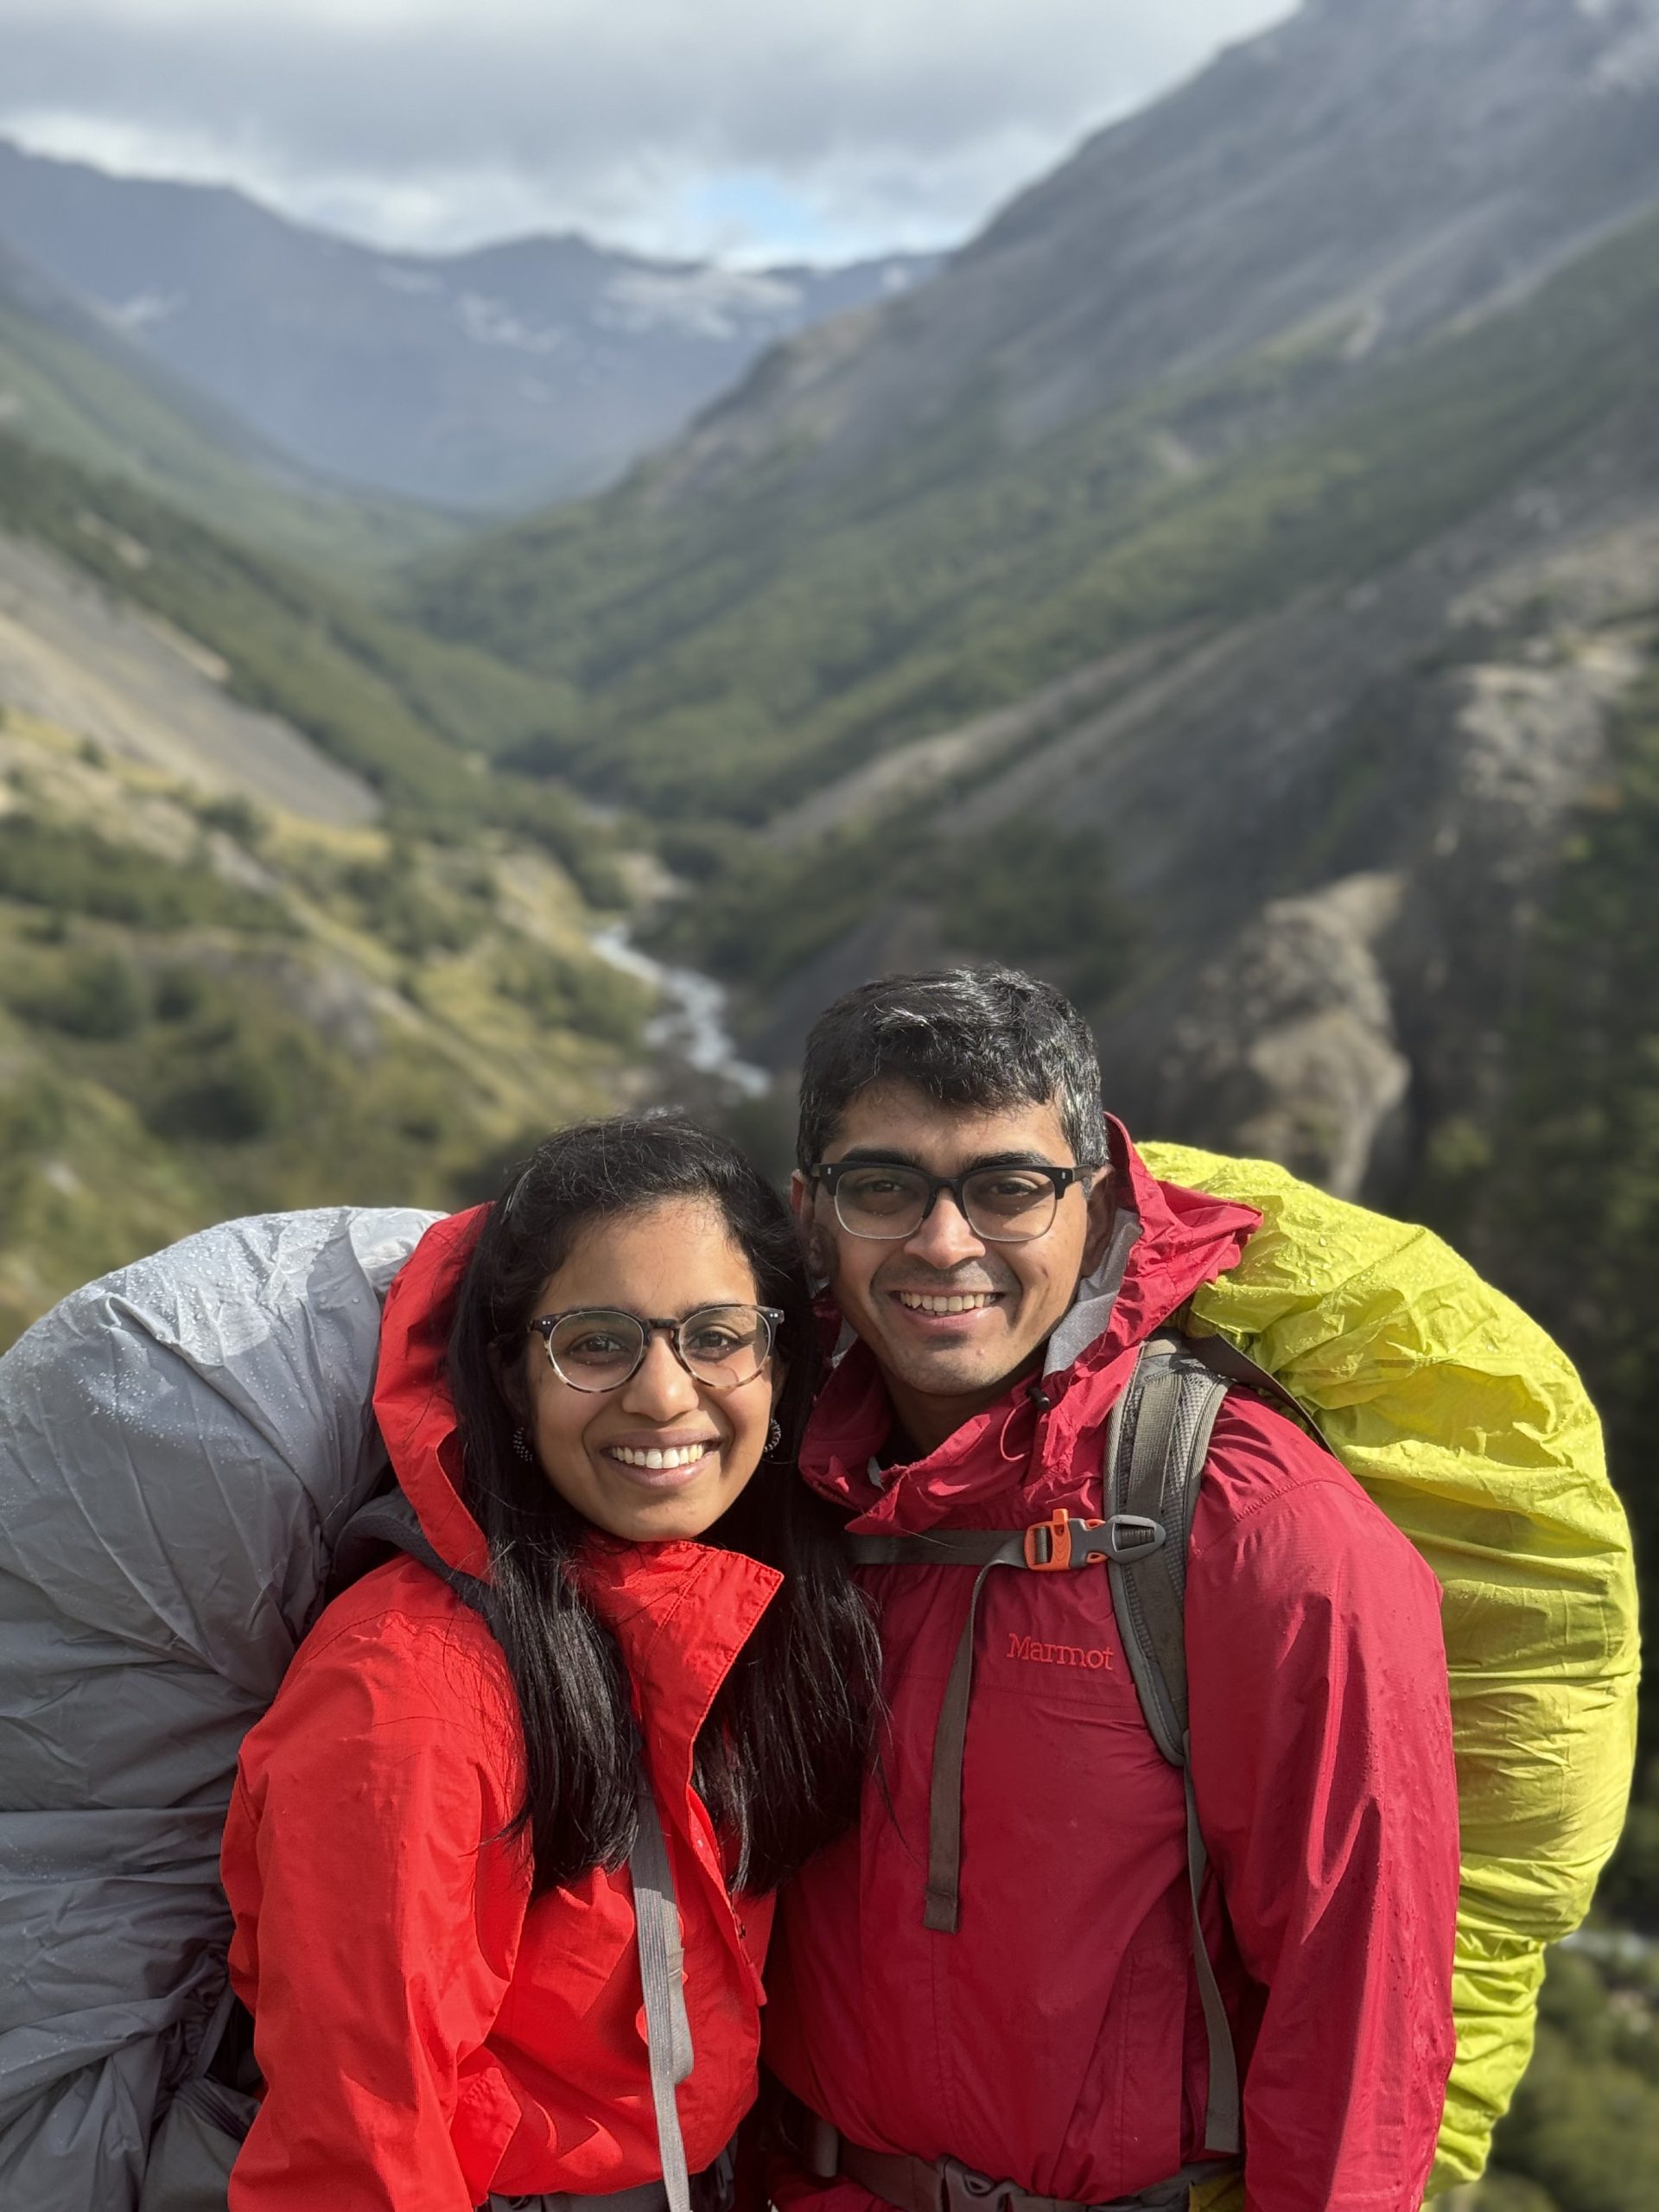
Day 1: Puerto Natales to Las Torres and Refugio Chilenos
It’s go time! We were up at the crack of dawn, buzzing with nerves and excitement, because today we’d be hiking to the Las Torres viewpoint — one of the most iconic spots in all of Patagonia.
We caught the earliest bus out of Puerto Natales at 6:45 AM, headed for Laguna Amarga, the main entrance to Torres del Paine National Park. If you’re doing the W Circuit and starting with Las Torres like we did, make sure to book the earliest bus you can — you’ll want every hour of daylight for this hike. These buses fill up fast, so definitely book ahead. We went with Recorrido, and the whole process was super easy.
Once we got to Laguna Amarga, we transferred to a shuttle van that takes you to the Welcome Center, where the trail actually begins. You can’t pre-book this shuttle, but it’s timed to match the bus arrivals — we took the first one at 8:45 AM. It costs $5 USD, cash (Pesos) only, so don’t forget to bring cash.
🎟️ Oh, and don’t forget your park entry ticket!
You’ll need to buy this online before you arrive. We paid around 44,500 Chilean Pesos per person, and they’ll check it when you get off the bus at Laguna Amarga. You can book it ahead of time on the official Chilean National Parks Passes website.
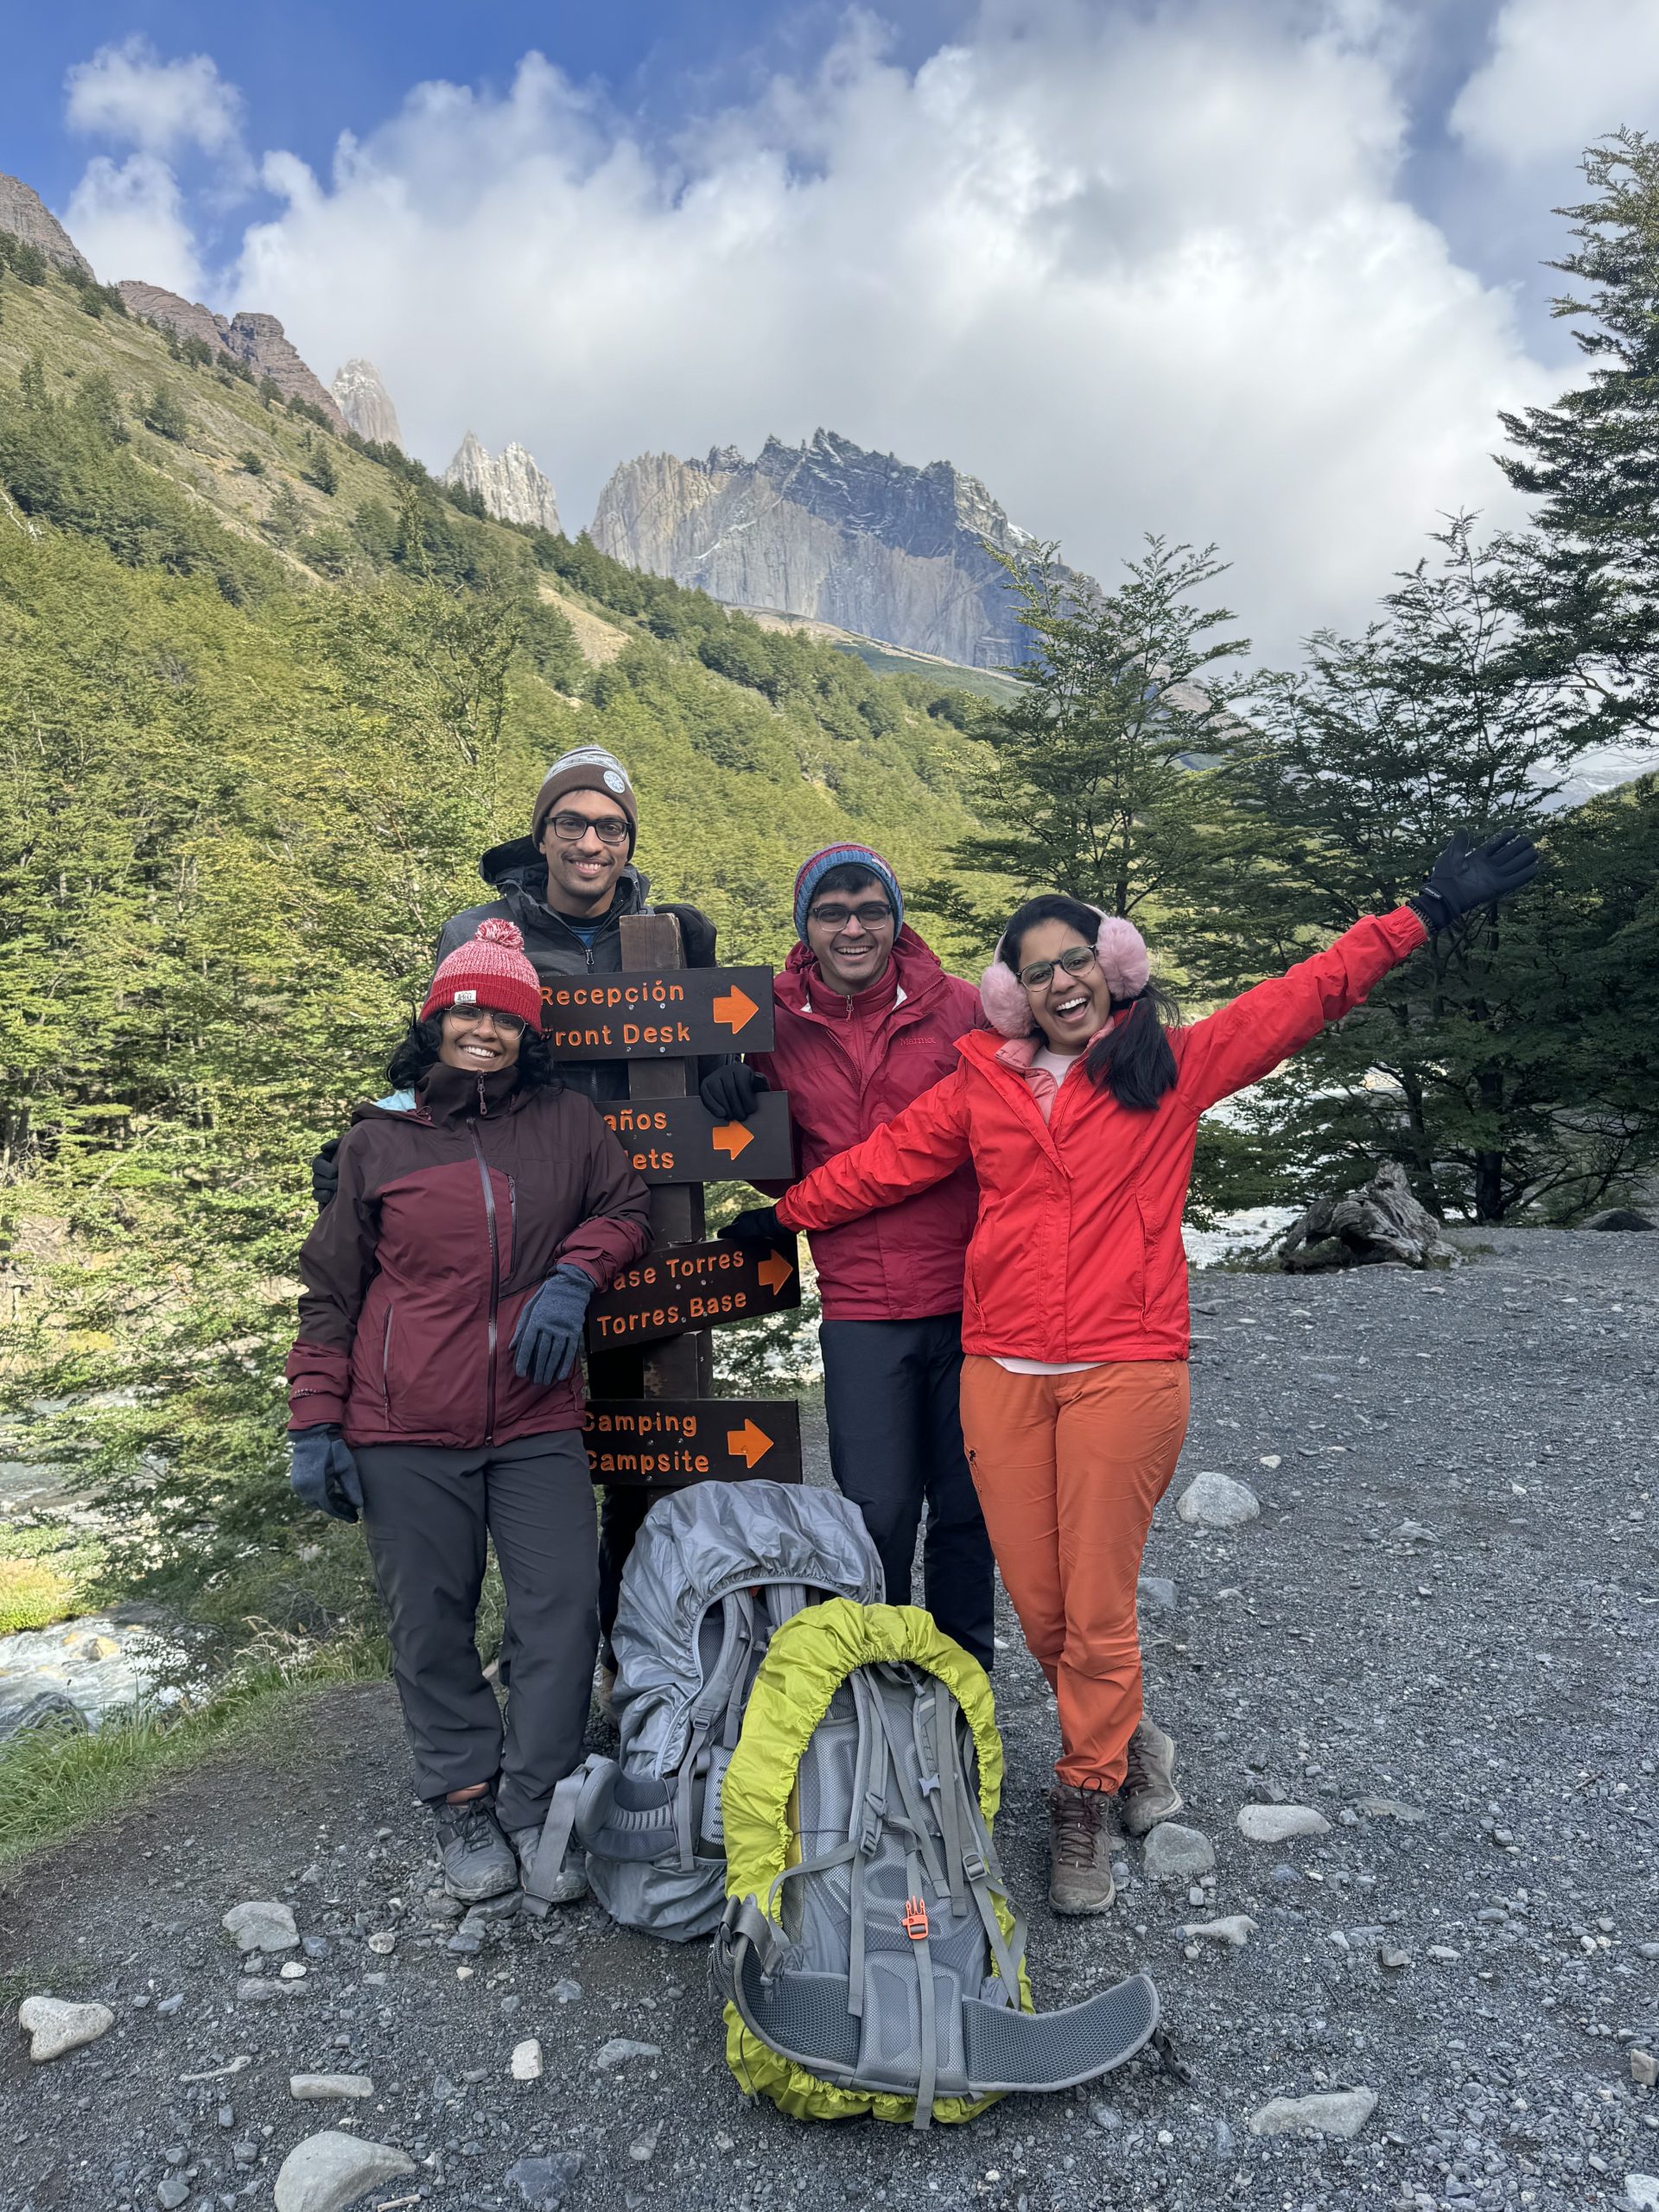
Once we were at the Welcome Center, with our bags on, and hearts pounding with excitement, we officially stepped onto the W Circuit trail at around 9:30am.
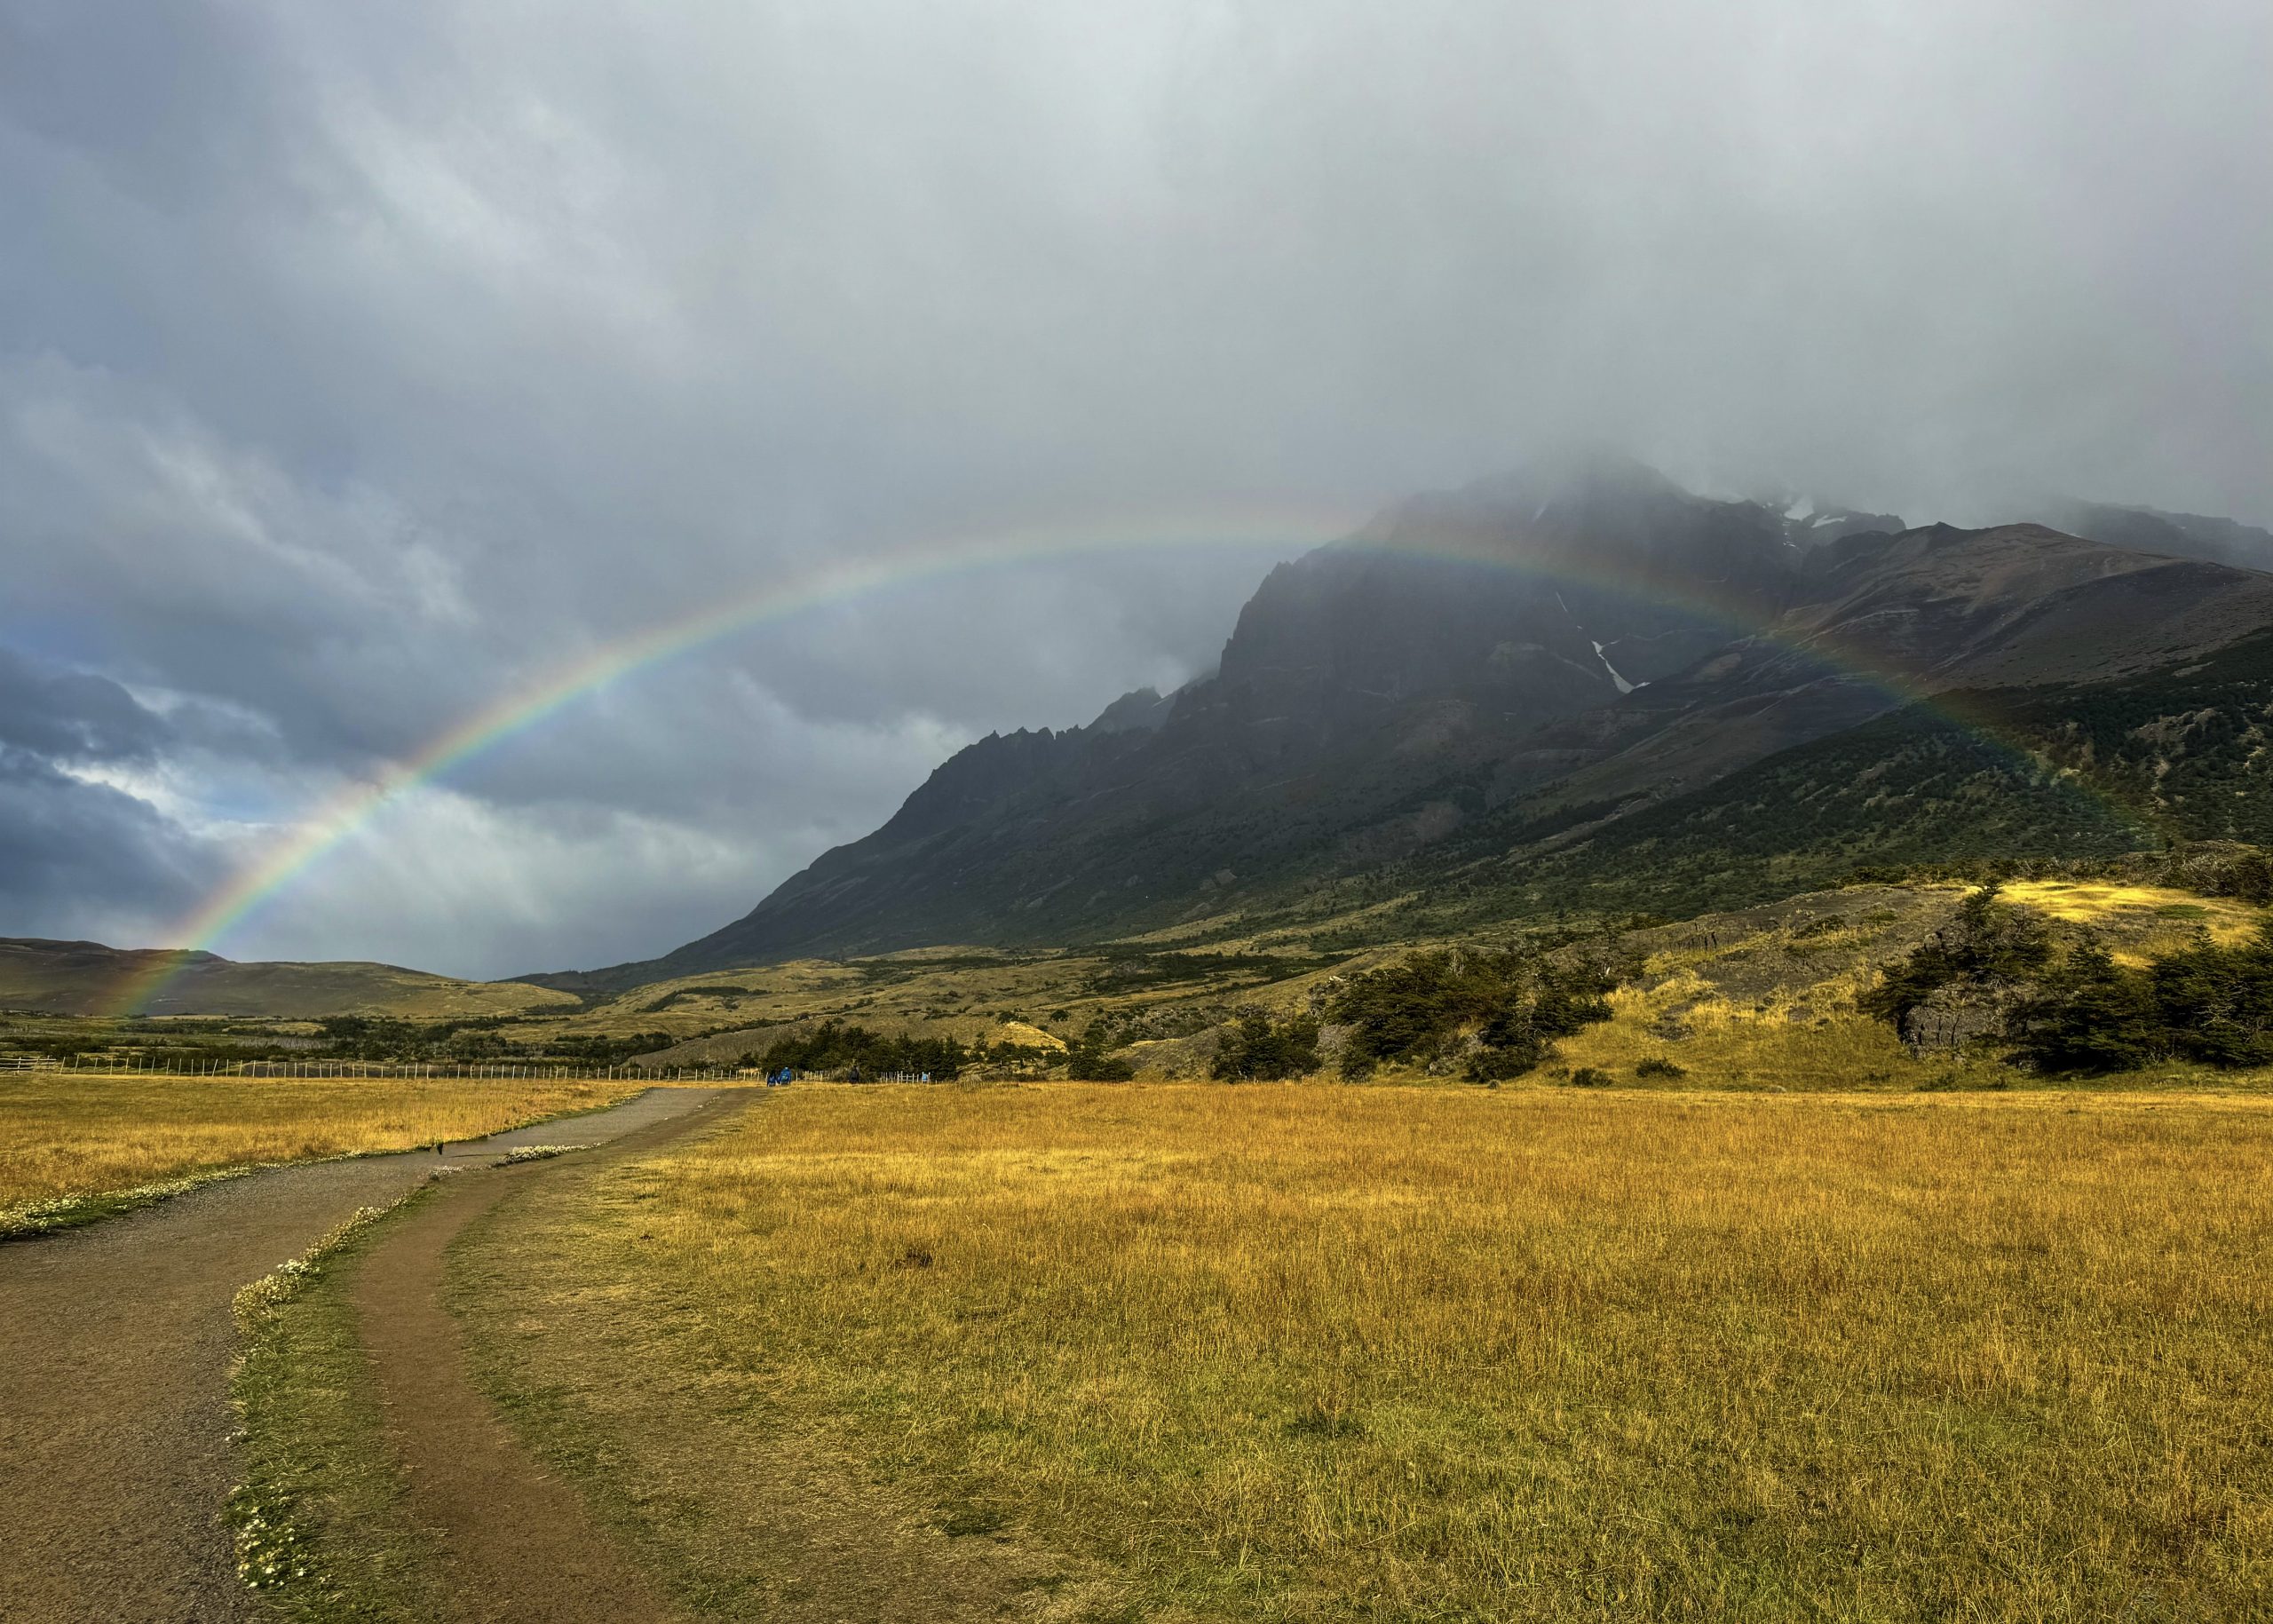
Segment 1 – Climbing to Chileno (With a Rainbow Welcome!) 🌈🏔️
Distance: ~4 miles
Elevation gain: ~1500ft
The hike to Refugio Chileno was our first real taste of the W Circuit — backpacks on, boots muddy, and hearts so ready. This segment is around 4 miles with 1,500 feet of elevation gain, which sounds pretty doable… until you throw in some classic Patagonian rain and a full pack. 😅
But Patagonia doesn’t just throw rain at you — it also throws in the drama. As we stepped onto the trail, the drizzle turned into pure magic: a full-on rainbow stretched across the valley, like a big colorful “Welcome to the mountains!” It felt like a movie moment, and we just stood there grinning like kids.
Then came the climb.
This section is all uphill, and with the rain coming down and our packs weighing us down, it was definitely a challenge. But we kept moving, taking breathers whenever we needed and soaking in the views — we weren’t alone either. Hikers of all kinds were on the trail with us: day trippers, fellow W trekkers, and a general buzz of excitement that made it feel like we were all in on the same epic journey.
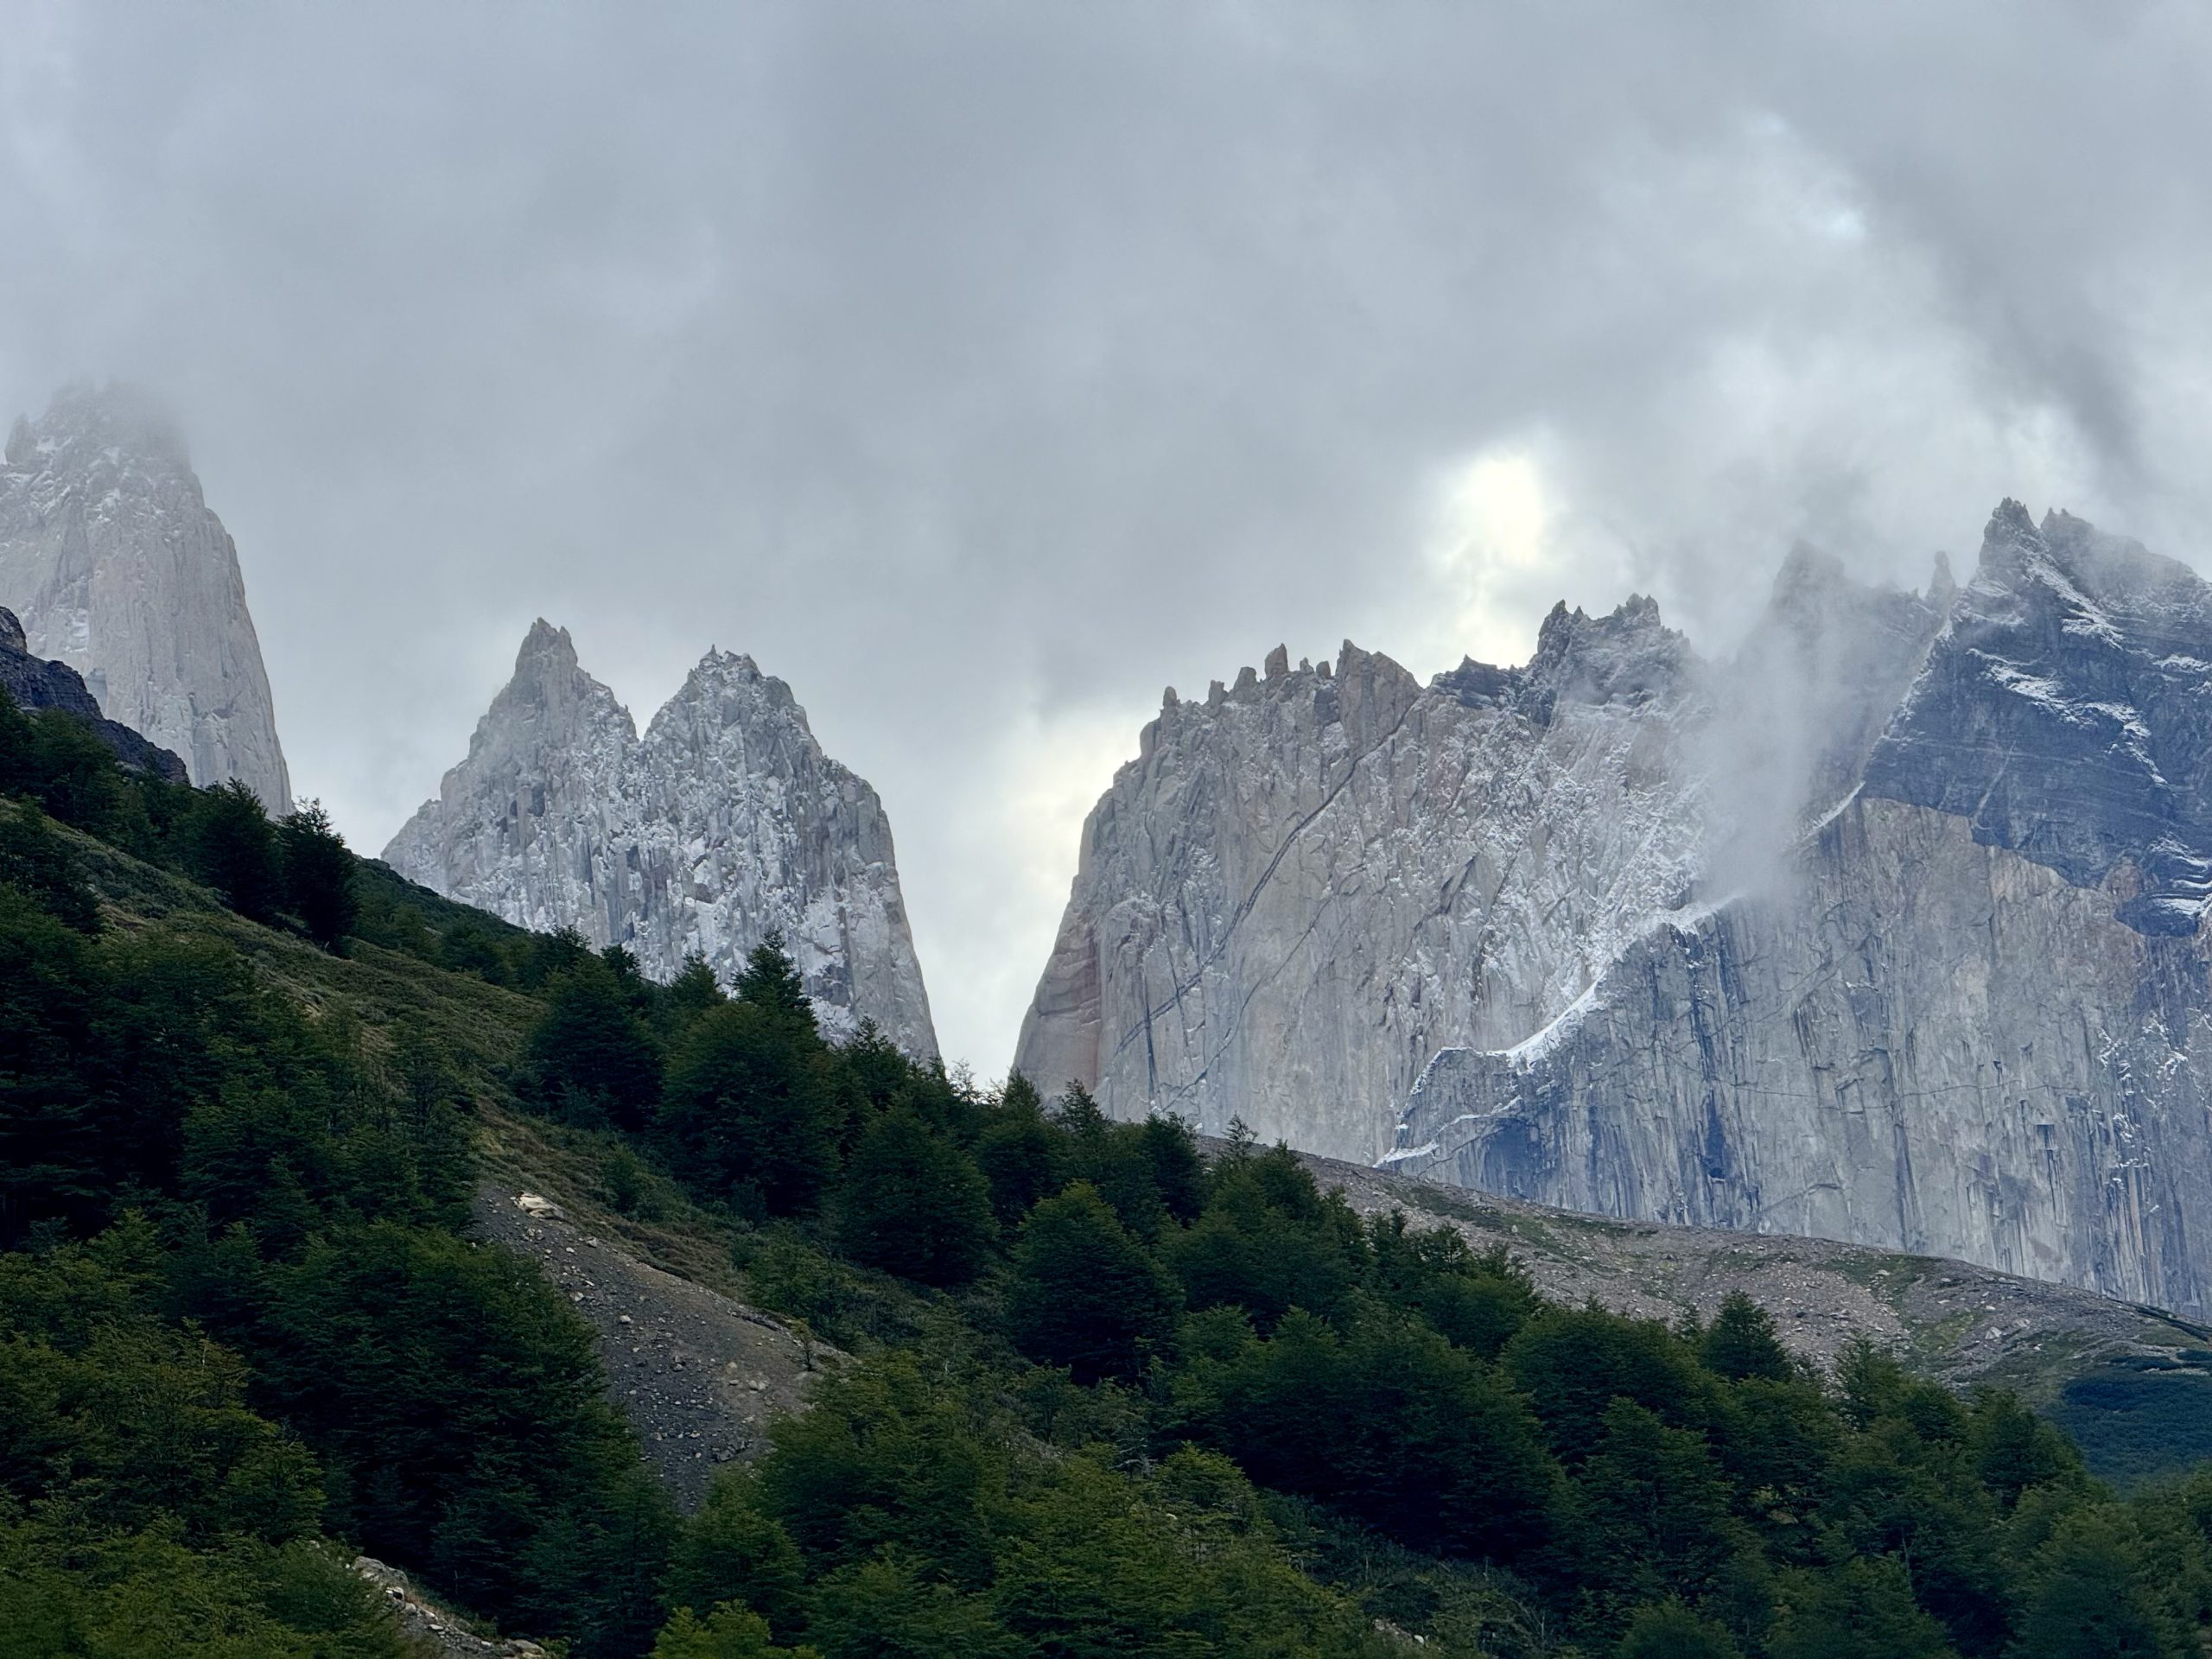
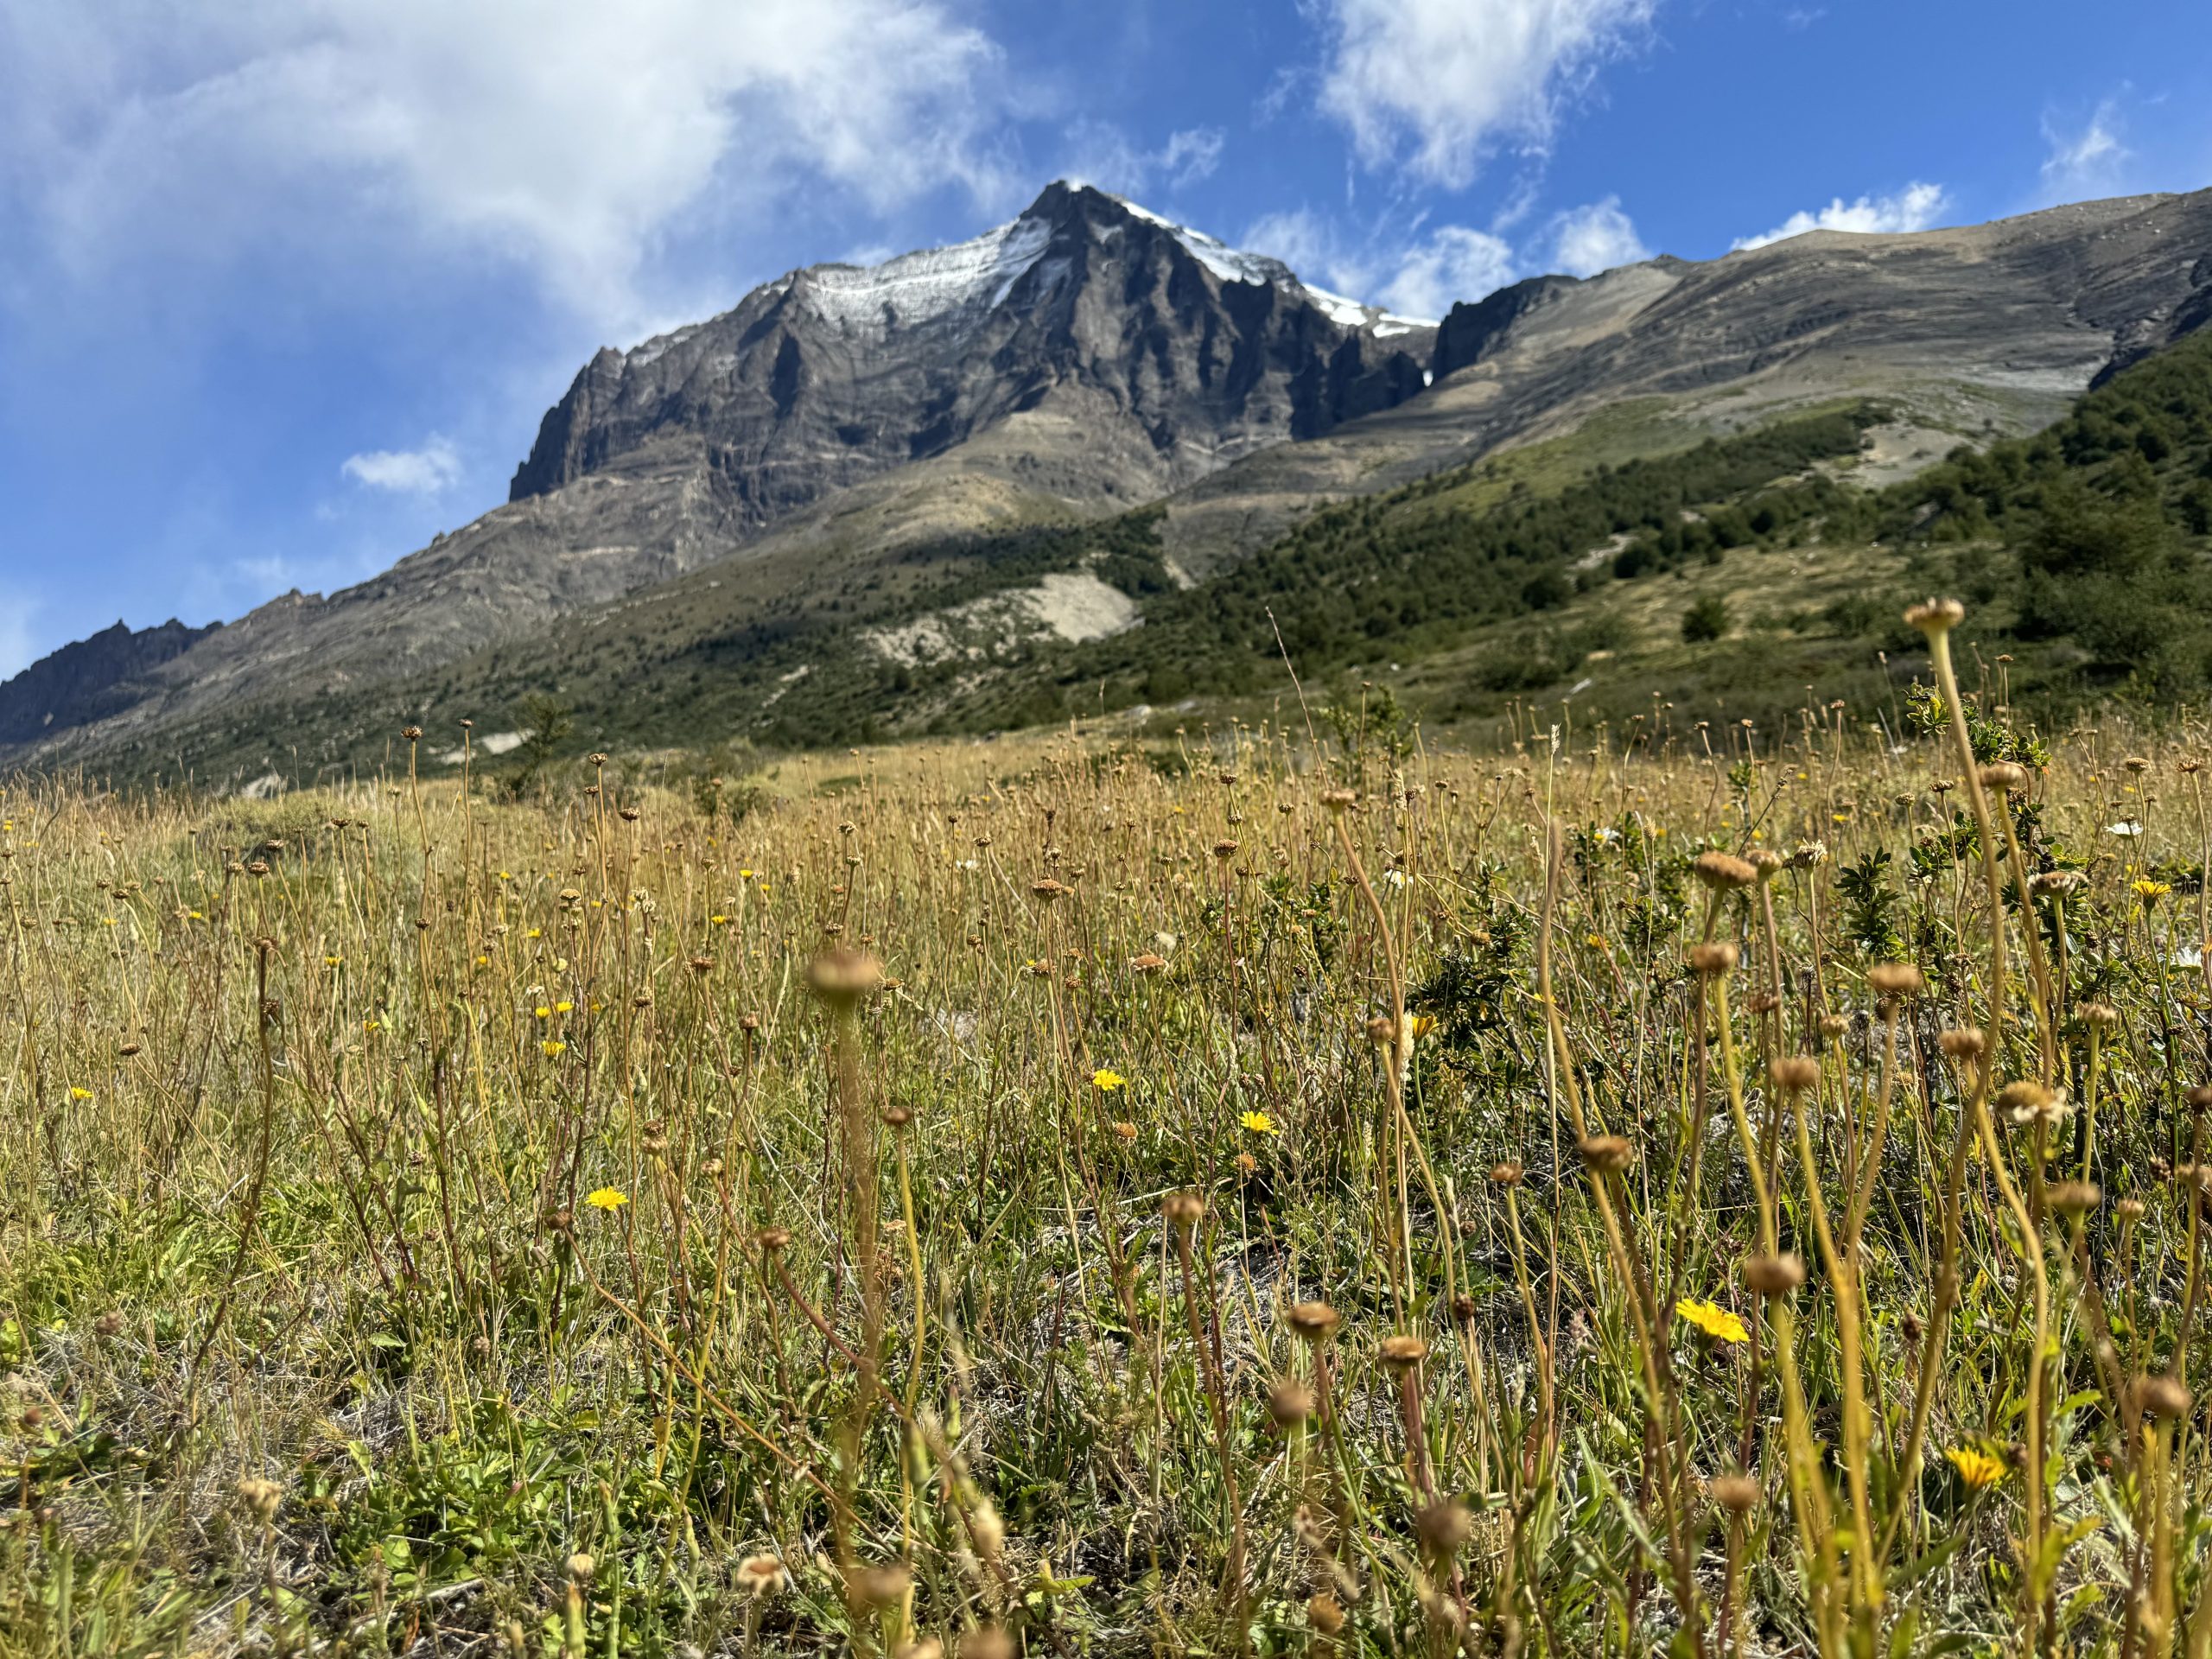
At the top of the climb, we reached the legendary Windy Pass — and yep, it lived up to the name. You know that kind of wind where you have to lean forward just to stay on your feet? That kind. The views were jaw-dropping — mountains in every direction, a glacial stream cutting through the valley — and the wind just added to the drama. We snapped some quick (slightly chaotic) photos and then made our way down towards camp.
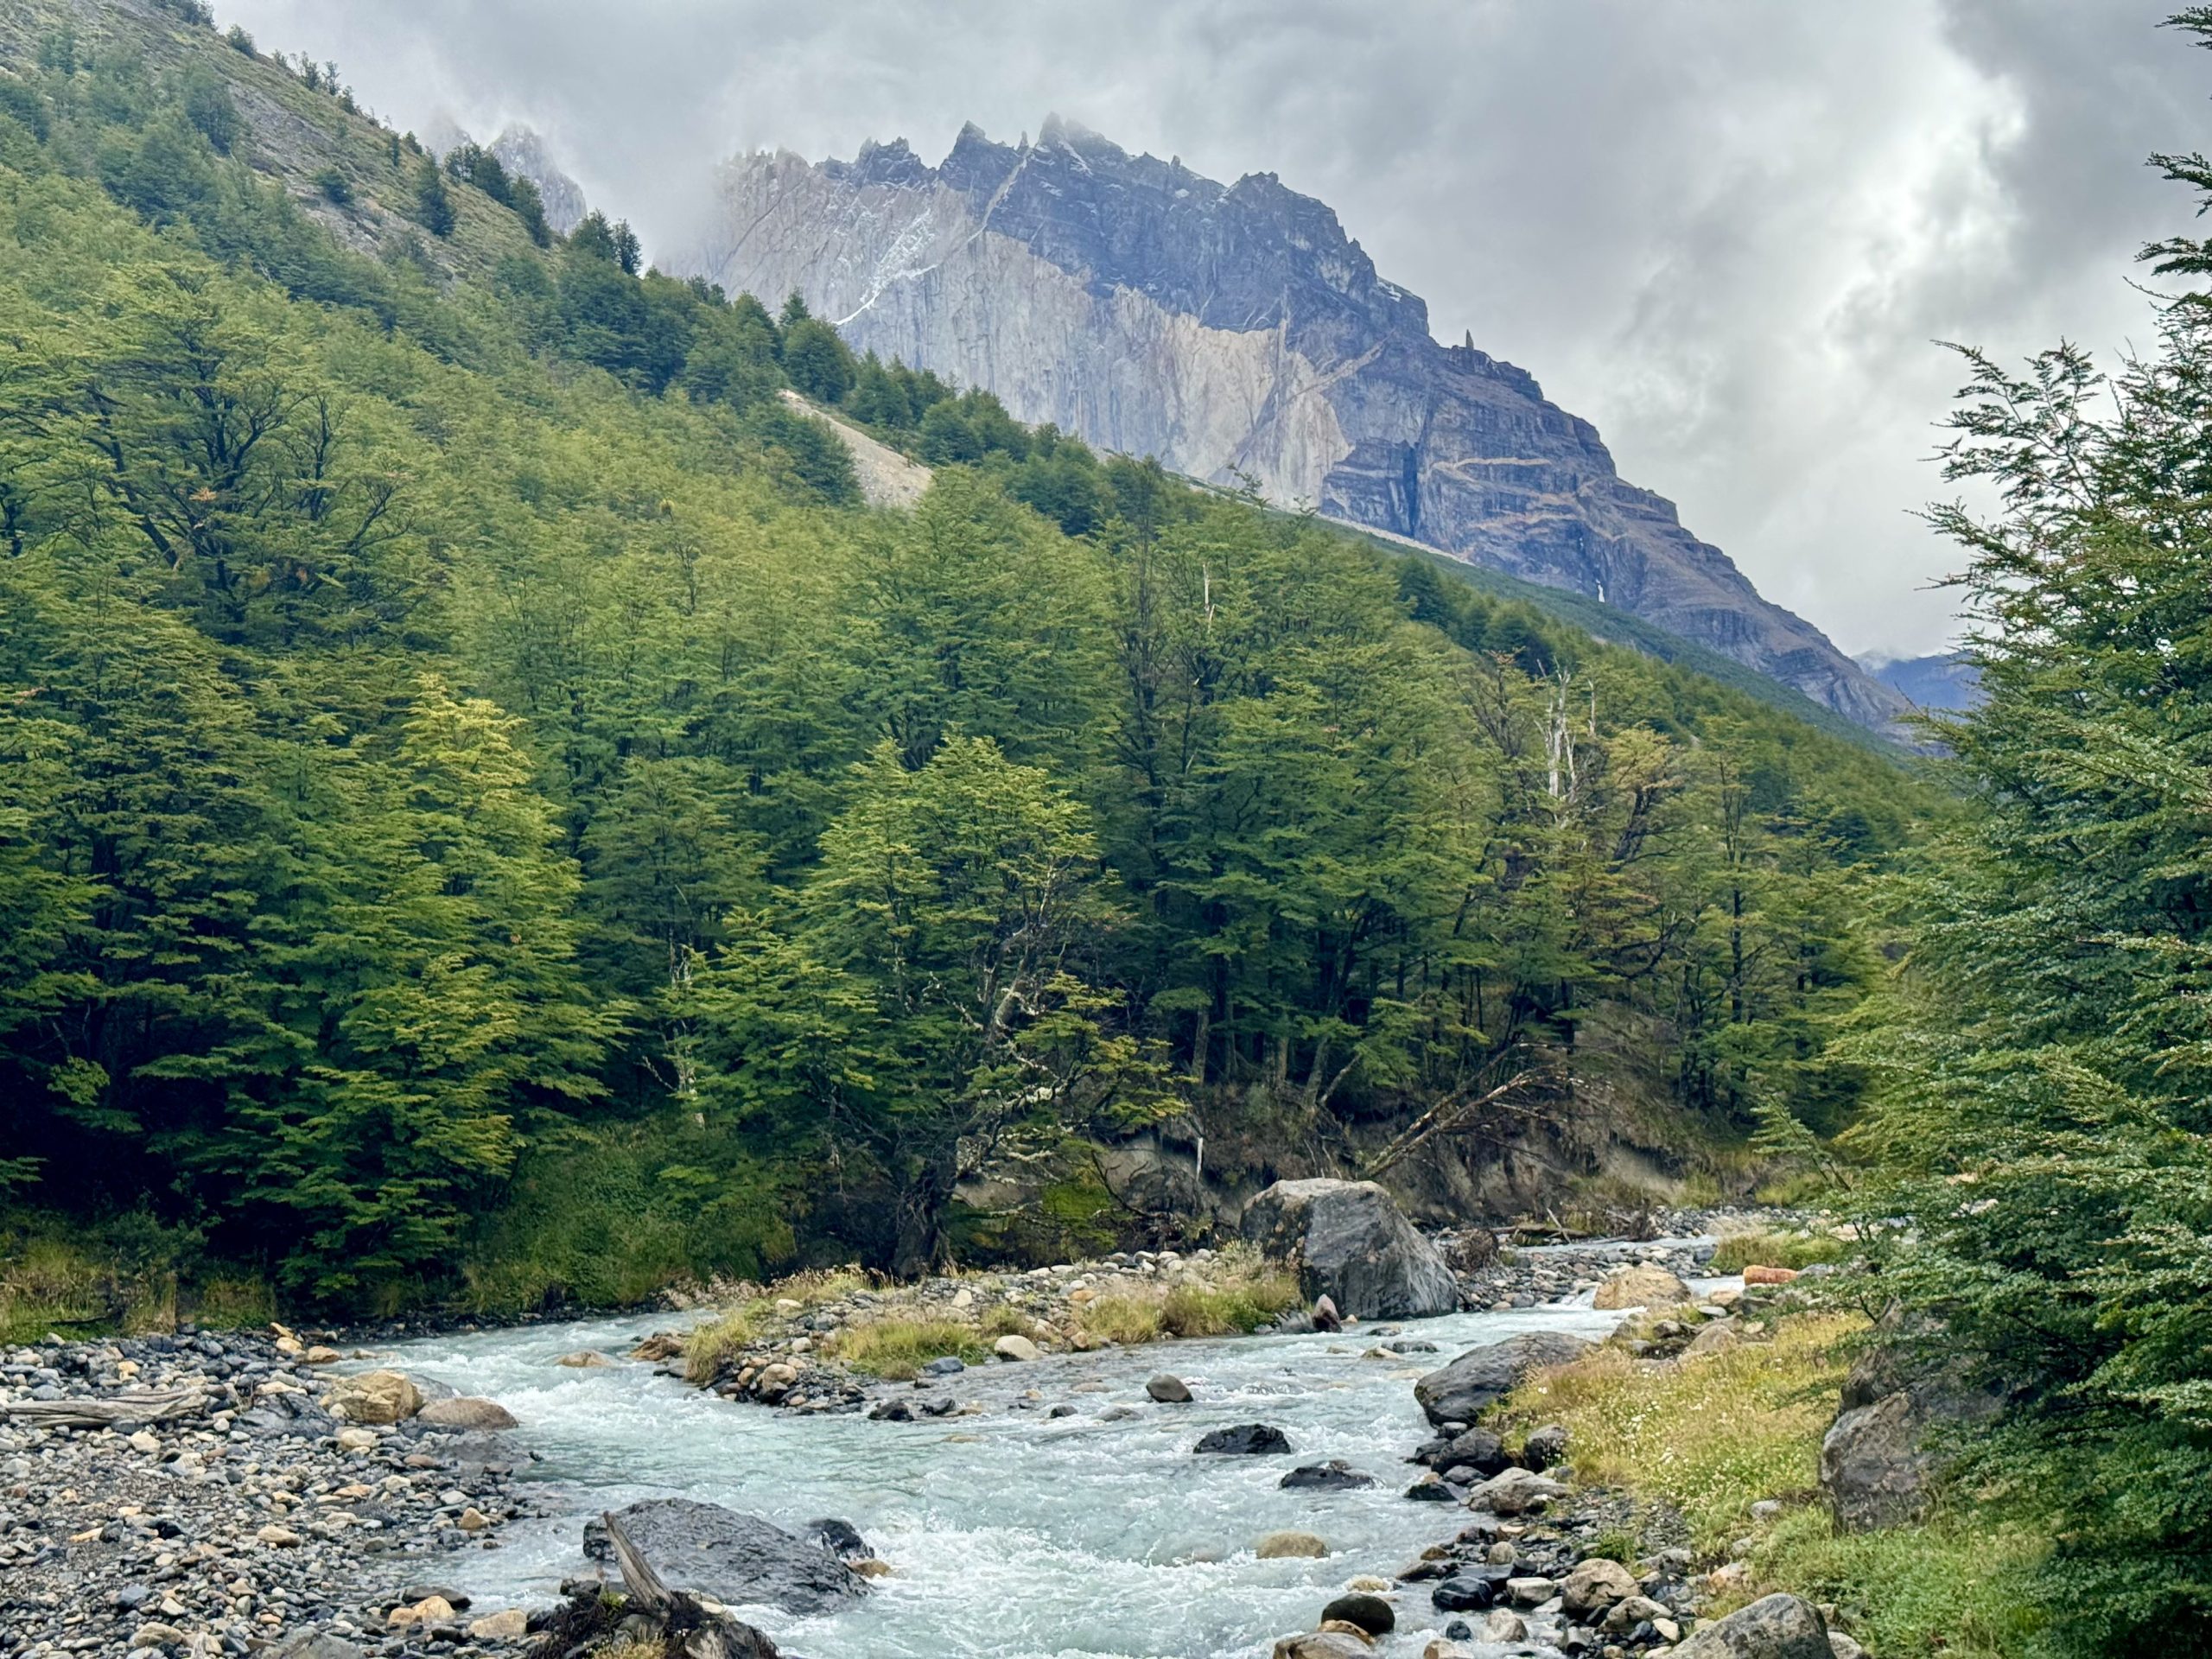
The trail to Refugio Chileno follows a river and gives you your first real “Whoa, I’m in Patagonia” moments. Mist floating through the trees, icy blue water rushing below, and just enough mystery in the air to make it feel like anything could happen.
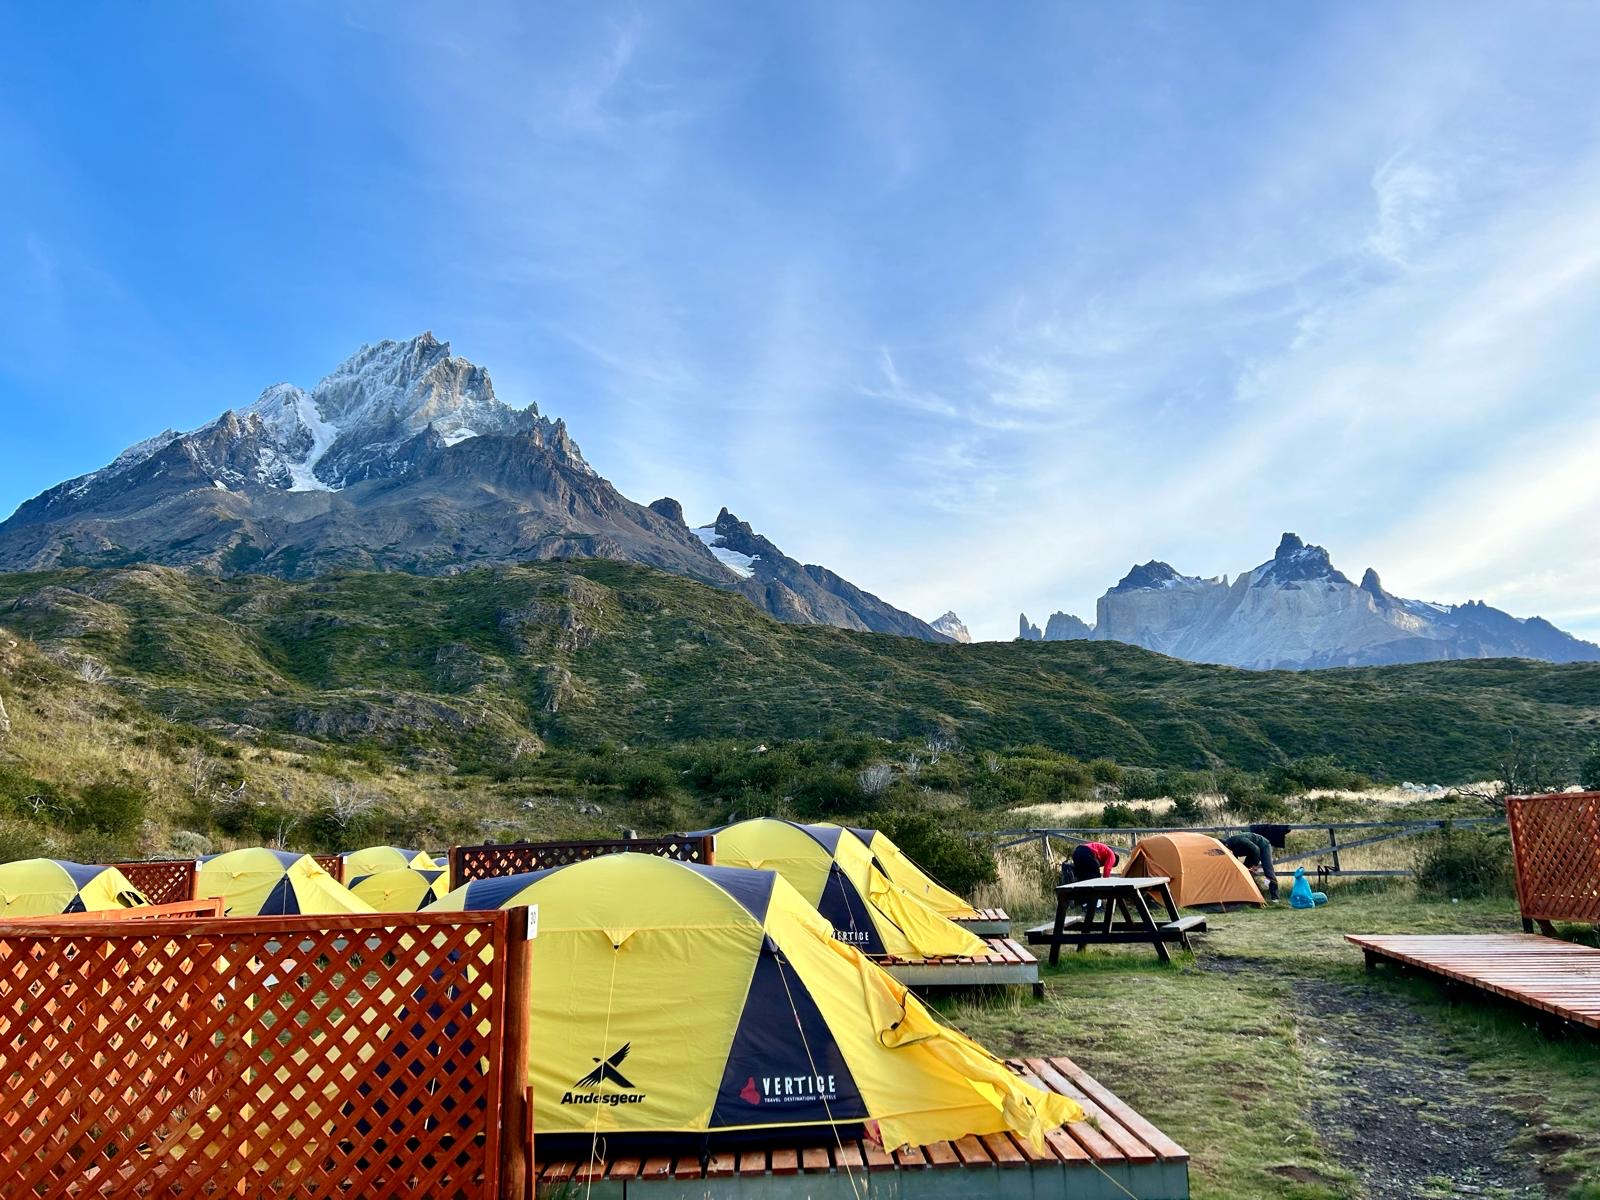
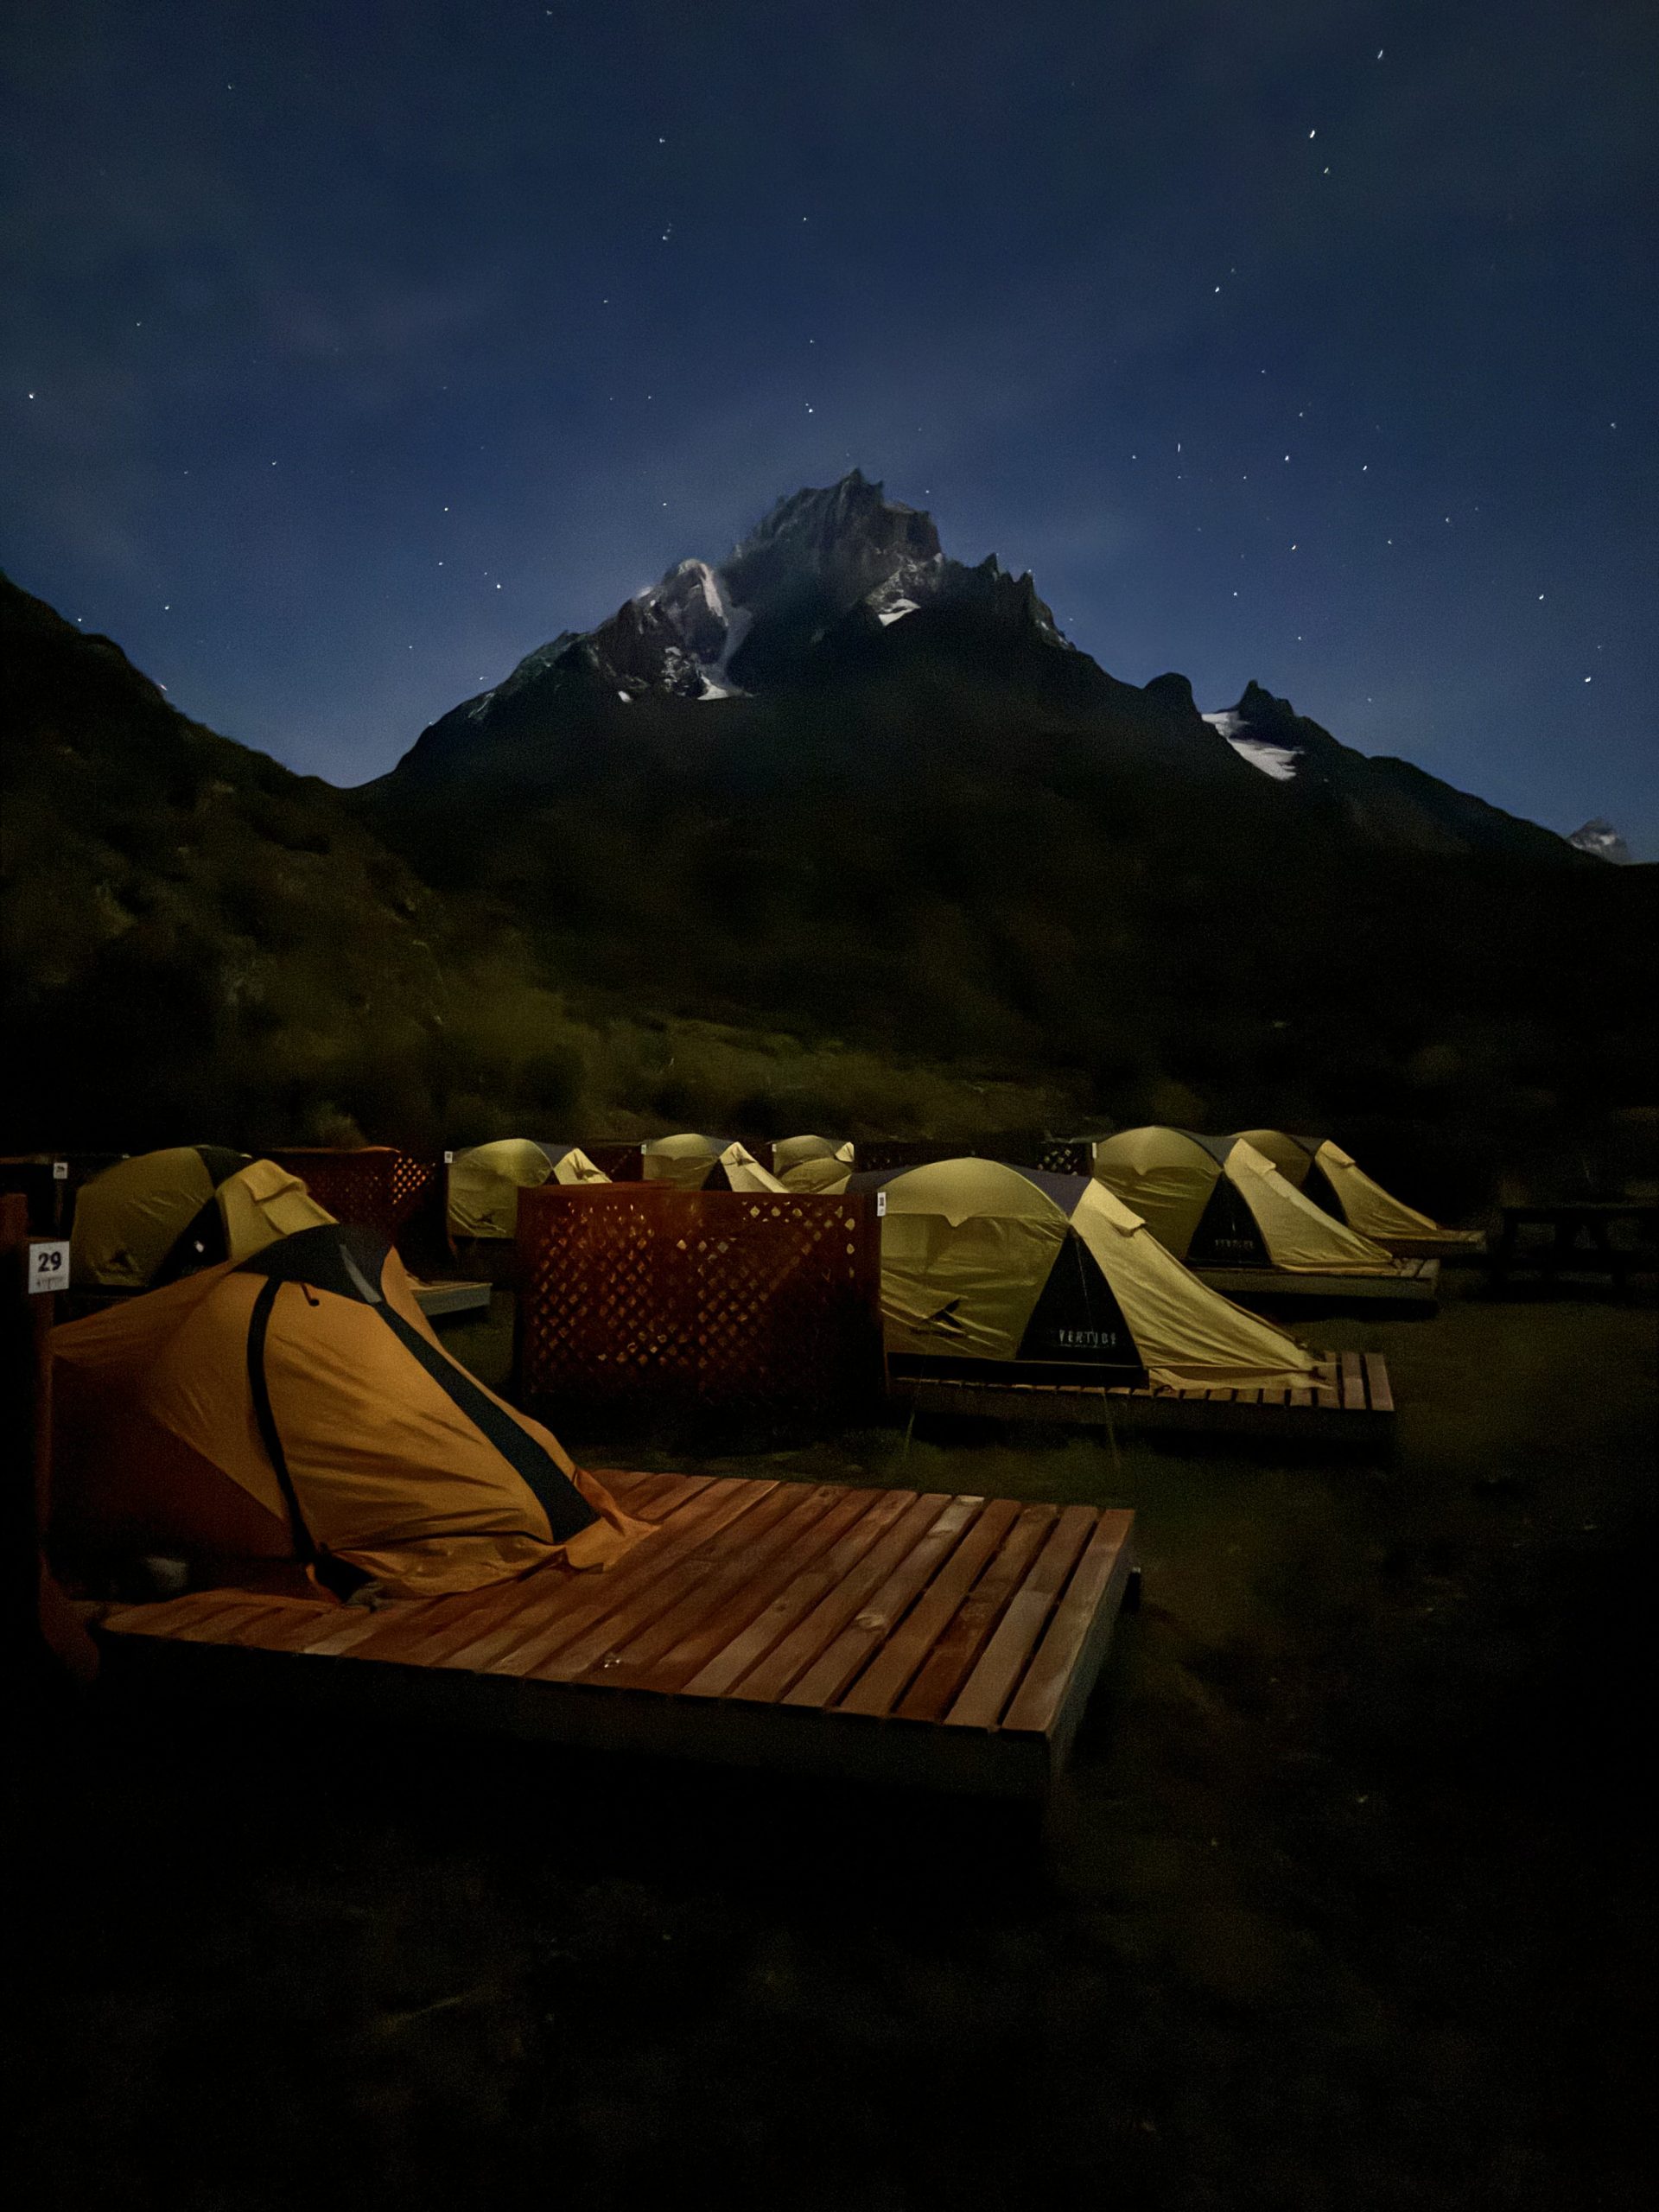
When we got to Chileno, we were soggy, sore, and so ready to chill. And this refugio is absolutely adorable. Tents perched along the hillside, views peeking through the clouds, and a cozy little restaurant buzzing with hikers. If the clouds play nice, you can even catch a glimpse of the towers right from camp. We made a beeline for the hot chocolate at the bar.
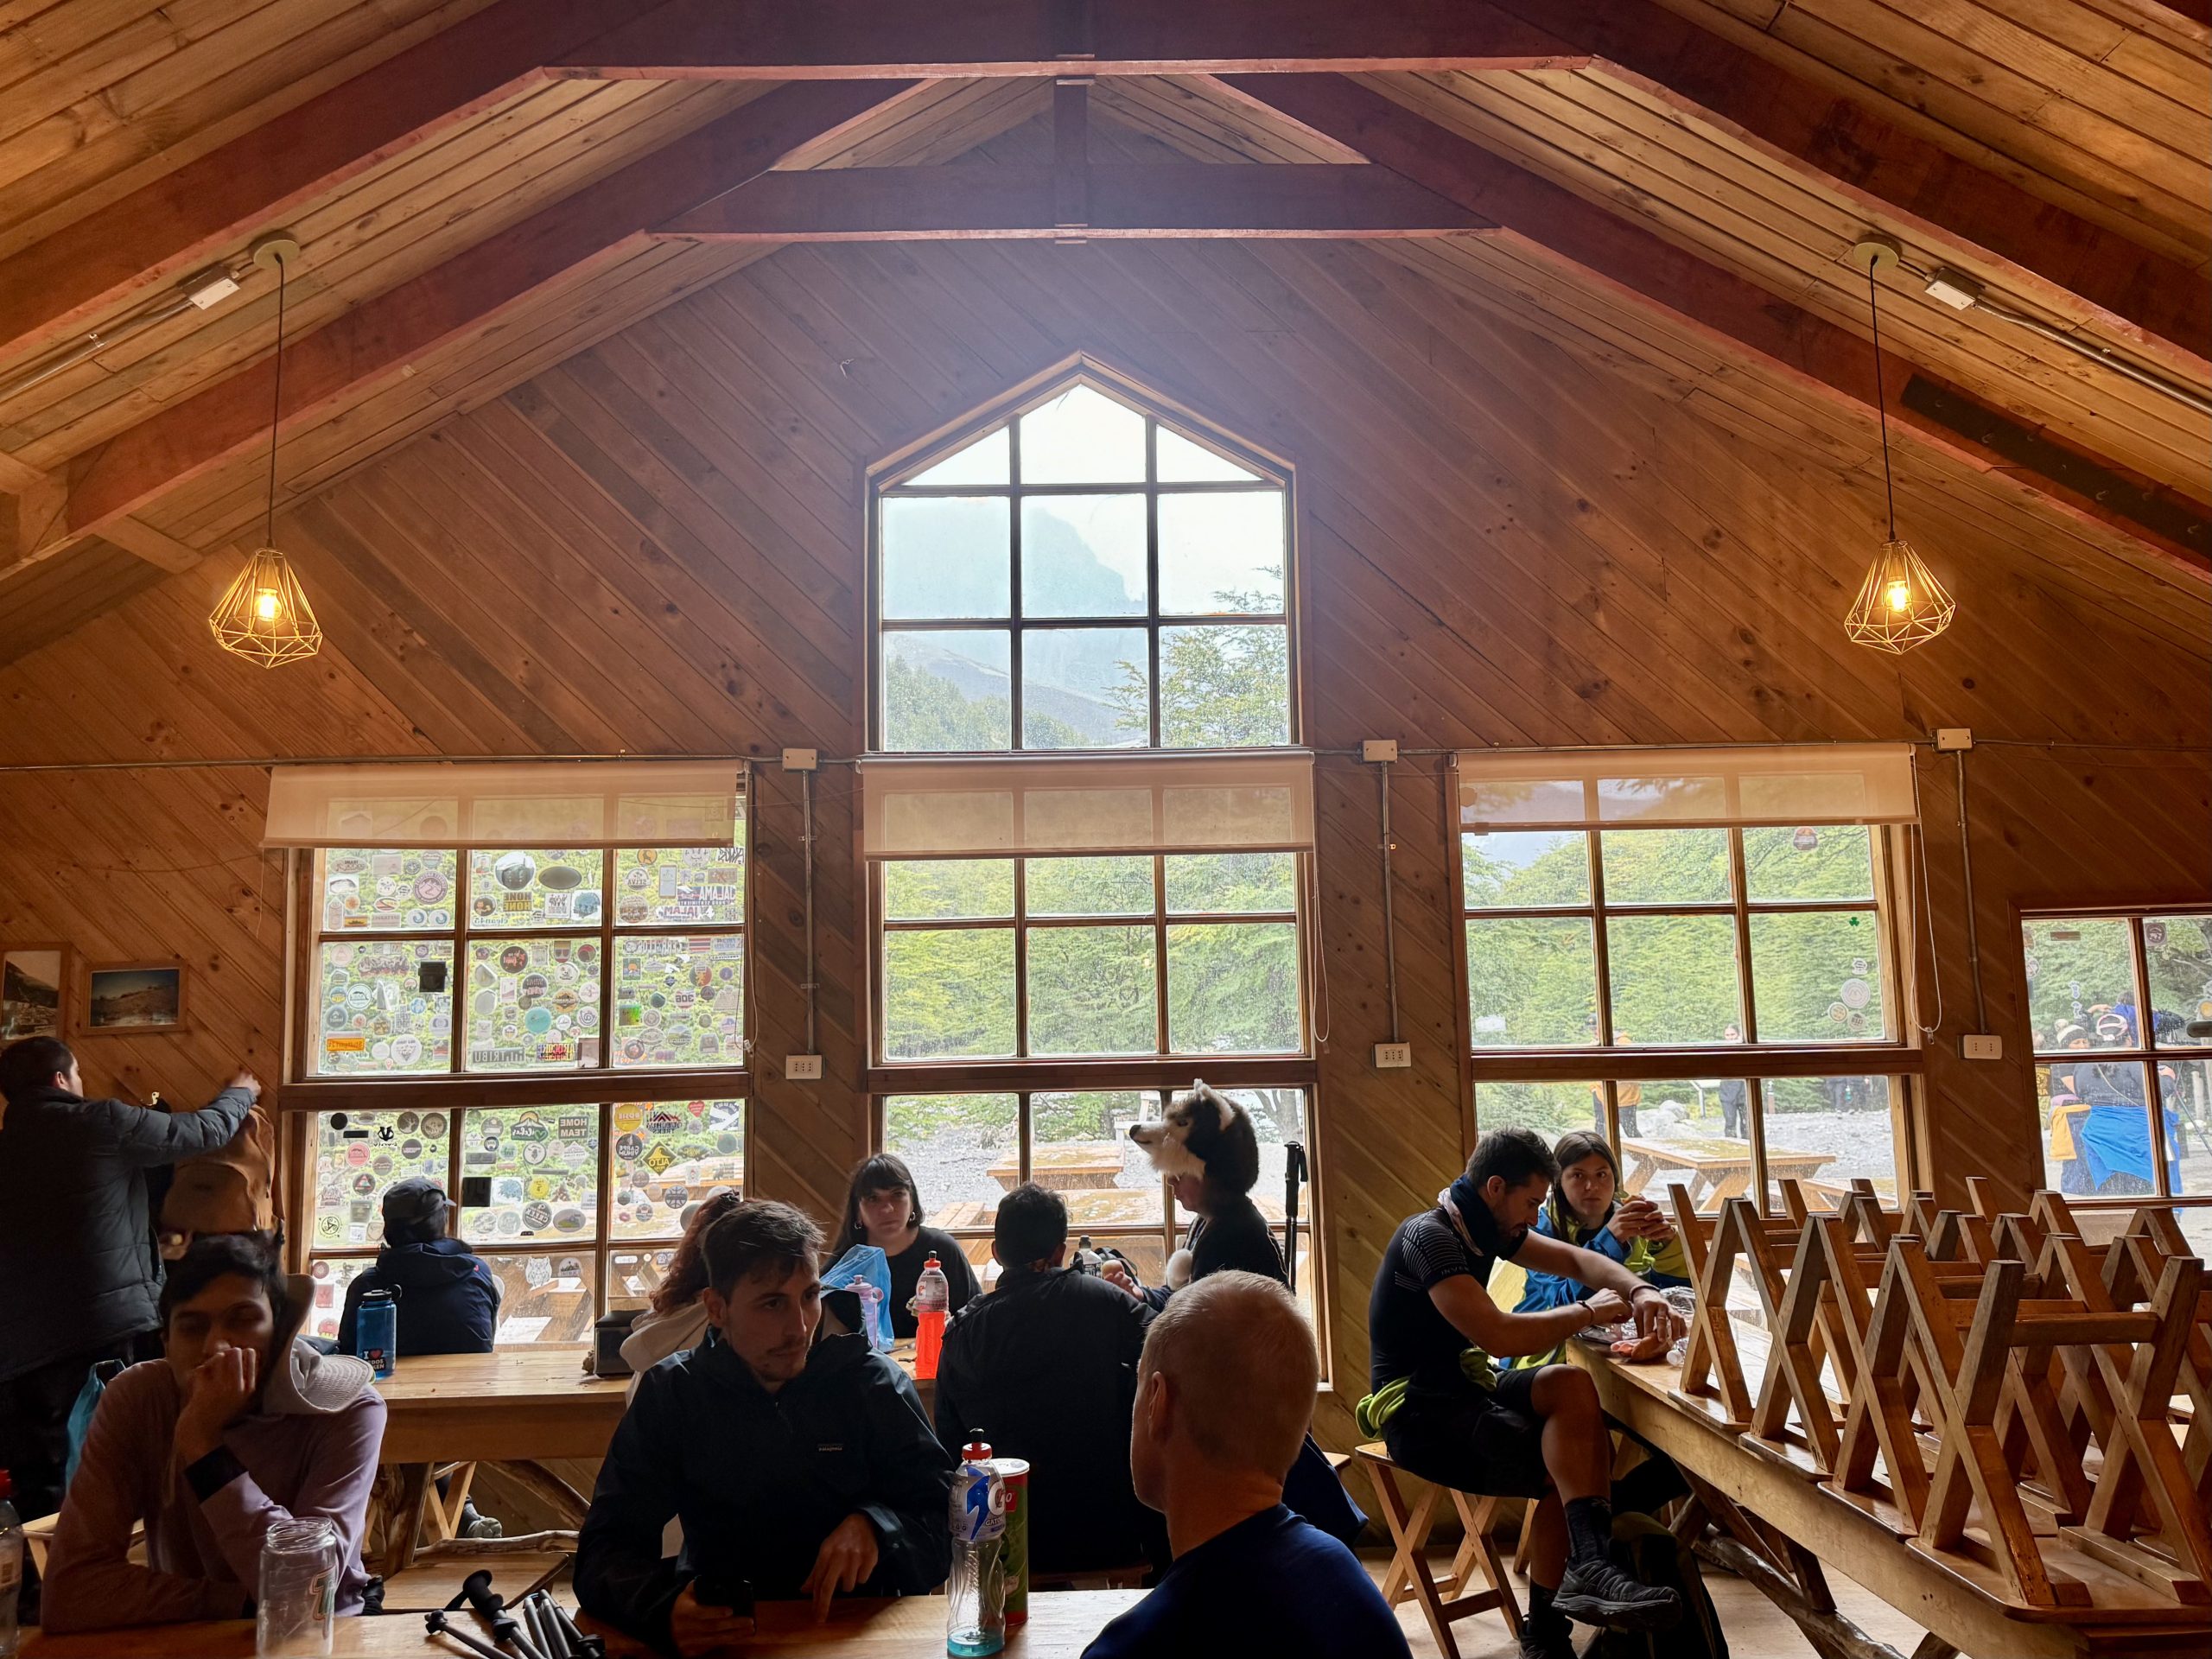
Then came the big question: Do we hike up to Las Torres now or wait until the morning? The weather board said cloudy skies with possible breaks in visibility. We stood there in our rain jackets, muddy boots, sipping hot chocolate and going back and forth.
We decided to go for it that same afternoon — not because the weather looked great (it didn’t), but because we knew that saving the hike for the next morning would make Day 2 way too hard. We figured we had time and energy left in the tank, so why not give it a shot?
Segment 2: Refugio Chileno to the Base of Las Torres
Distance: ~6 miles
Elevation gain: ~2300ft
Once we dropped our big backpacks off at our tent (thank goodness), we headed out for the big one — the iconic Torres del Paine view. This hike was about 6 miles round trip with 2,300 ft elevation gain, and we were feeling pretty good at the start. You could even see the tips of the towers peeking through the clouds from the refugio. Things were looking promising!
The trail starts out gently, winding through a beautiful forest, with wooden bridges and bubbling streams. It felt like something out of a fairytale. But… fairytales often come with dragons — and for us, that dragon was the final climb.
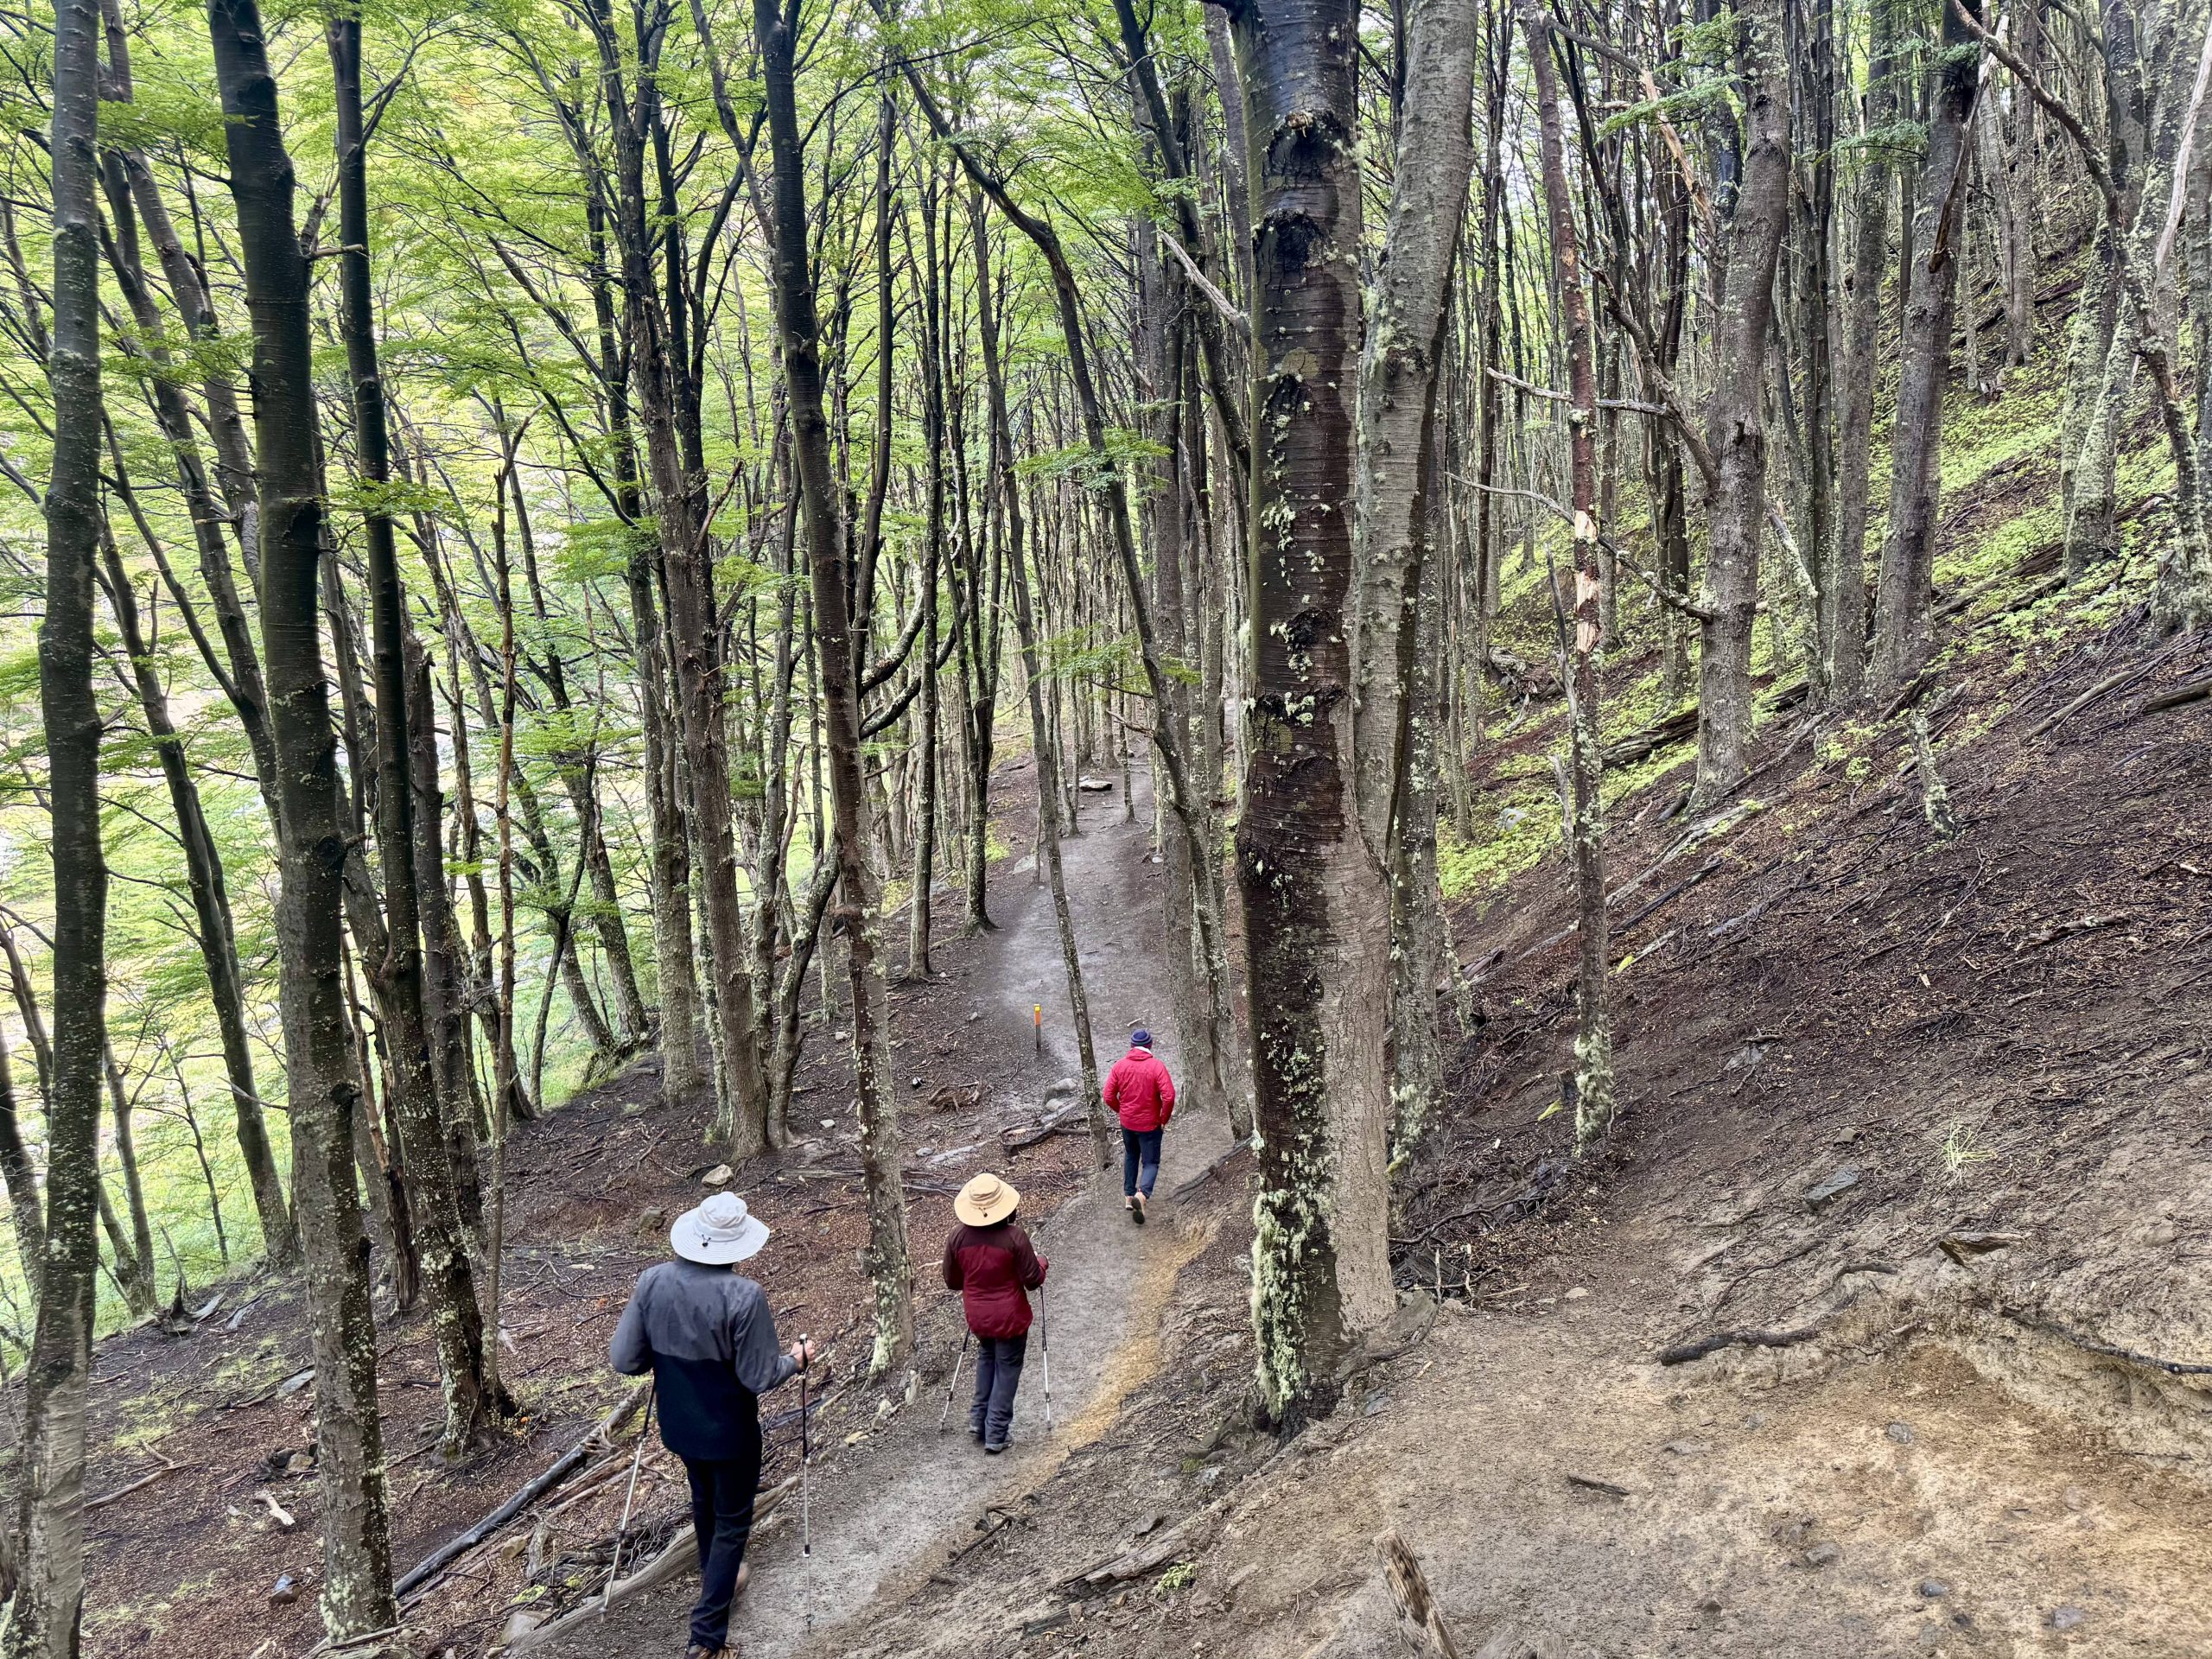
Whew. That last mile was brutal. 😵💫 The incline kicked our butts. It was steep, rocky, relentless, and the wind was not messing around either. Every turn, we thought, this must be it — and then it wasn’t.
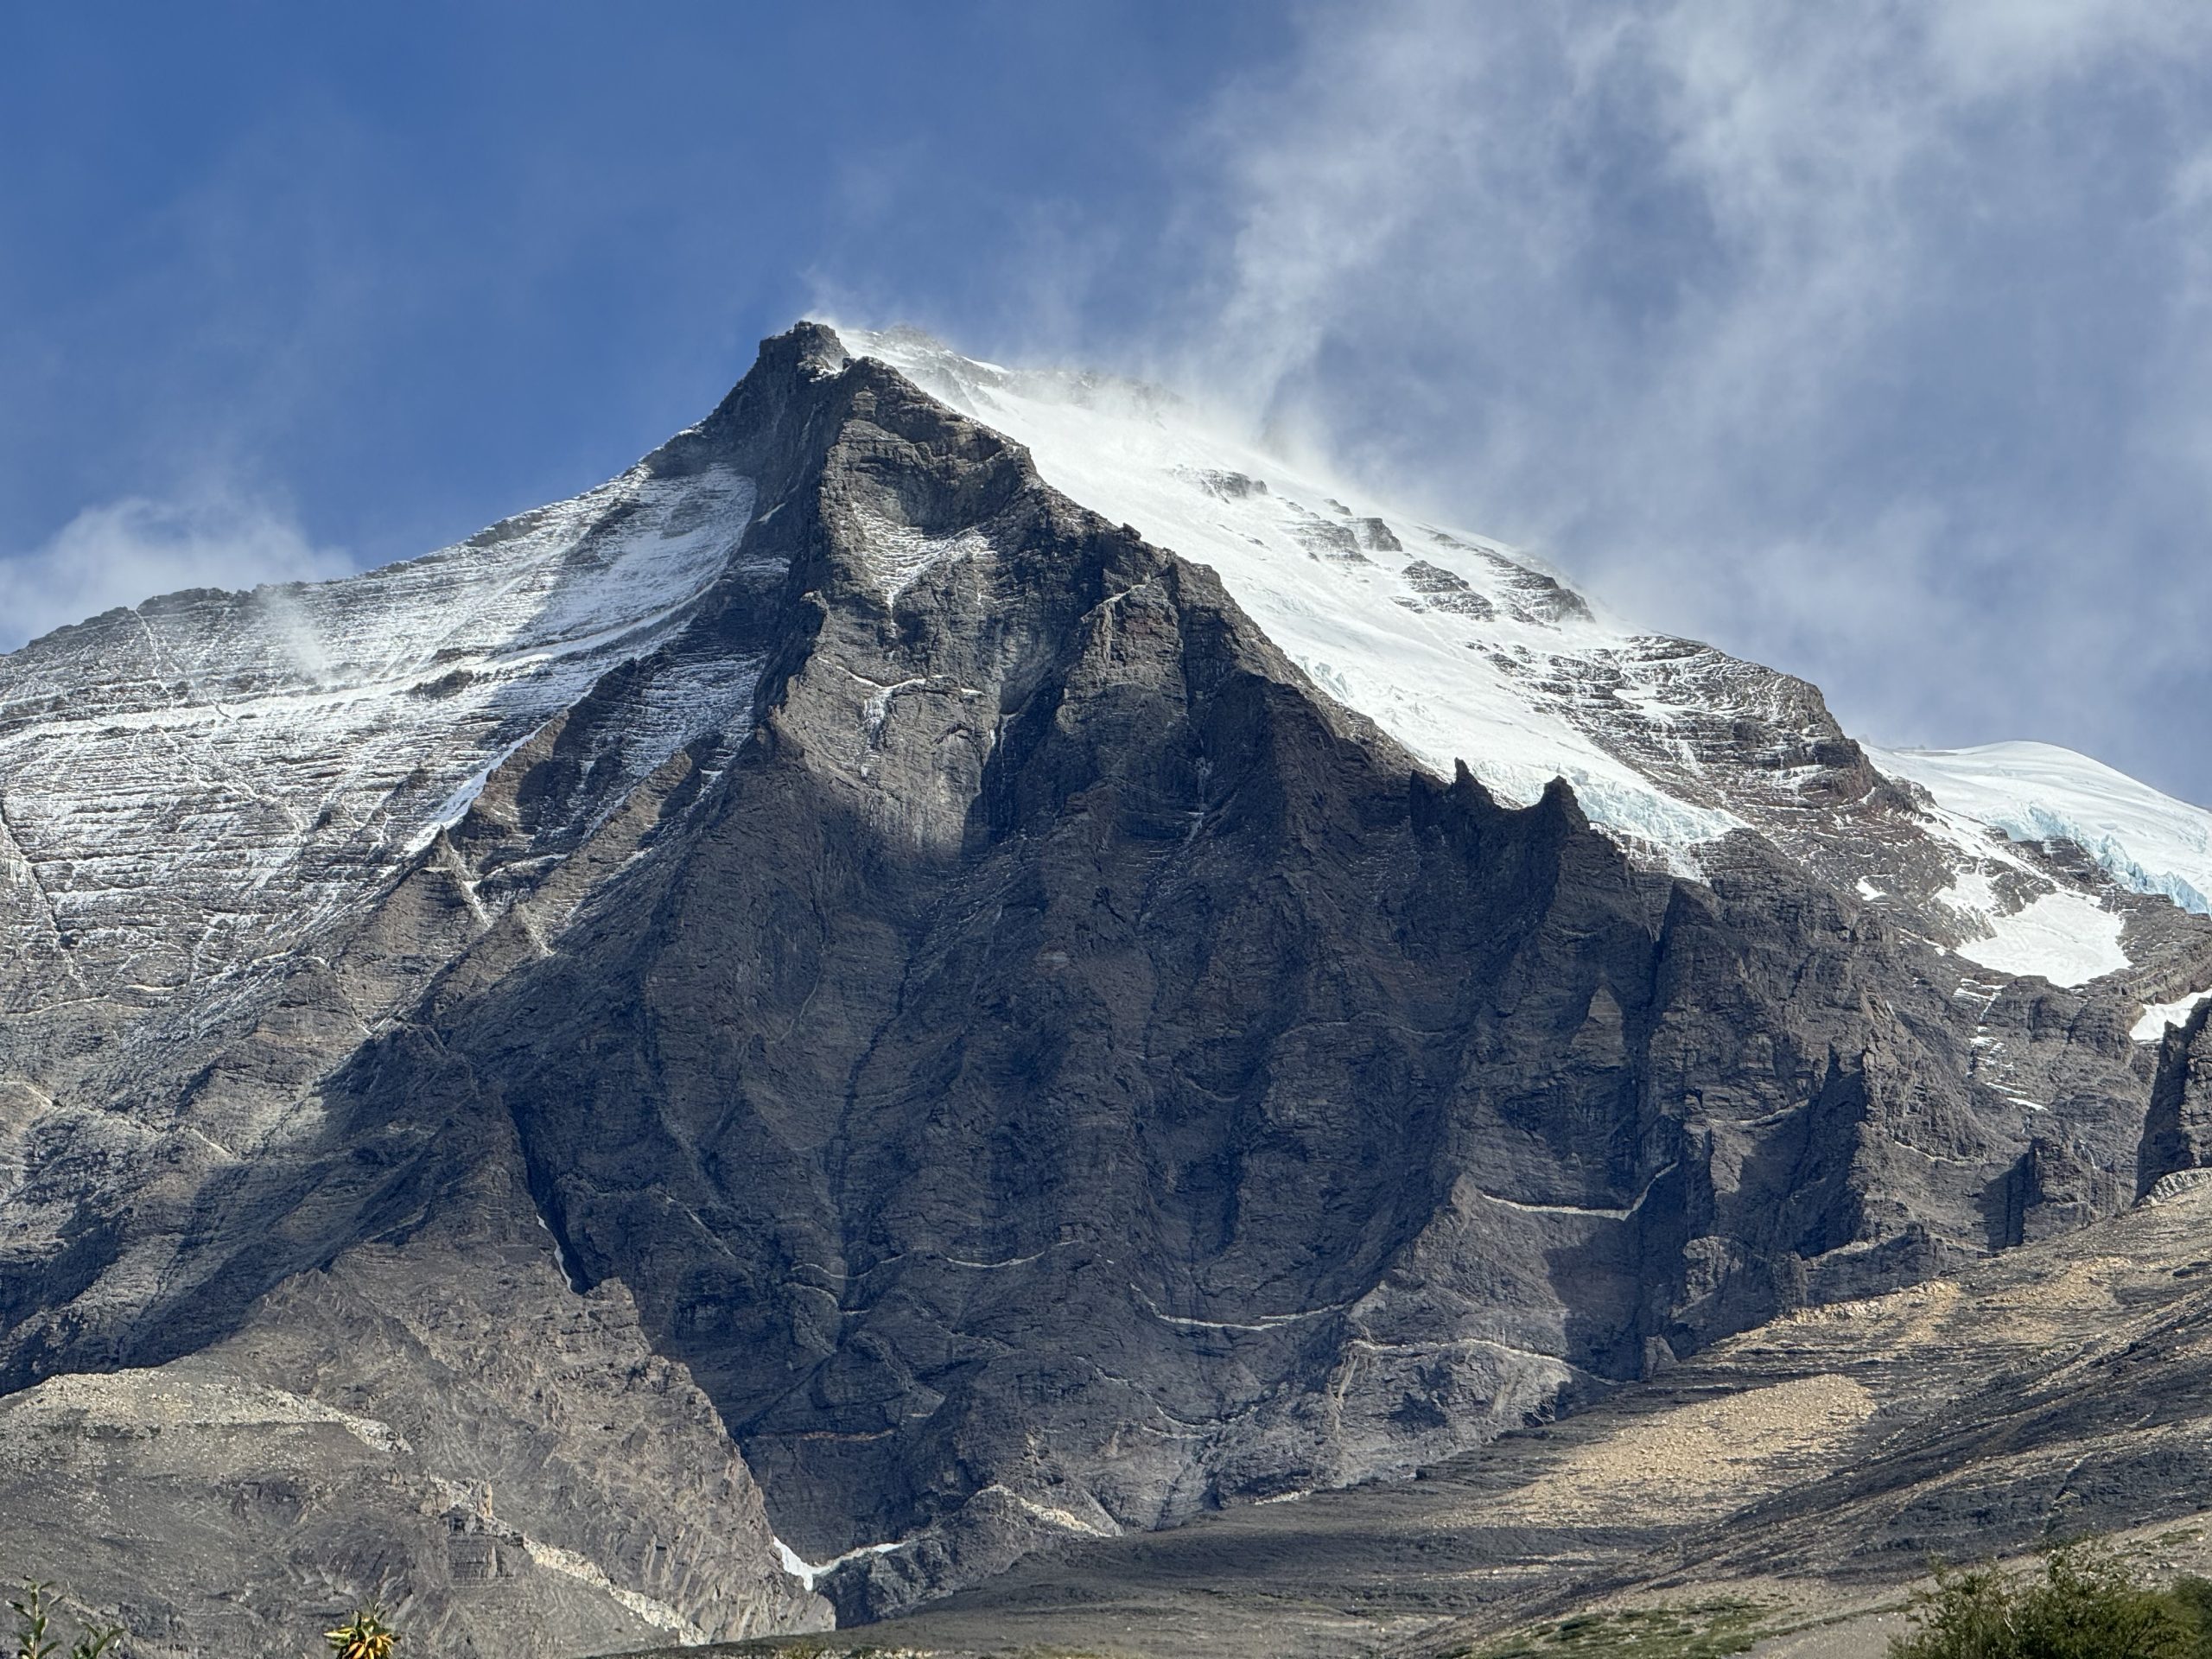
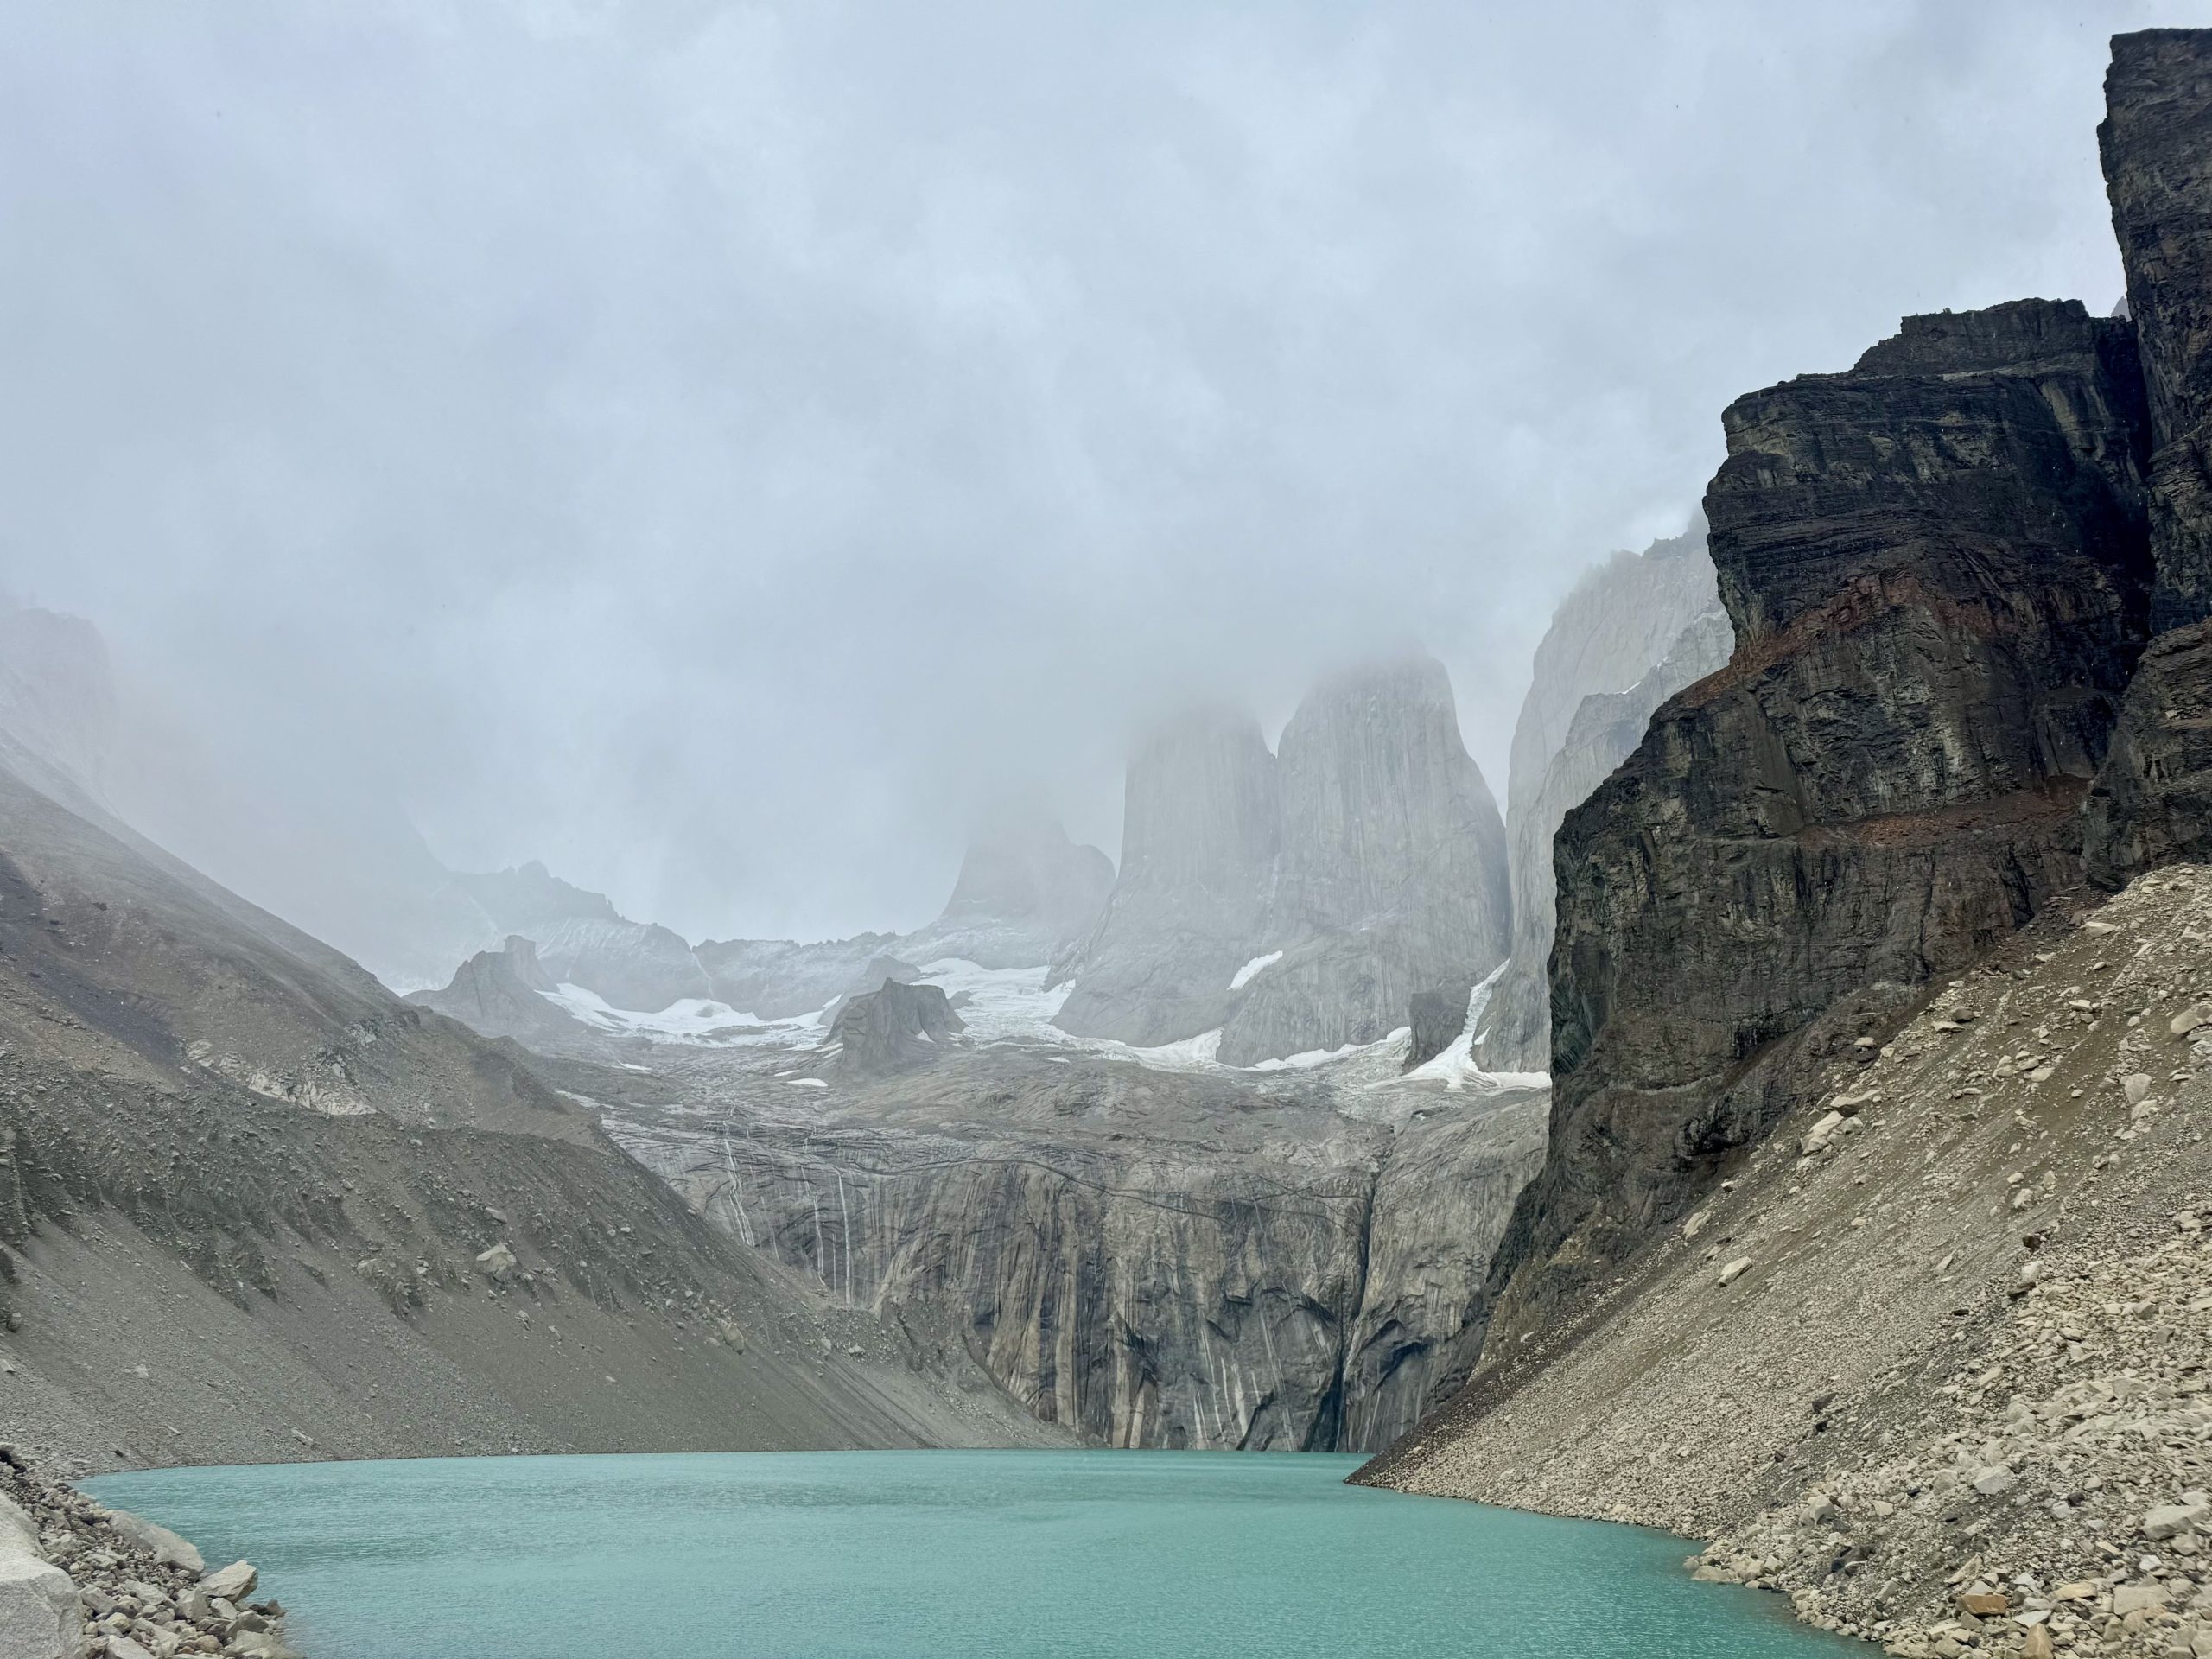
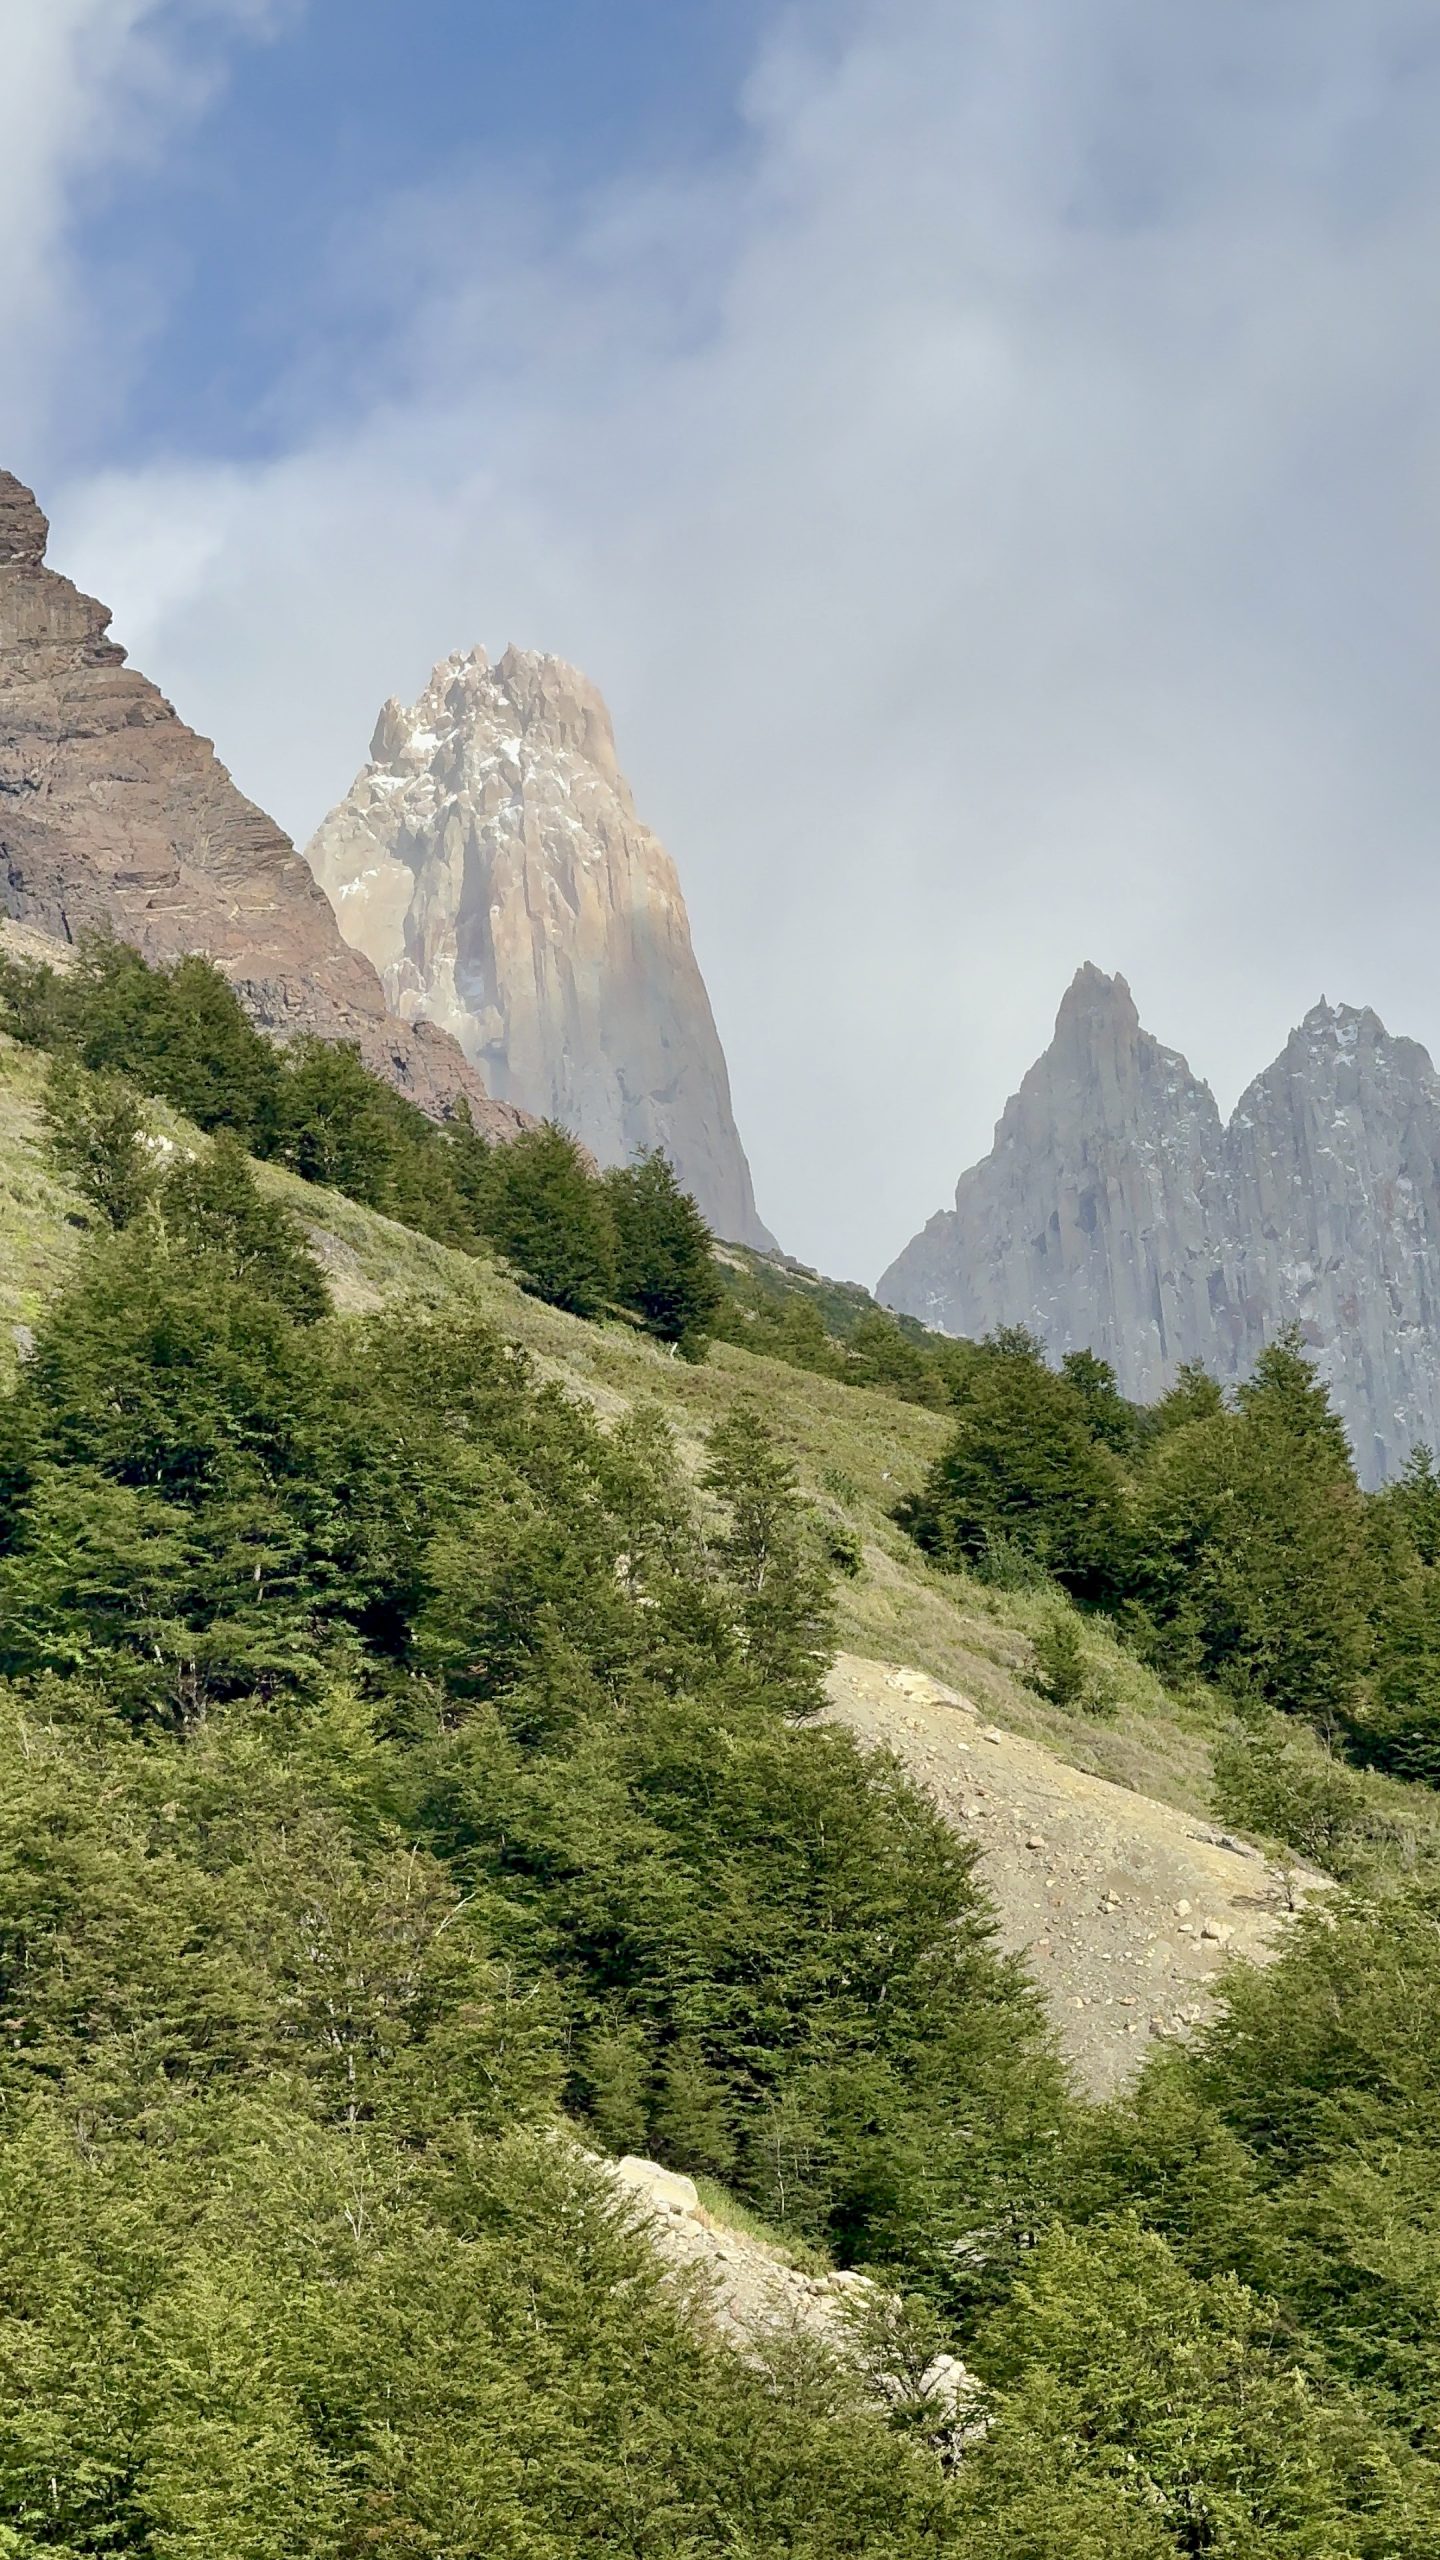
When we finally turned the last corner and reached the viewpoint, the towers were right there in front of us… but just as we caught our breath, the clouds rolled in and covered them up like a curtain dropping at the end of a show. It was heartbreaking. We didn’t get to take in the view. And to top it off, we were asked to leave soon after because the sun was setting and they don’t want hikers lingering up there too late.
What we’d do differently: If we could do it again, we’d plan our hike to the towers so we had at least a couple of hours to hang out at the viewpoint. The weather changes fast in Patagonia — and if you’re patient, the clouds might drift away just long enough to give you that iconic Las Torres view. Don’t rush it — bring a snack, soak it all in, and give the towers time to show off.
We hiked back down with sore legs and heavier hearts than when we started.
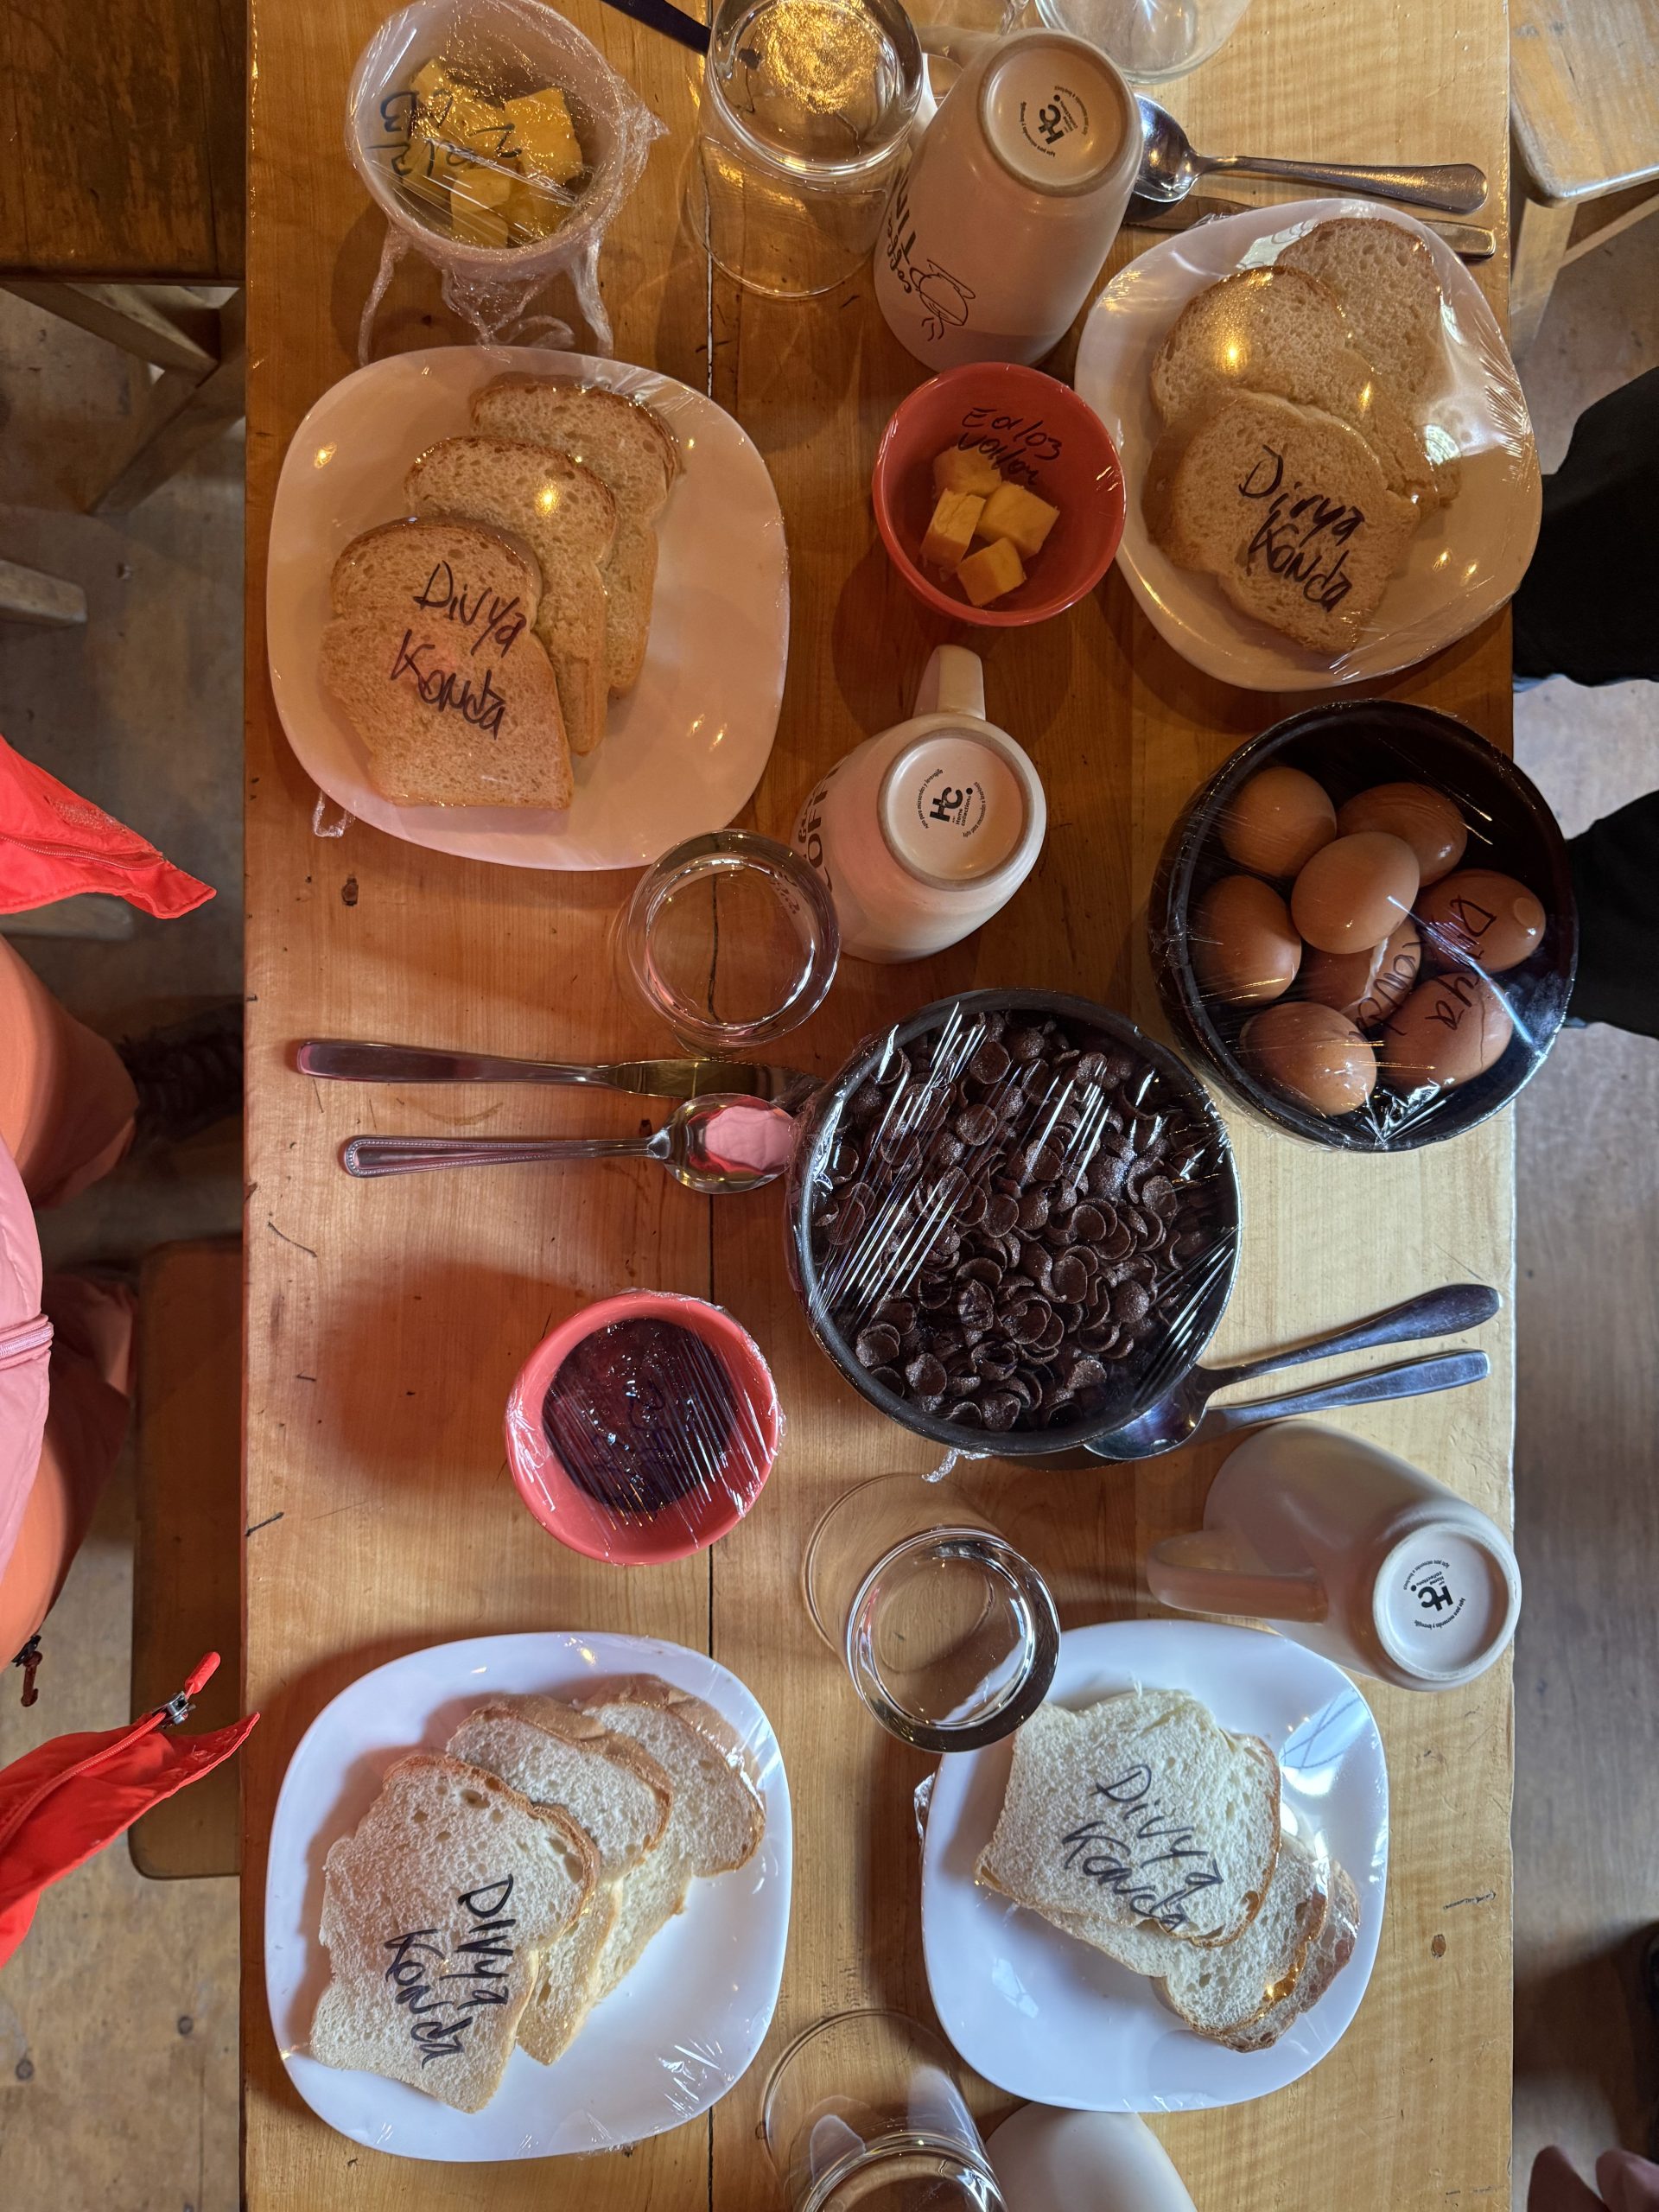
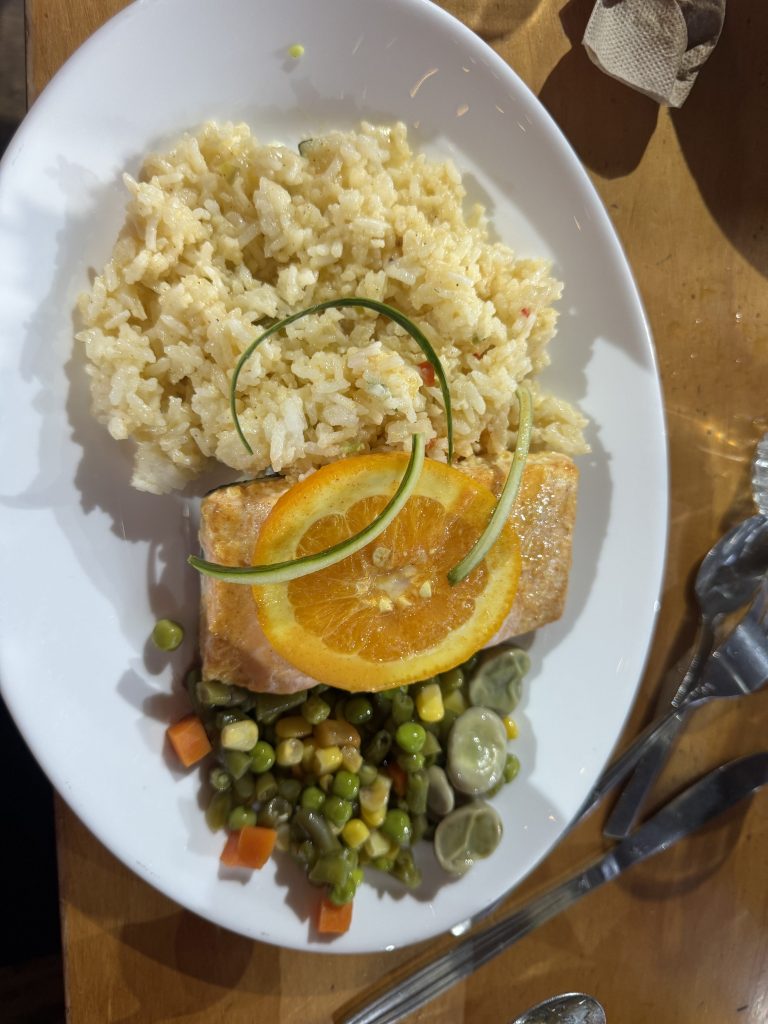
Back at camp, we took warm showers (a blessing!) and made it to the restaurant for dinner. We had pre-booked the full meal package: breakfast, packed lunch, and dinner. You pick a time slot and sit down at your assigned table with other hikers, and they bring the meal out like clockwork.
The food was simple but filling, and very vegetarian-friendly. Our friend who was traveling with us is vegetarian and was happily fueled up every day. But… sadly, I didn’t get to enjoy dinner that night because my stomach was not having it. I ended up skipping the meal, taking some meds (thank goodness for that packing list), and retreating to the tent early.
That night was freezing! The tents do not come with heaters but the weather and the wind are pretty cold in March. I shivered the whole night while Aditya, my husband, slept like a baby. All in all, Day 1 was tough. The weather wasn’t on our side, our legs were toast, and morale was a little low heading into Day 2.
But trust me — it only got better from here. Way better. In fact, our last couple days ended up being our absolute favorite of the entire trek. So, keep reading!
Pro tip (that I wish I knew earlier): If you’re someone like me who freezes easily, fill your water bottle with hot water and tuck it into your sleeping bag. It’ll keep you toasty all night.
Day 2: Chilenos to Cuernos – A day of rainbows and recovery
Distance: ~8.5 miles
Elevation Gain: ~1,400 ft
After a rough first day (emotionally and physically), Day 2 started slow. My stomach had thankfully calmed down, and we finally rolled into the breakfast area a bit late — by then, most other hikers were long gone, already out on the trail or coming back from their sunrise hike to the towers.
That morning apparently offered crystal-clear views of Las Torres, and we were definitely feeling a little bit of FOMO. People were showing us their photos and raving about how stunning it was — and we couldn’t help but wonder if we’d made the wrong call to not try going to the towers that morning.
What we’d do differently: If I had to plan the trip all over again, I’d probably plan an extra day at Chileno. This will give you enough time to make sure you can time your visit to the iconic towers for the view better even if the weather is not on your side.
But oh well. No time machines, only trails.
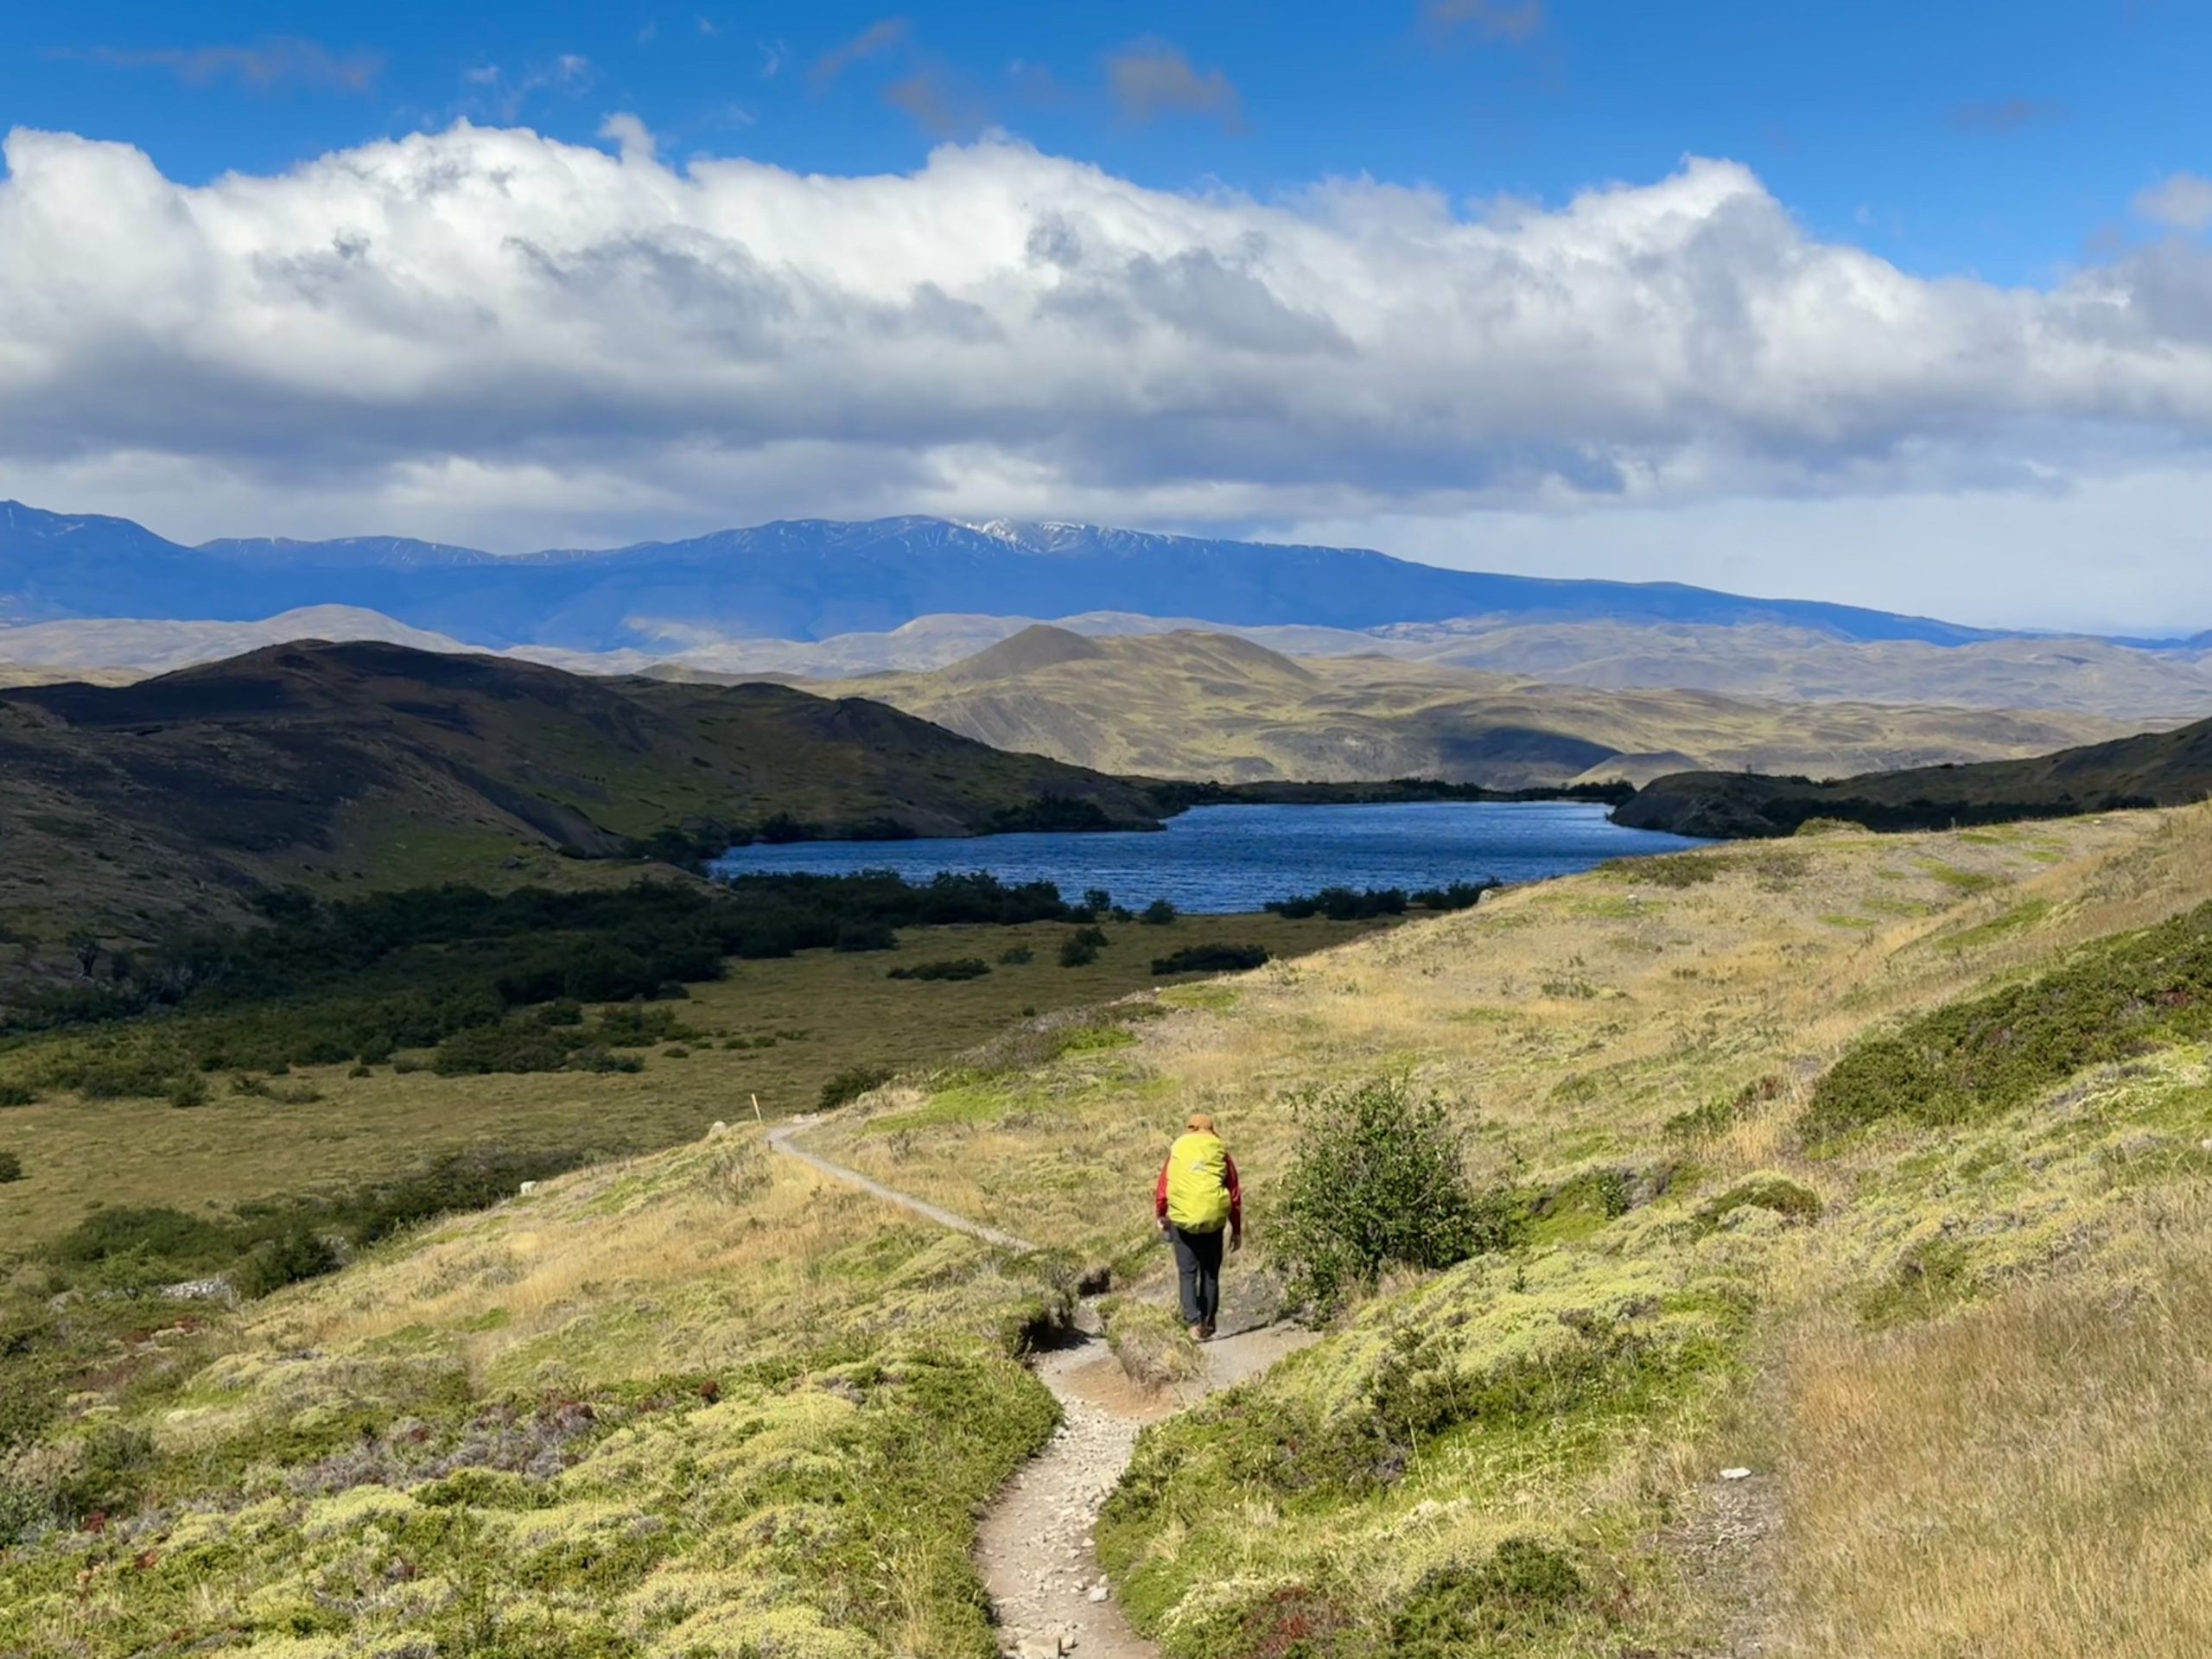
We picked up our packed lunches from the refugio, strapped on our backpacks again, and finally hit the trail at around 11:30am. Our goal for the day – Take it slow and recover. We had a long-ish 8.5 mile hike with 1,400 ft of elevation gain to get to our next campsite: Refugio Cuernos.
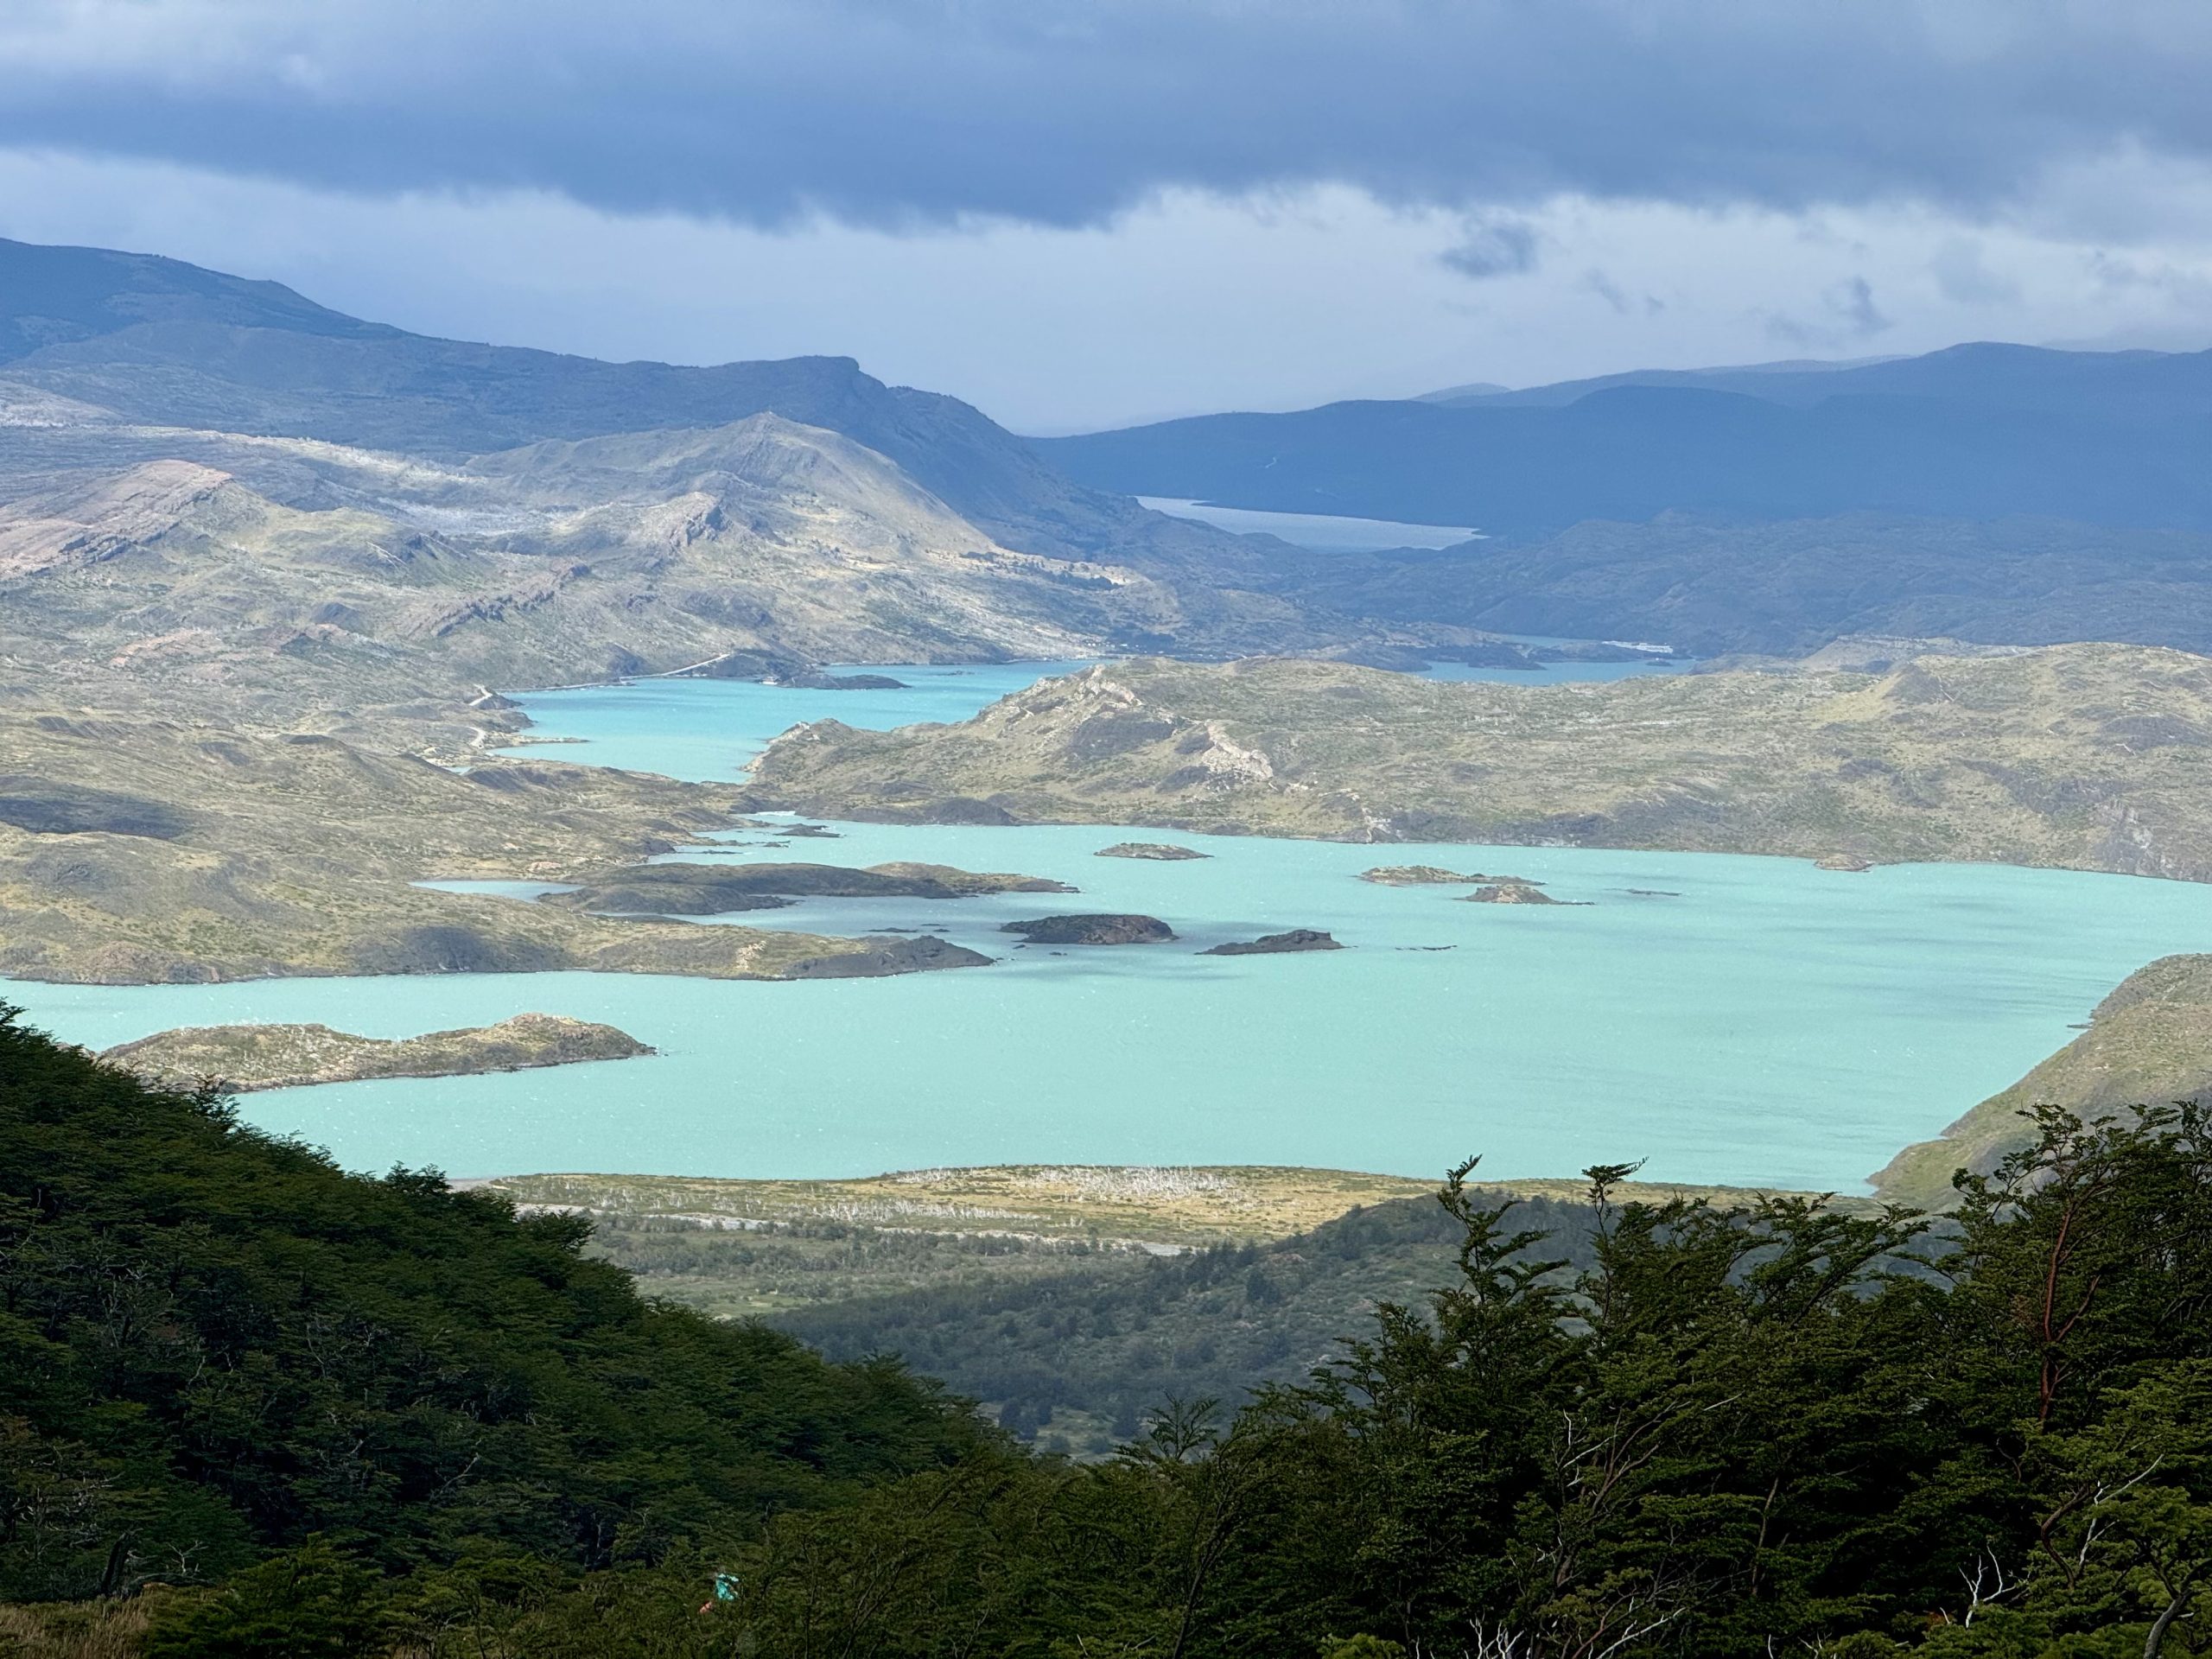
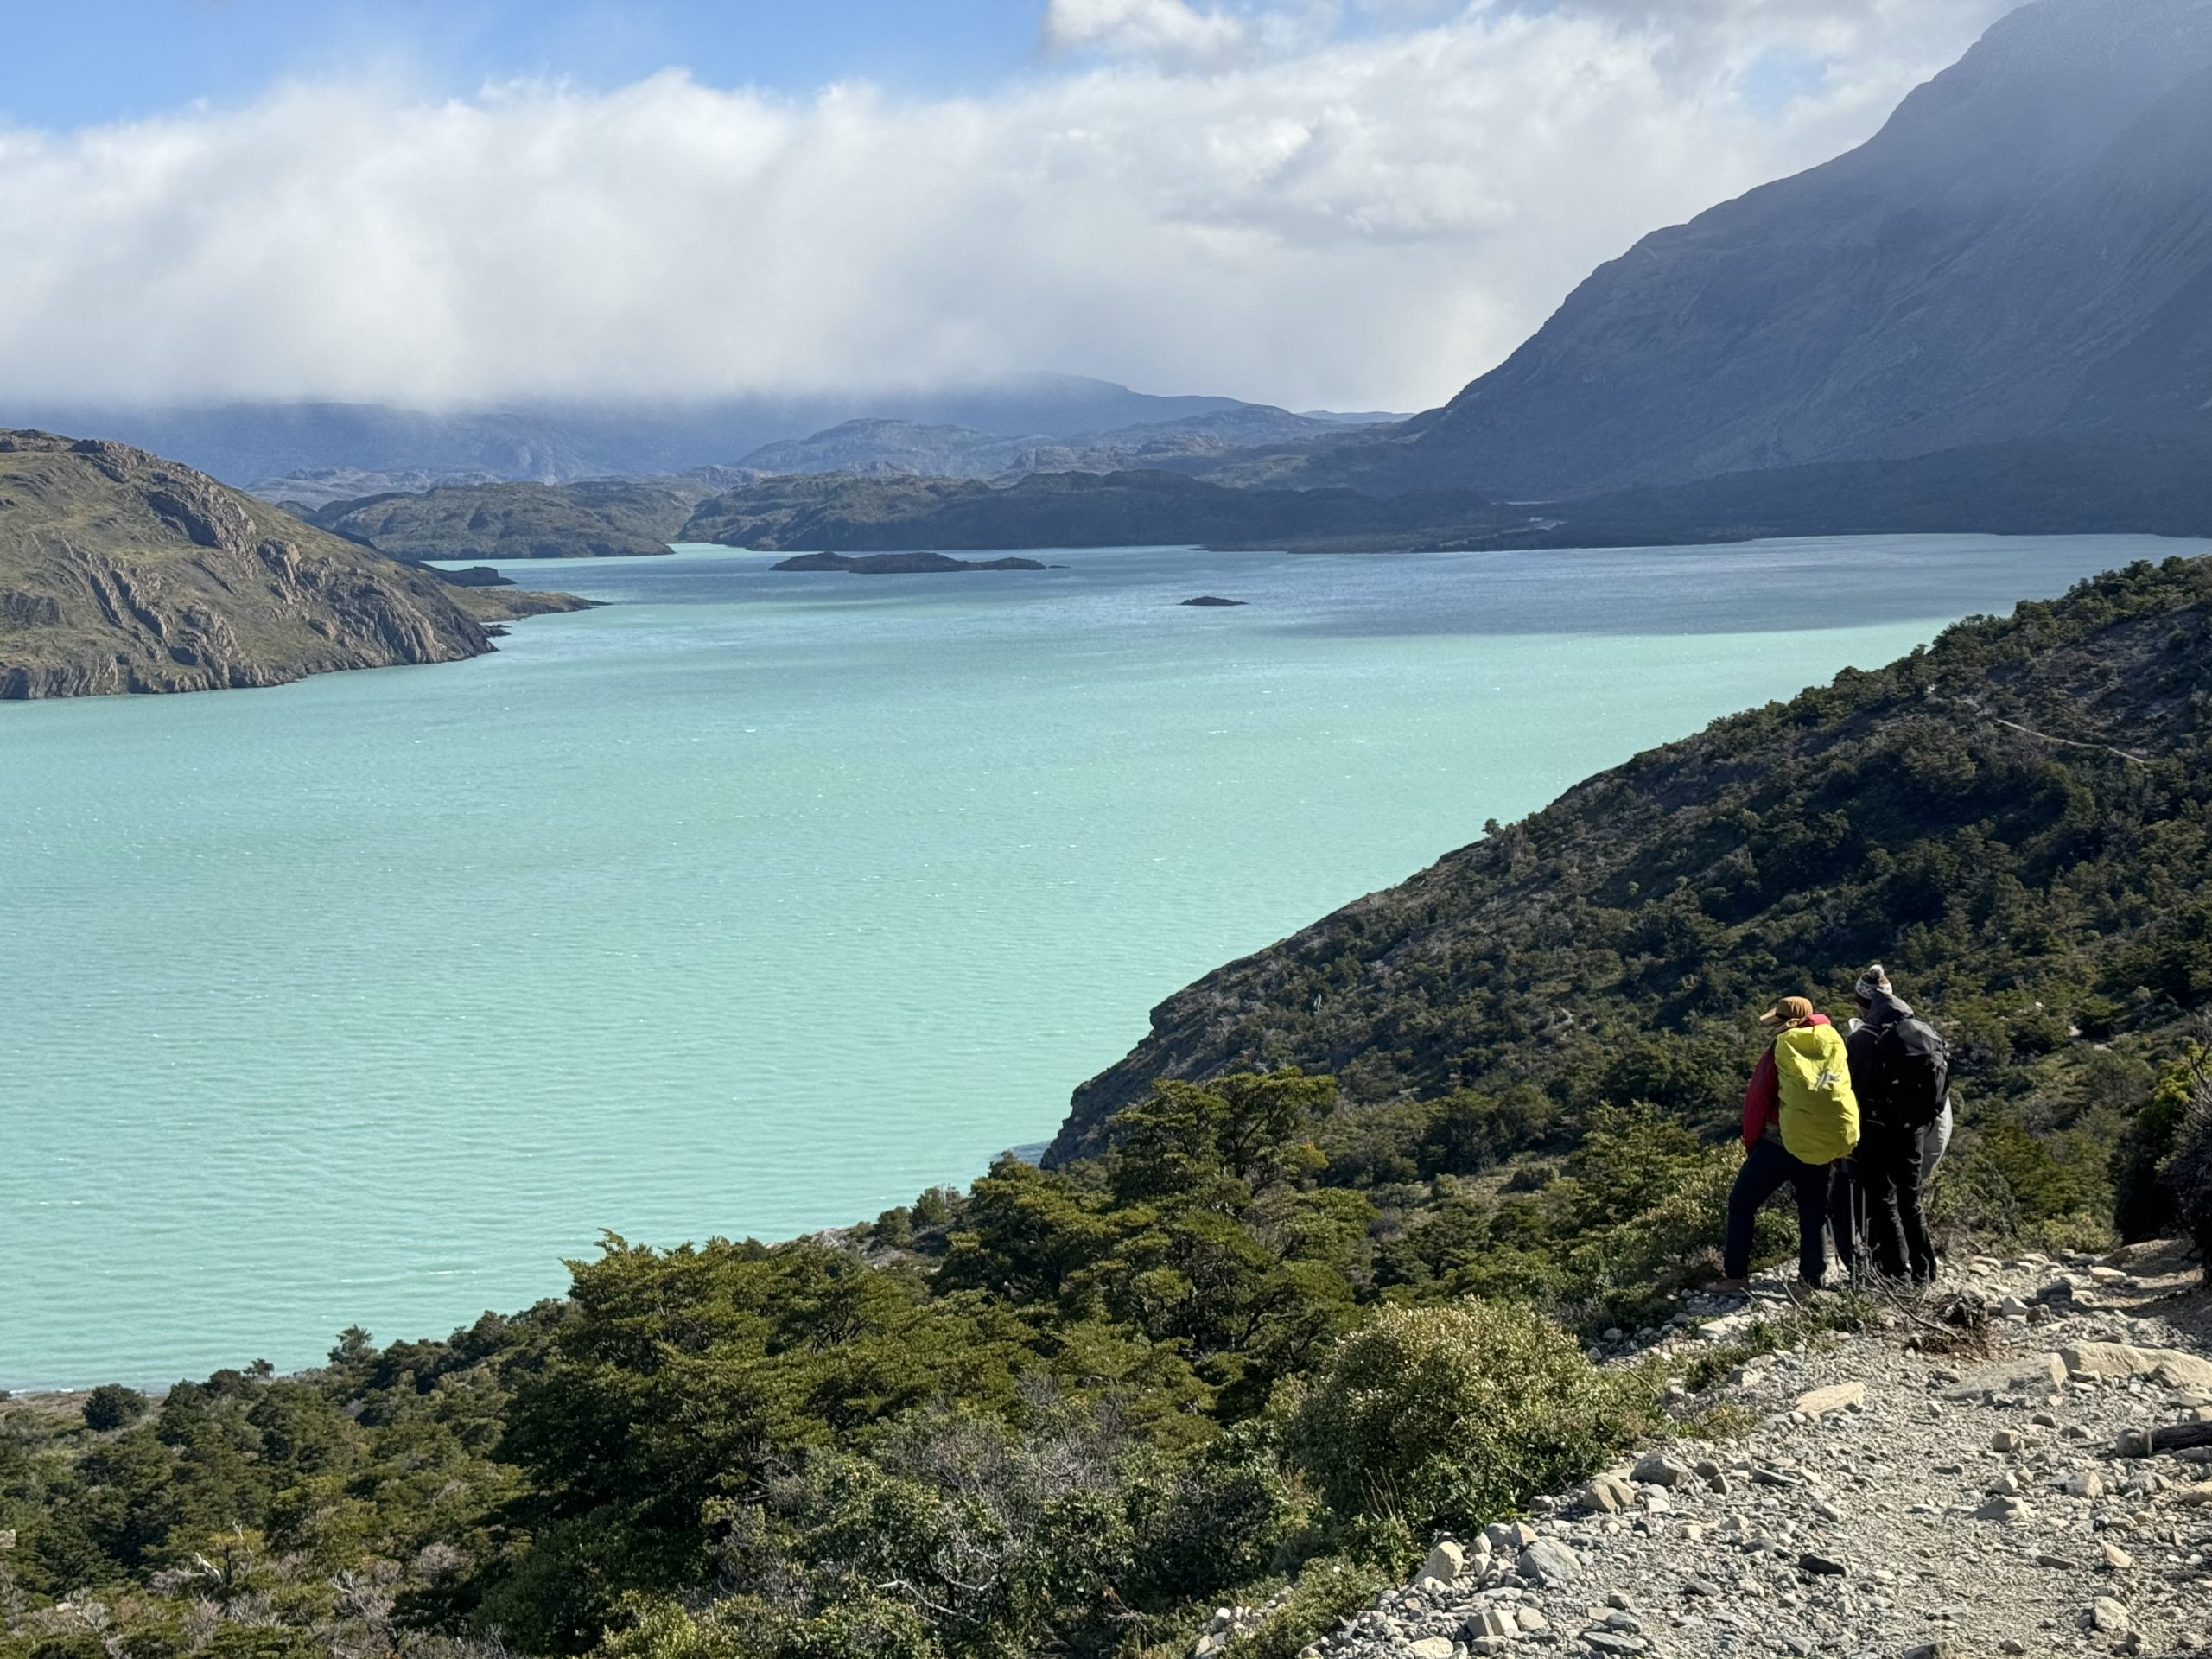
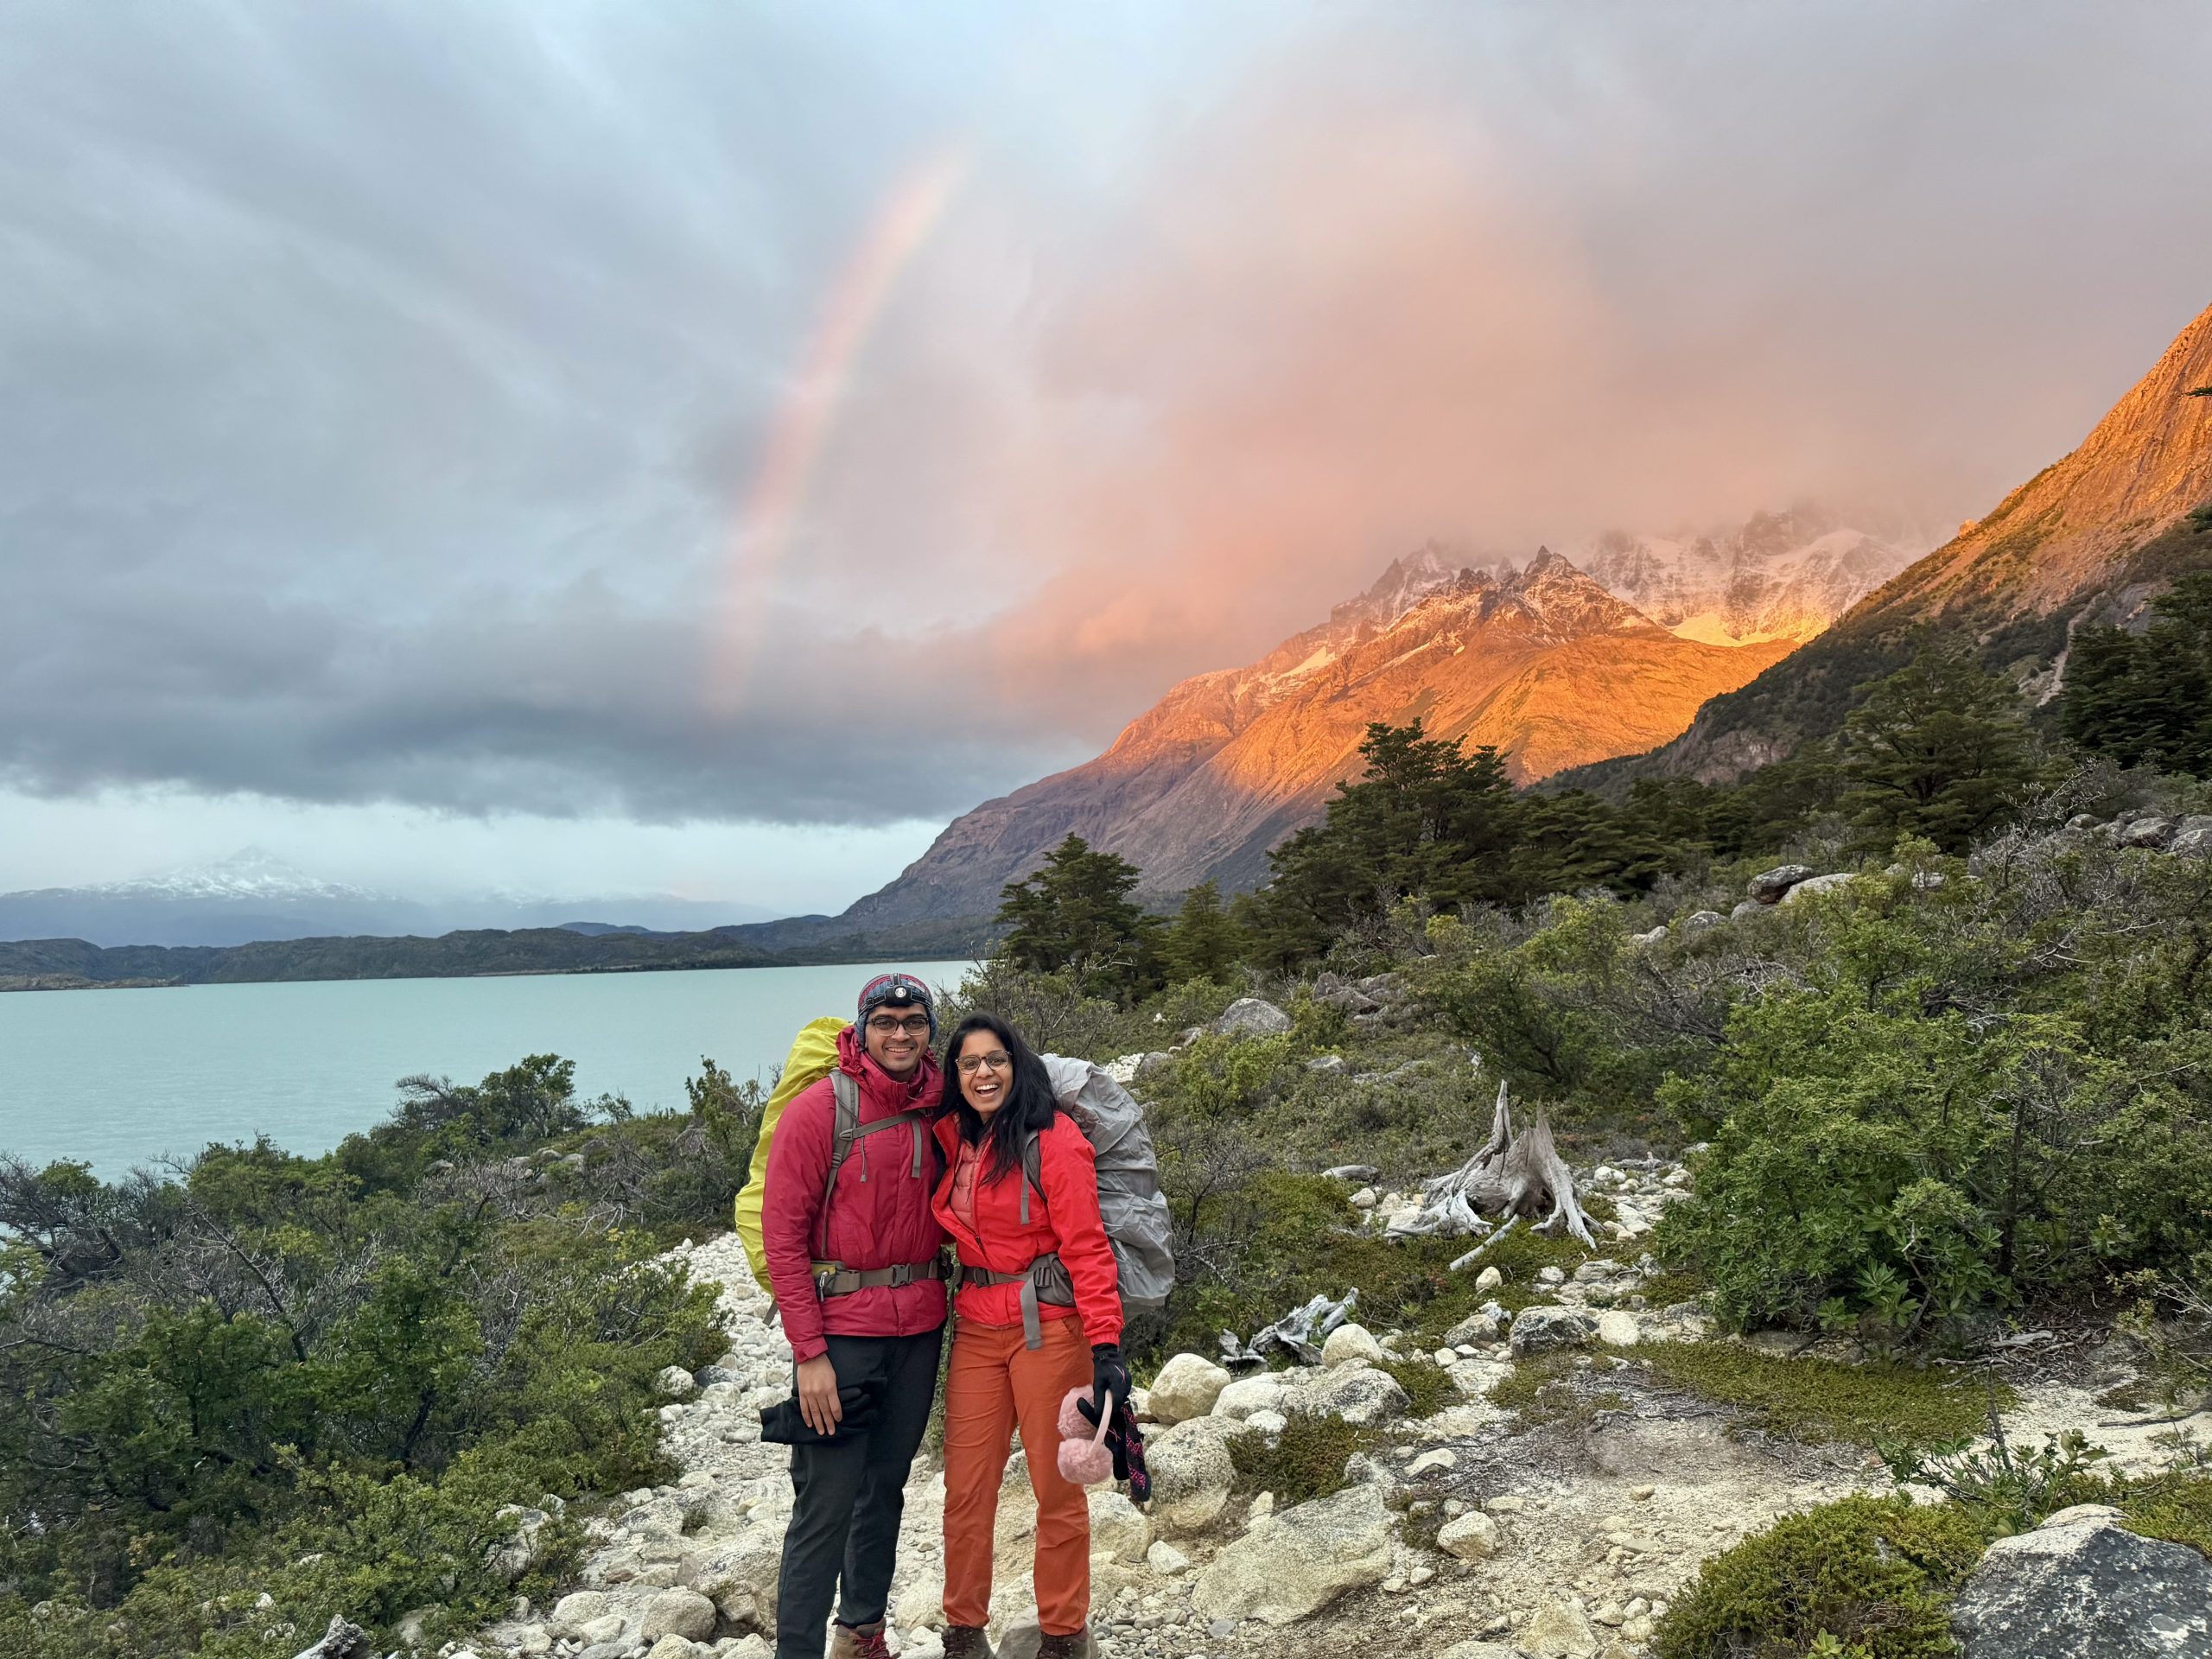
And let me just say — this is the day the park started to win us over. The sun came out. The skies cleared. We hiked alongside the turquoise waters of Lago Nordenskjöld, and ohhh the wind. It was wild. There was one section with a swinging bridge that we had to cross while bracing ourselves against full-on gusts.
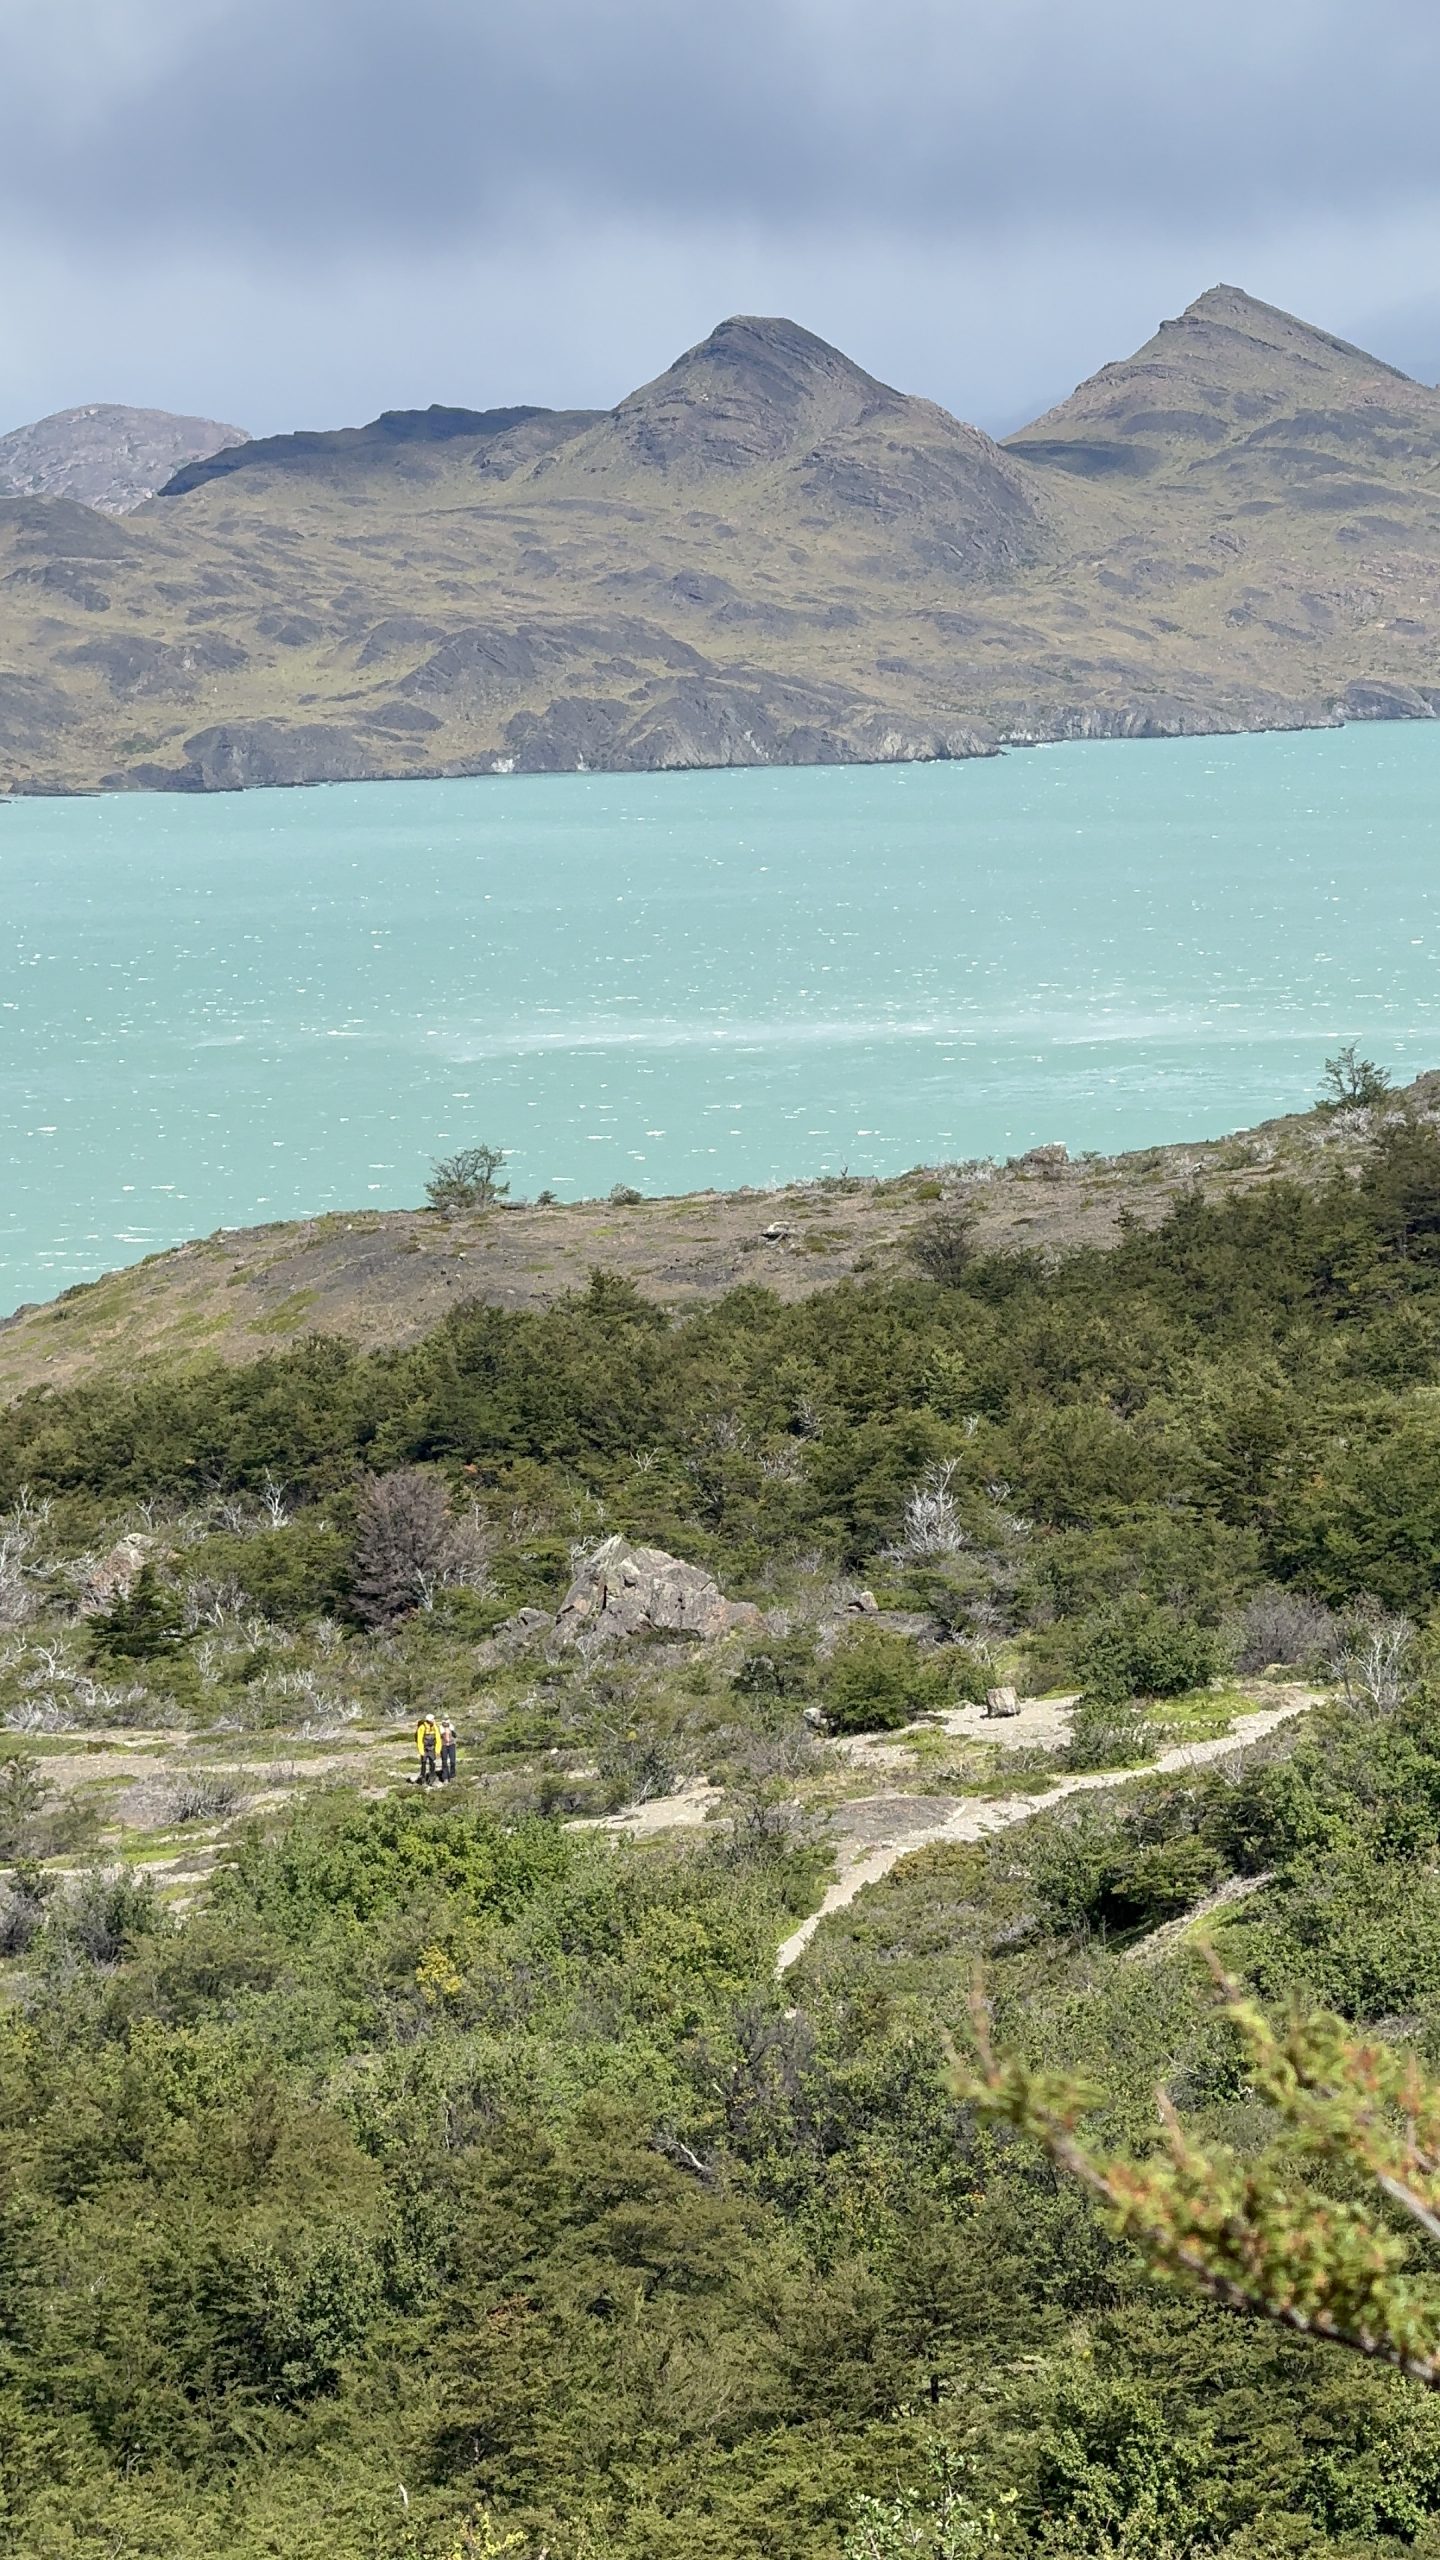

But, there was also magic to this madness. The wind would pick up water from the lake, toss it into the air like glitter, and the sunlight would catch the mist to create rainbows over the lake. Yes, rainbows. over. the. lake. It was otherworldly.
It completely washed away the disappointment from the day before. Just like that, we were falling in love with Patagonia all over again.
We reached Refugio Cuernos around 5pm, tired but happy. Cuernos has an option to stay in cozy wooden cabins (they looked like something out of a mountain postcard), but we were keeping things budget-friendly and went with the tent setup again.
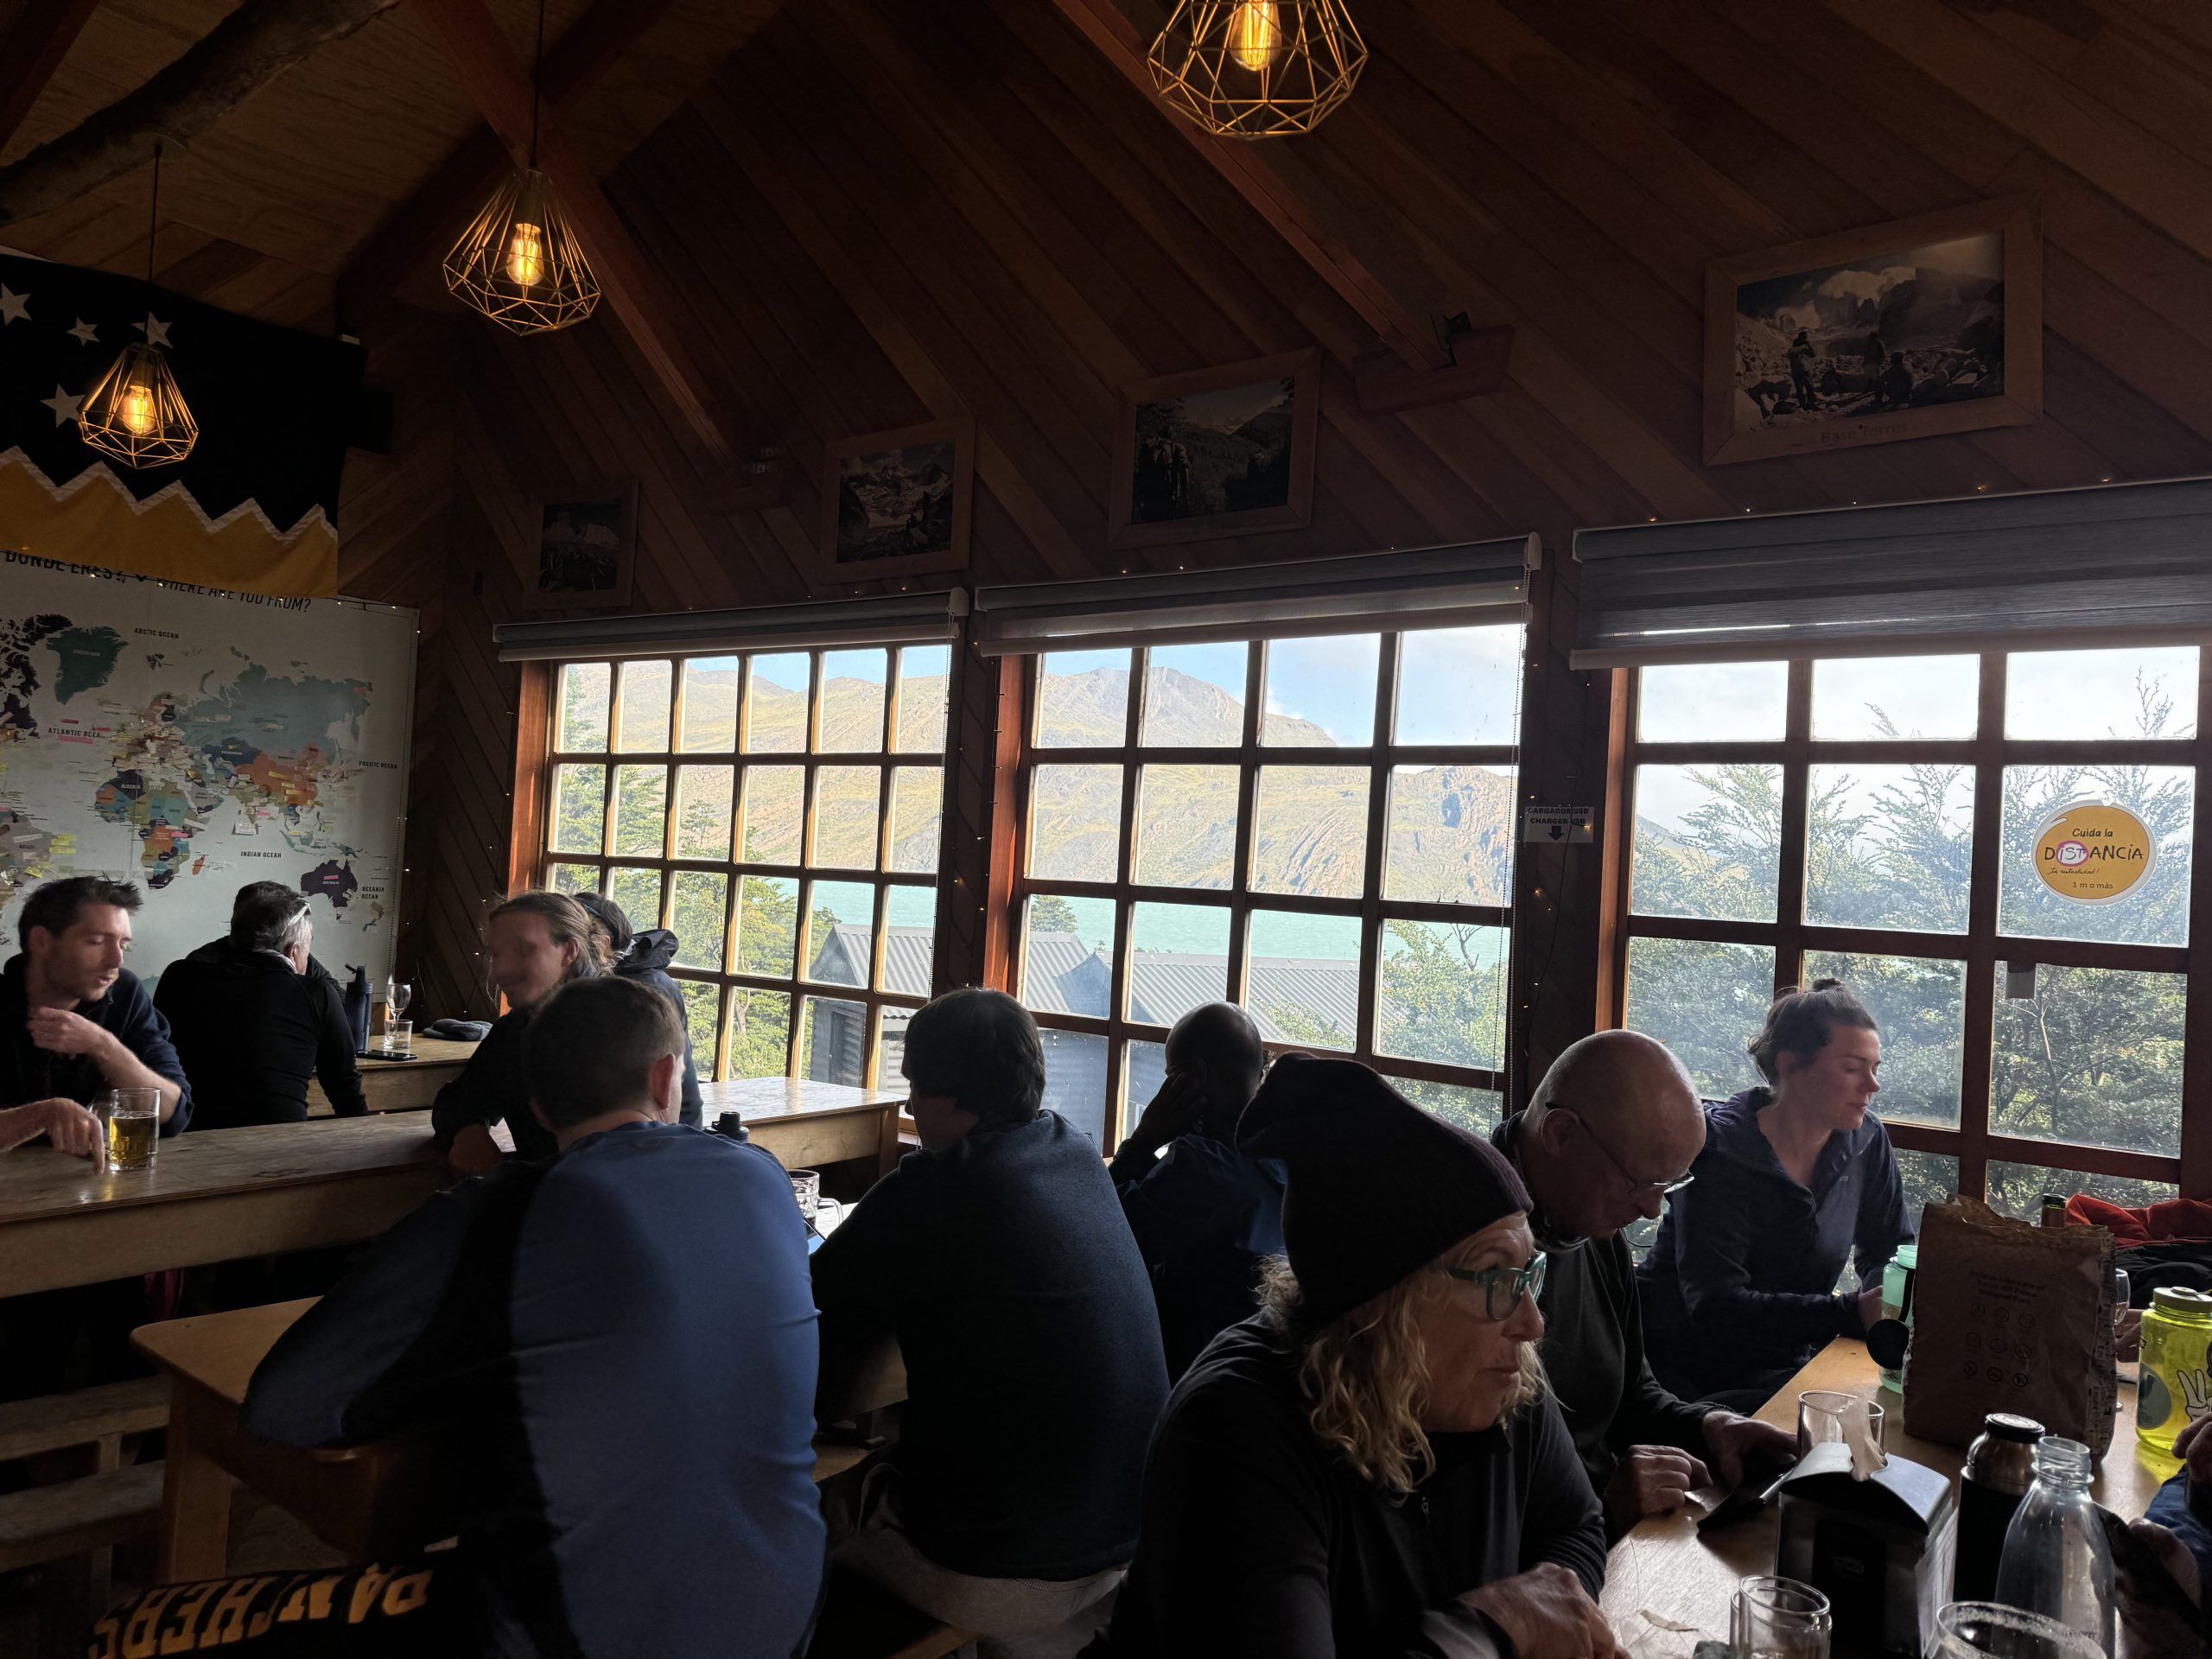
But the real star here was the restaurant at Cuernos. It has the dreamiest panoramic view of the lake, and we just sat there staring out the window for what felt like forever. We showered, grabbed an early dinner, and chatted with a few hikers we’d seen along the trail.
Interestingly, a few of them had tried to go back to the towers that morning to catch the sunrise views — but ended up so exhausted from the double climb that they were thinking about skipping the next day entirely. Some even needed medical help once they reached Cuernos.
That’s when we knew: we made the right call. Our choice to move forward with the trail and not overexert ourselves turned out to be a good one — especially since Day 3 was going to be the hardest of all.
We went to bed early that night, tucked into our sleeping bags with hot water bottles (seriously, do this — game changer). We knew we needed all the rest we could get before tackling what was coming next.
Day 3: Refugio Cuernos to Paine Grande – The hardest day with the most beautiful sunrise
Distance: ~16 miles
Elevation: ~4000ft
We were up early on Day 3, grabbing breakfast at 6:00 AM and hitting the trail by 6:30 — while most people were still cozy in their tents. And honestly, it felt kind of badass knowing what we were about to tackle: 16 miles, 4,000 ft of elevation gain. This was the big one.
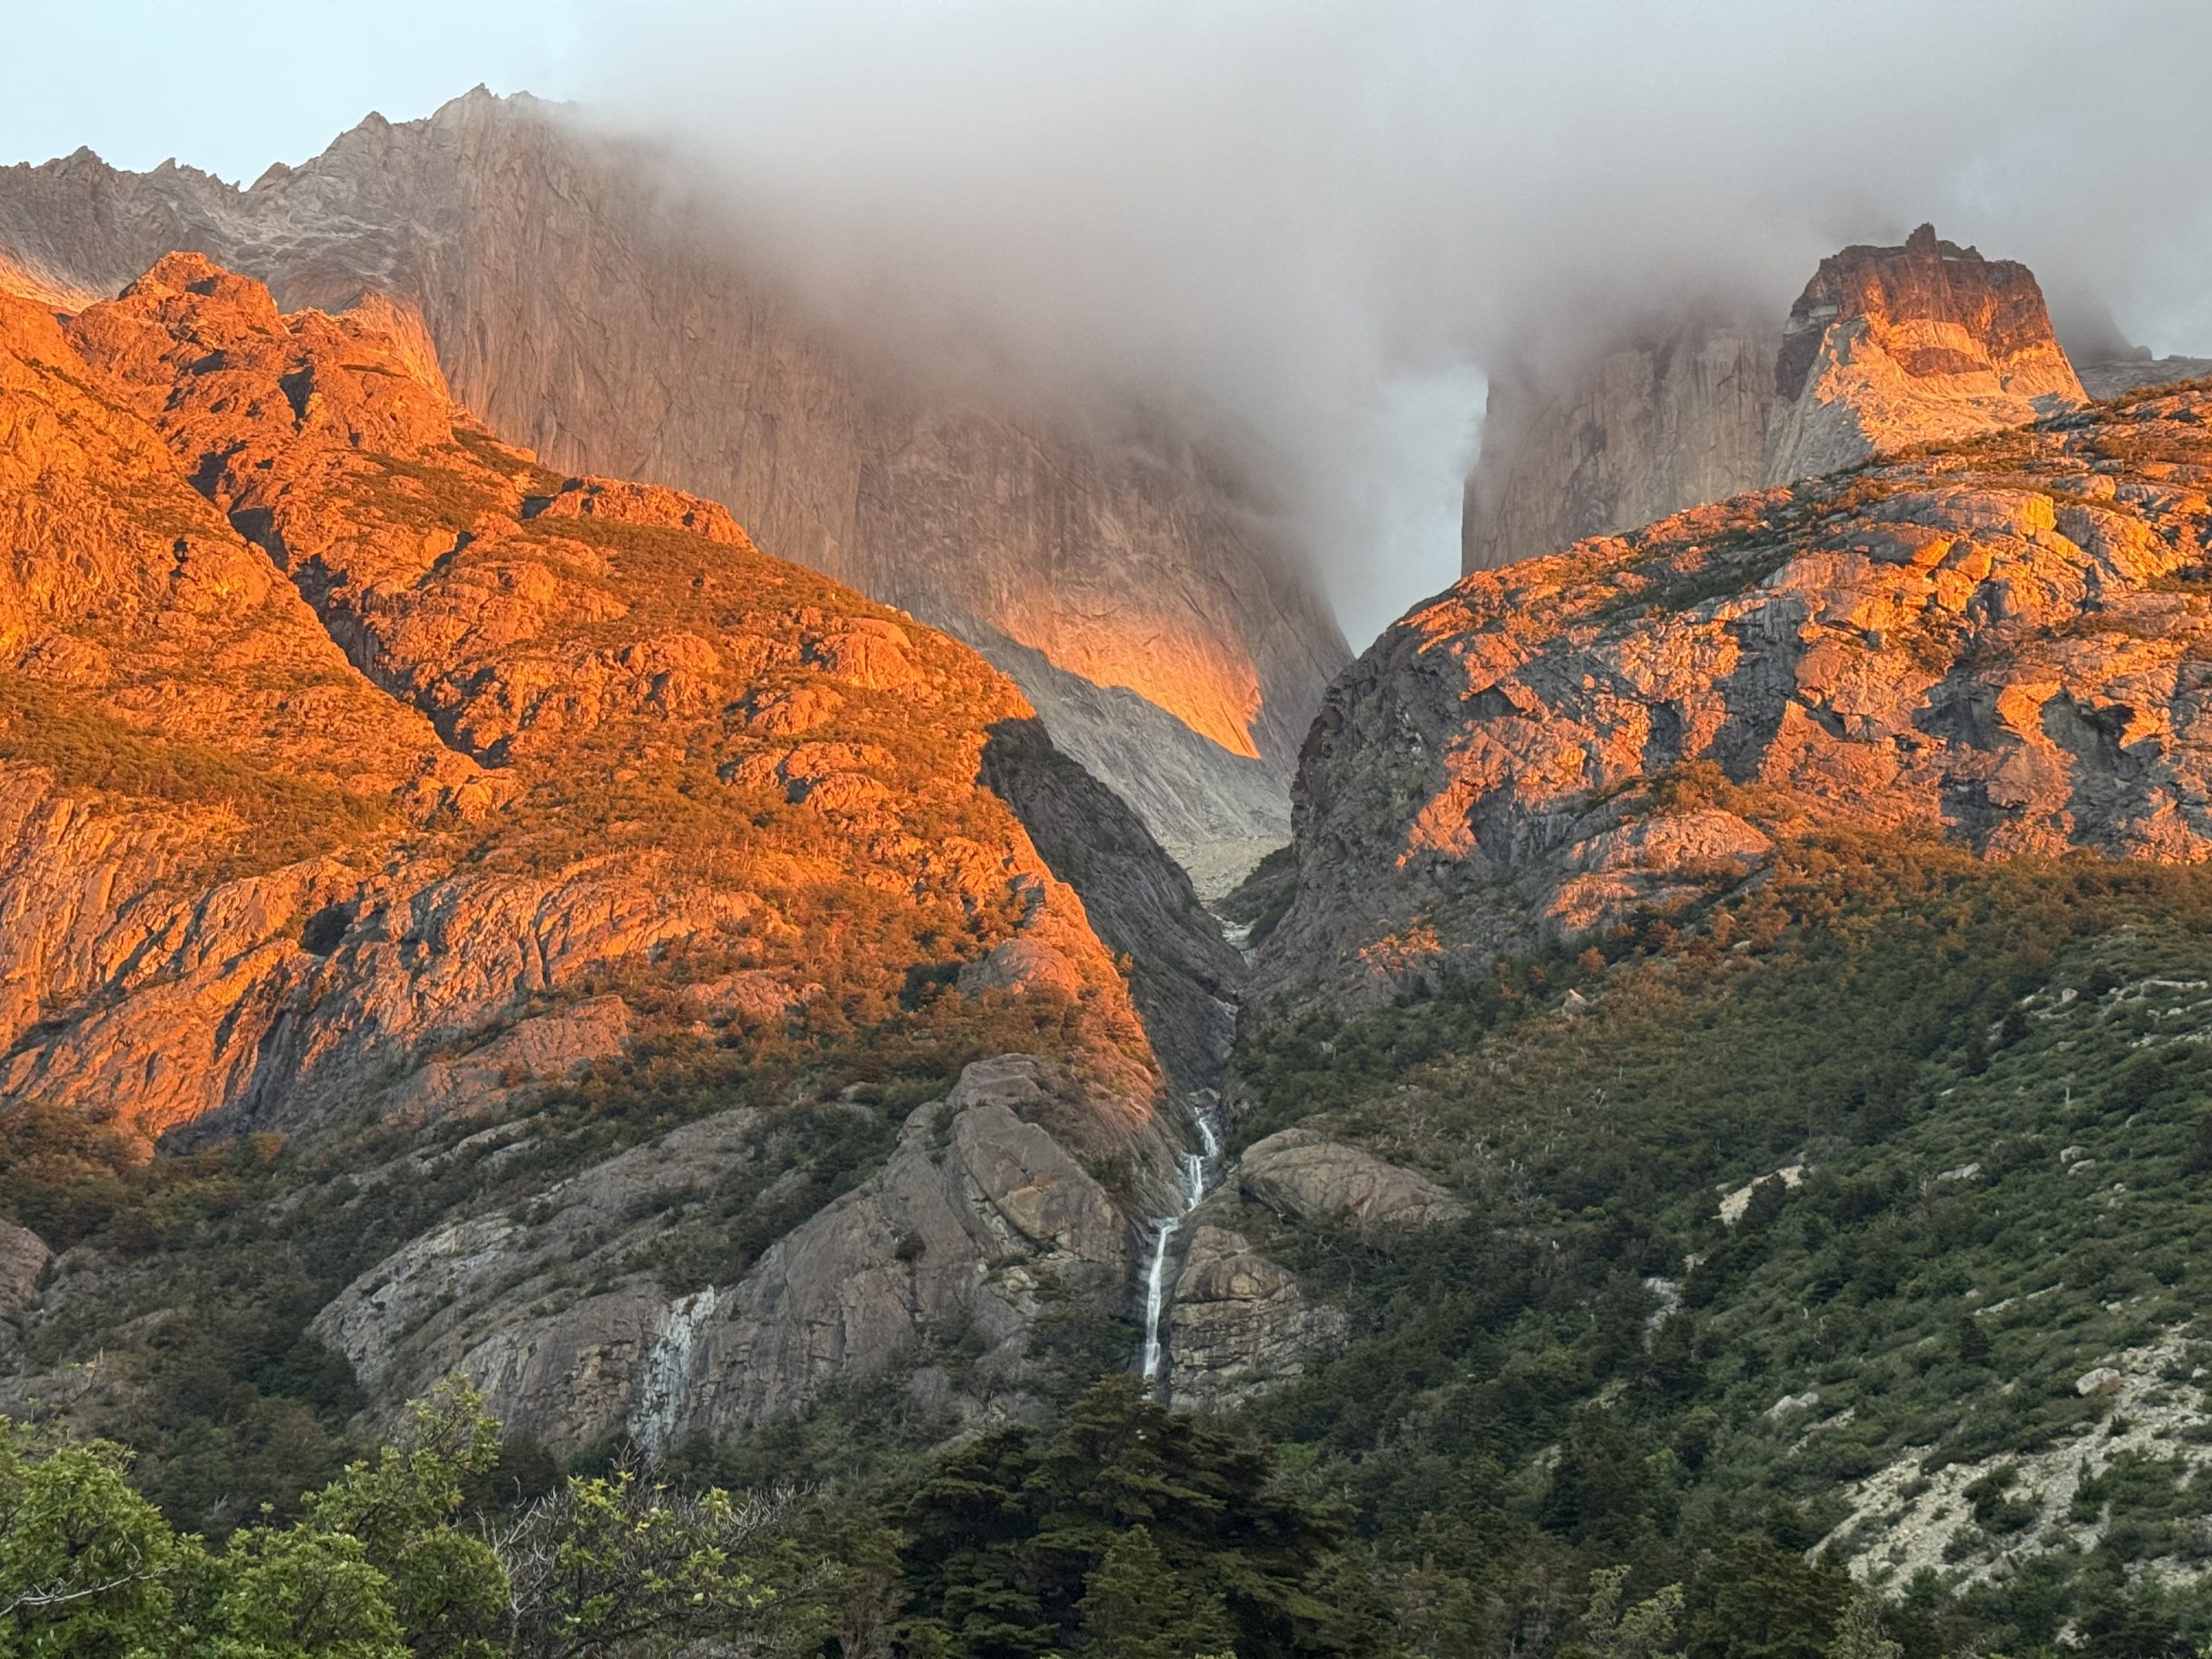
Segment 1: Cuernos to Camp Italiano
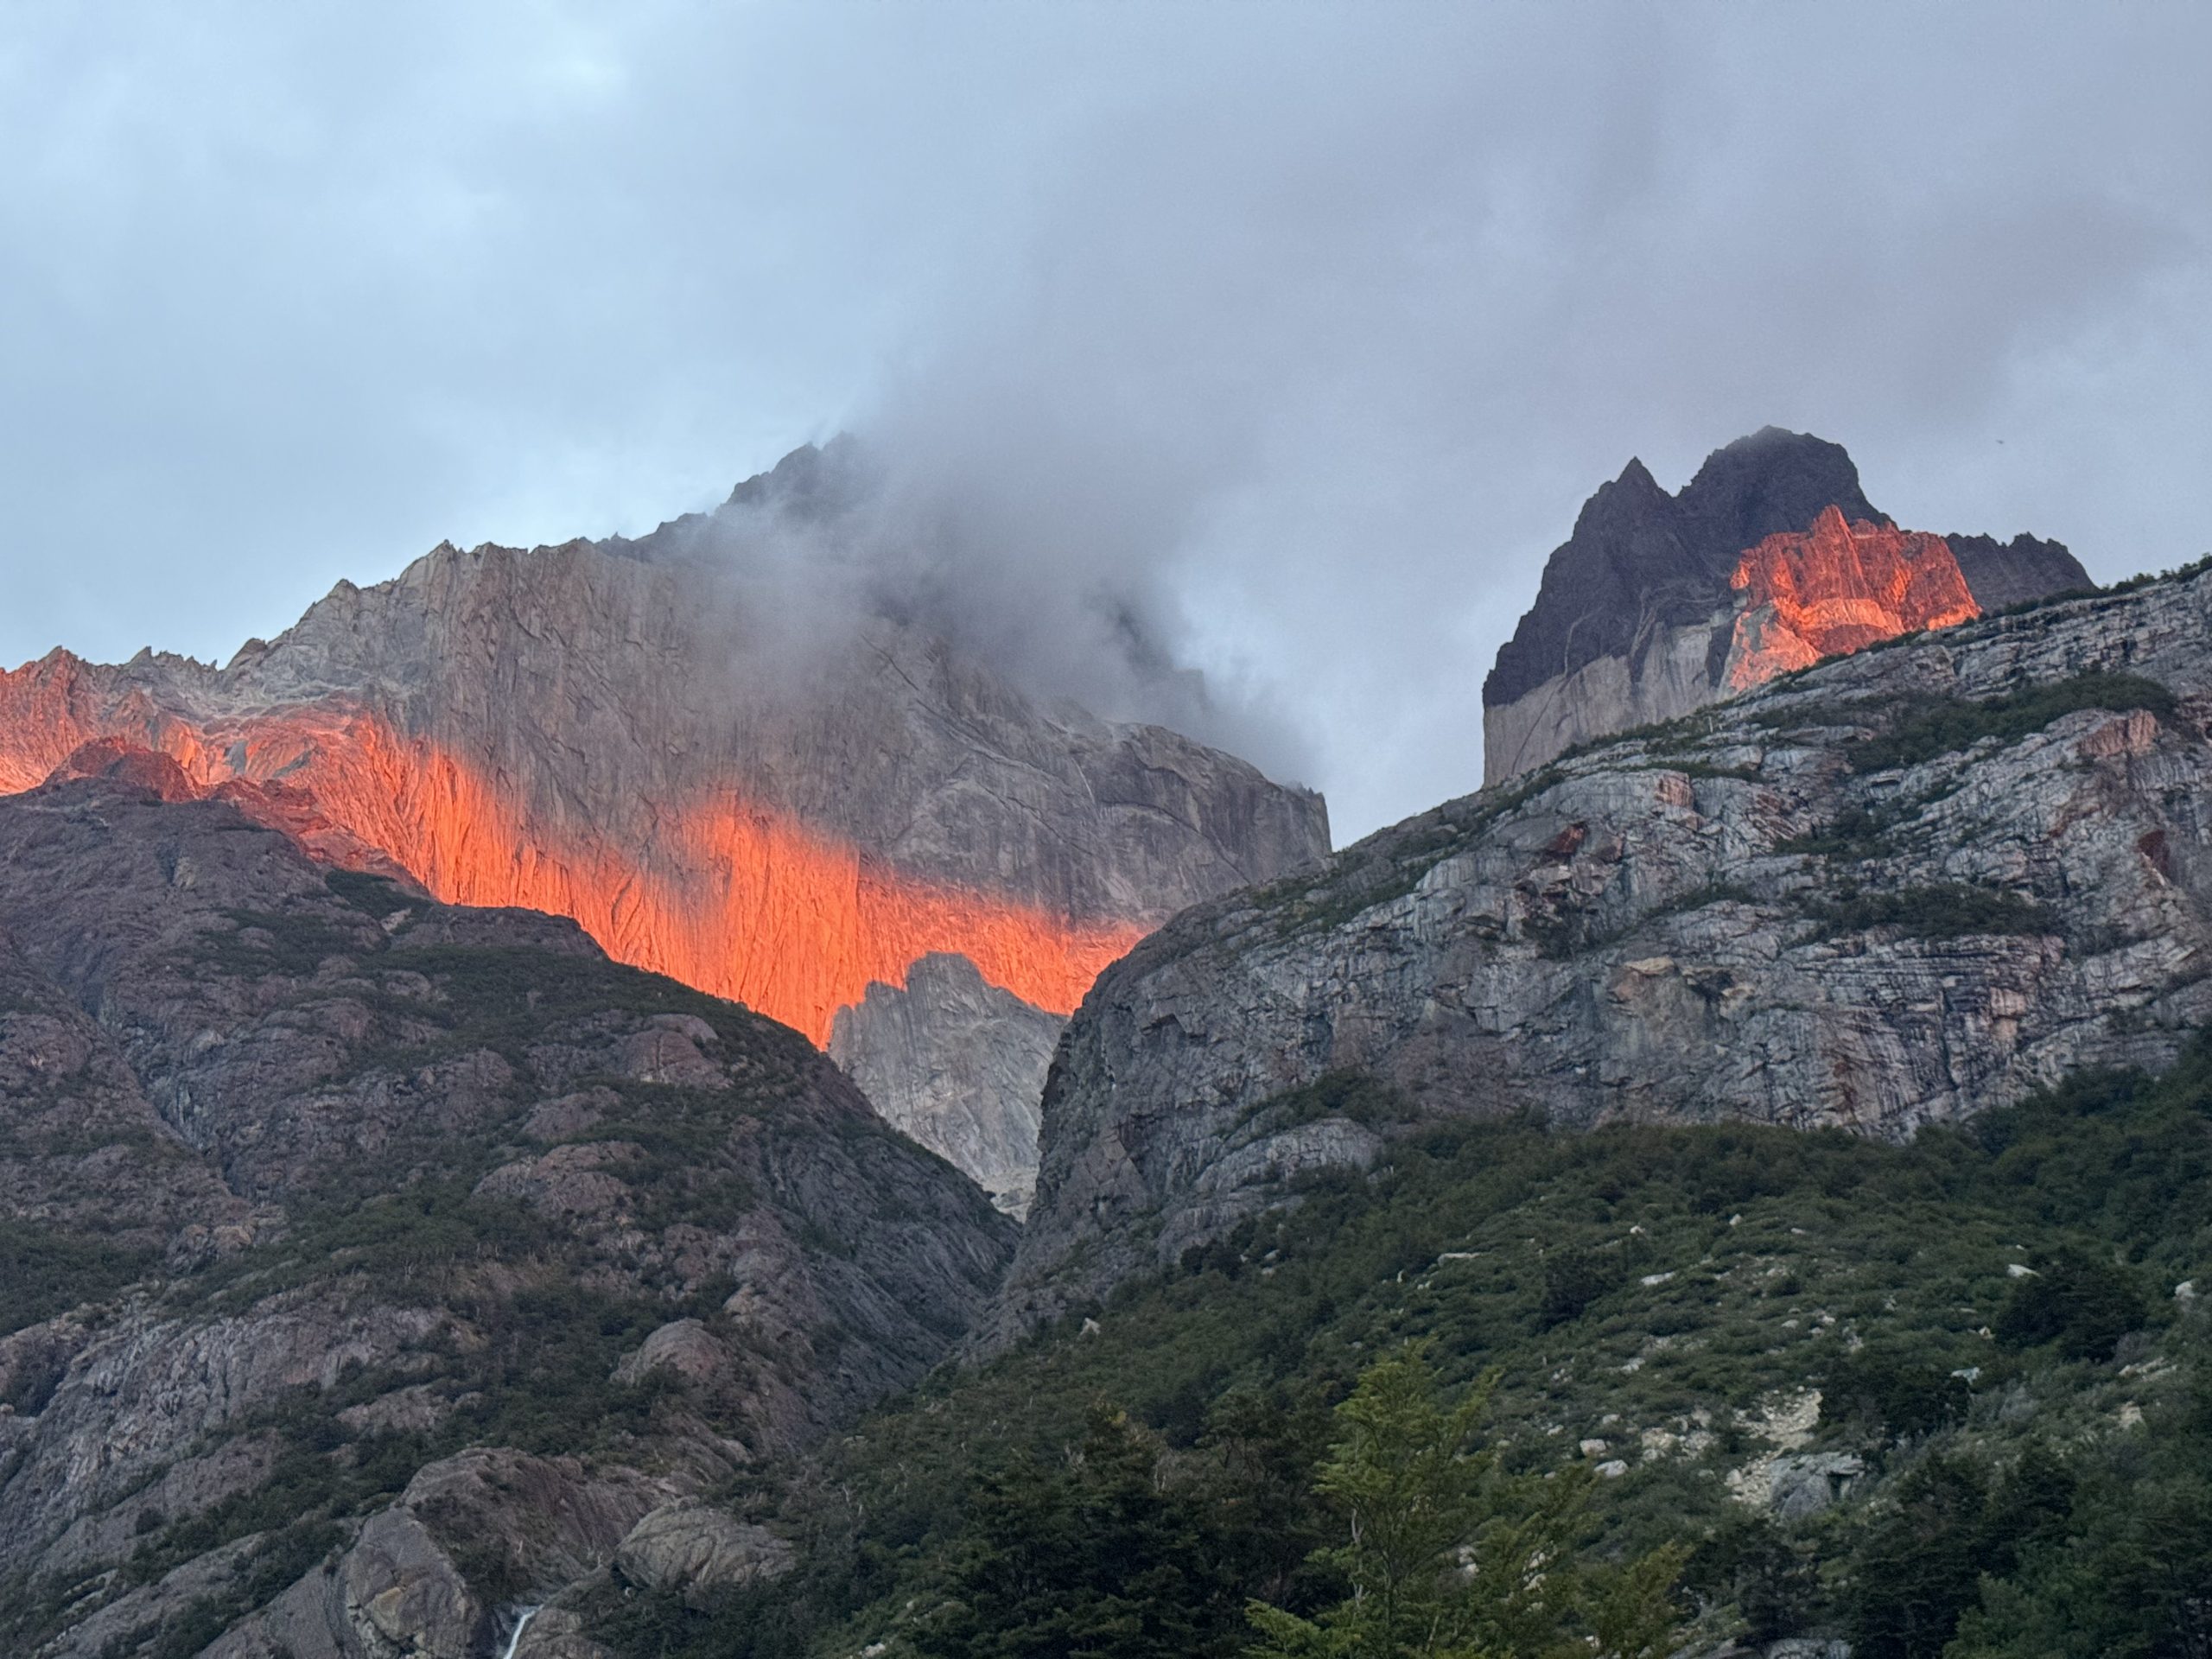
As we hiked, the world slowly lit up — and then it happened: the most breathtaking sunrise I’ve ever seen in my life. The orange glow hit the granite peaks and made them shimmer. The lake below turned orange, like it was catching fire. And just when we thought it couldn’t get any better… a sunrise rainbow. I didn’t even know that was possible.
The trail was moody and mystical the rest of the morning — clouds drifting through valleys, fog weaving through mountains, and every now and then, a peek at something epic.
We passed Refugio Frances, which is another lodging option for this segment — a good rest stop for bathrooms, water, and a snack. We took a short breather there before continuing to Camp Italiano, a free, more rustic campground where we’d stash our big backpacks before our out-and-back trip up the Frances Valley.
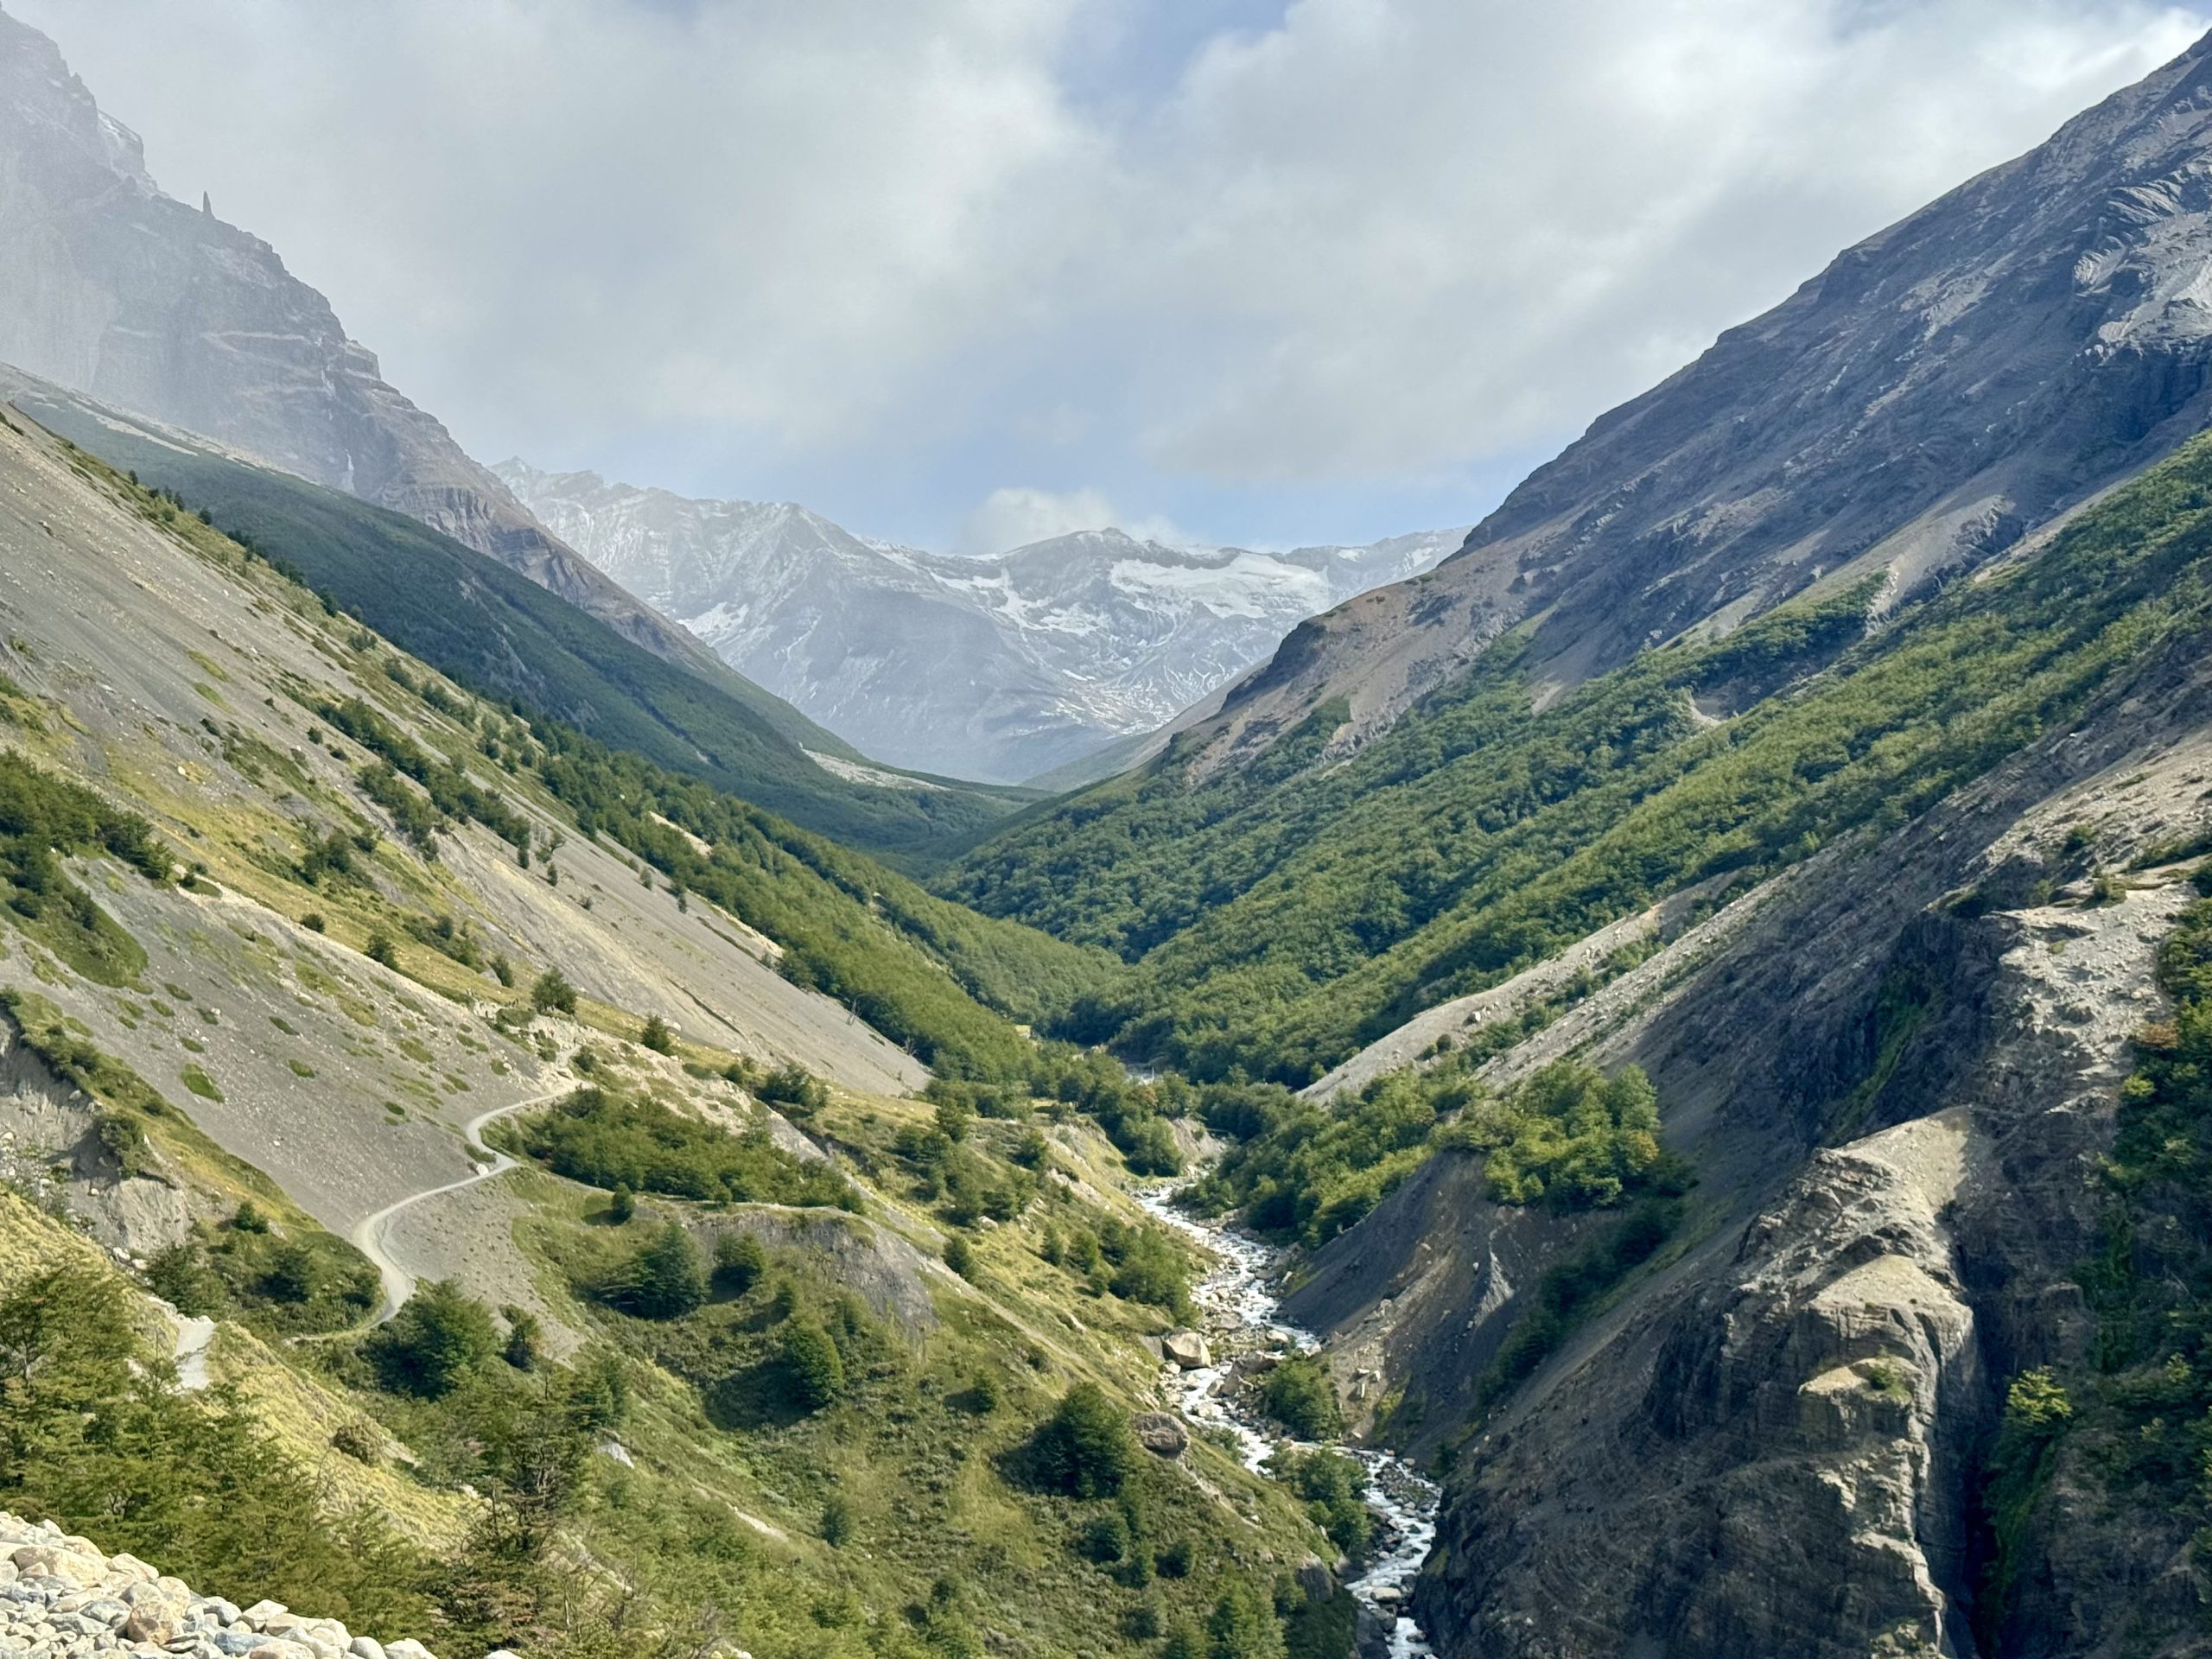
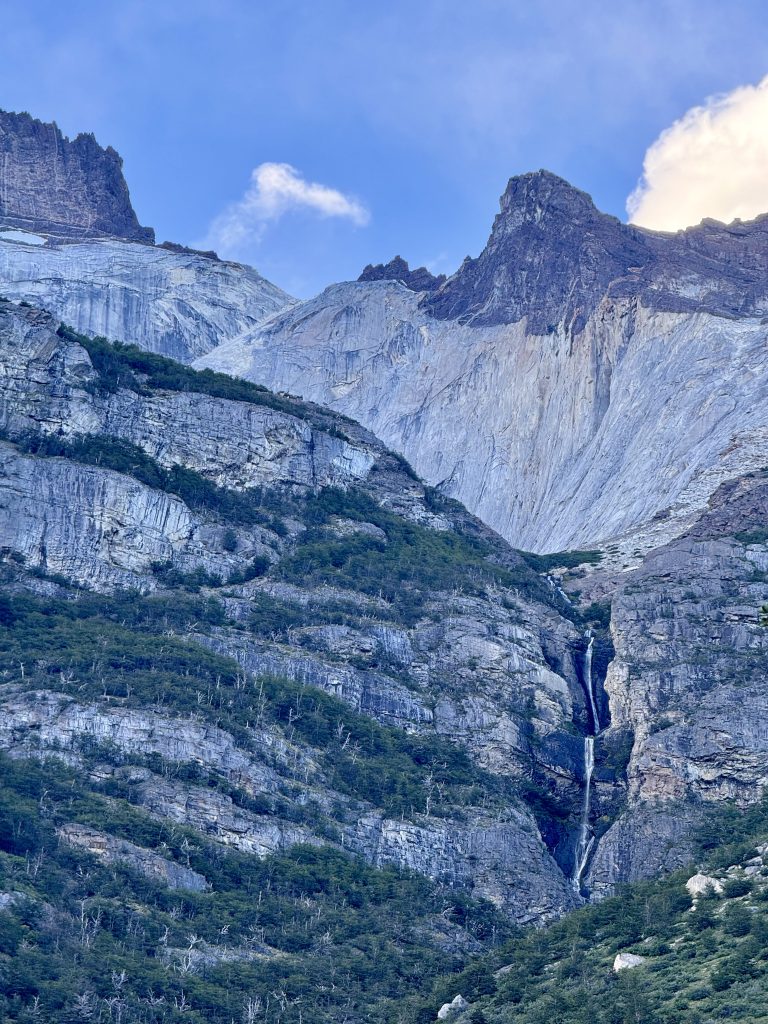
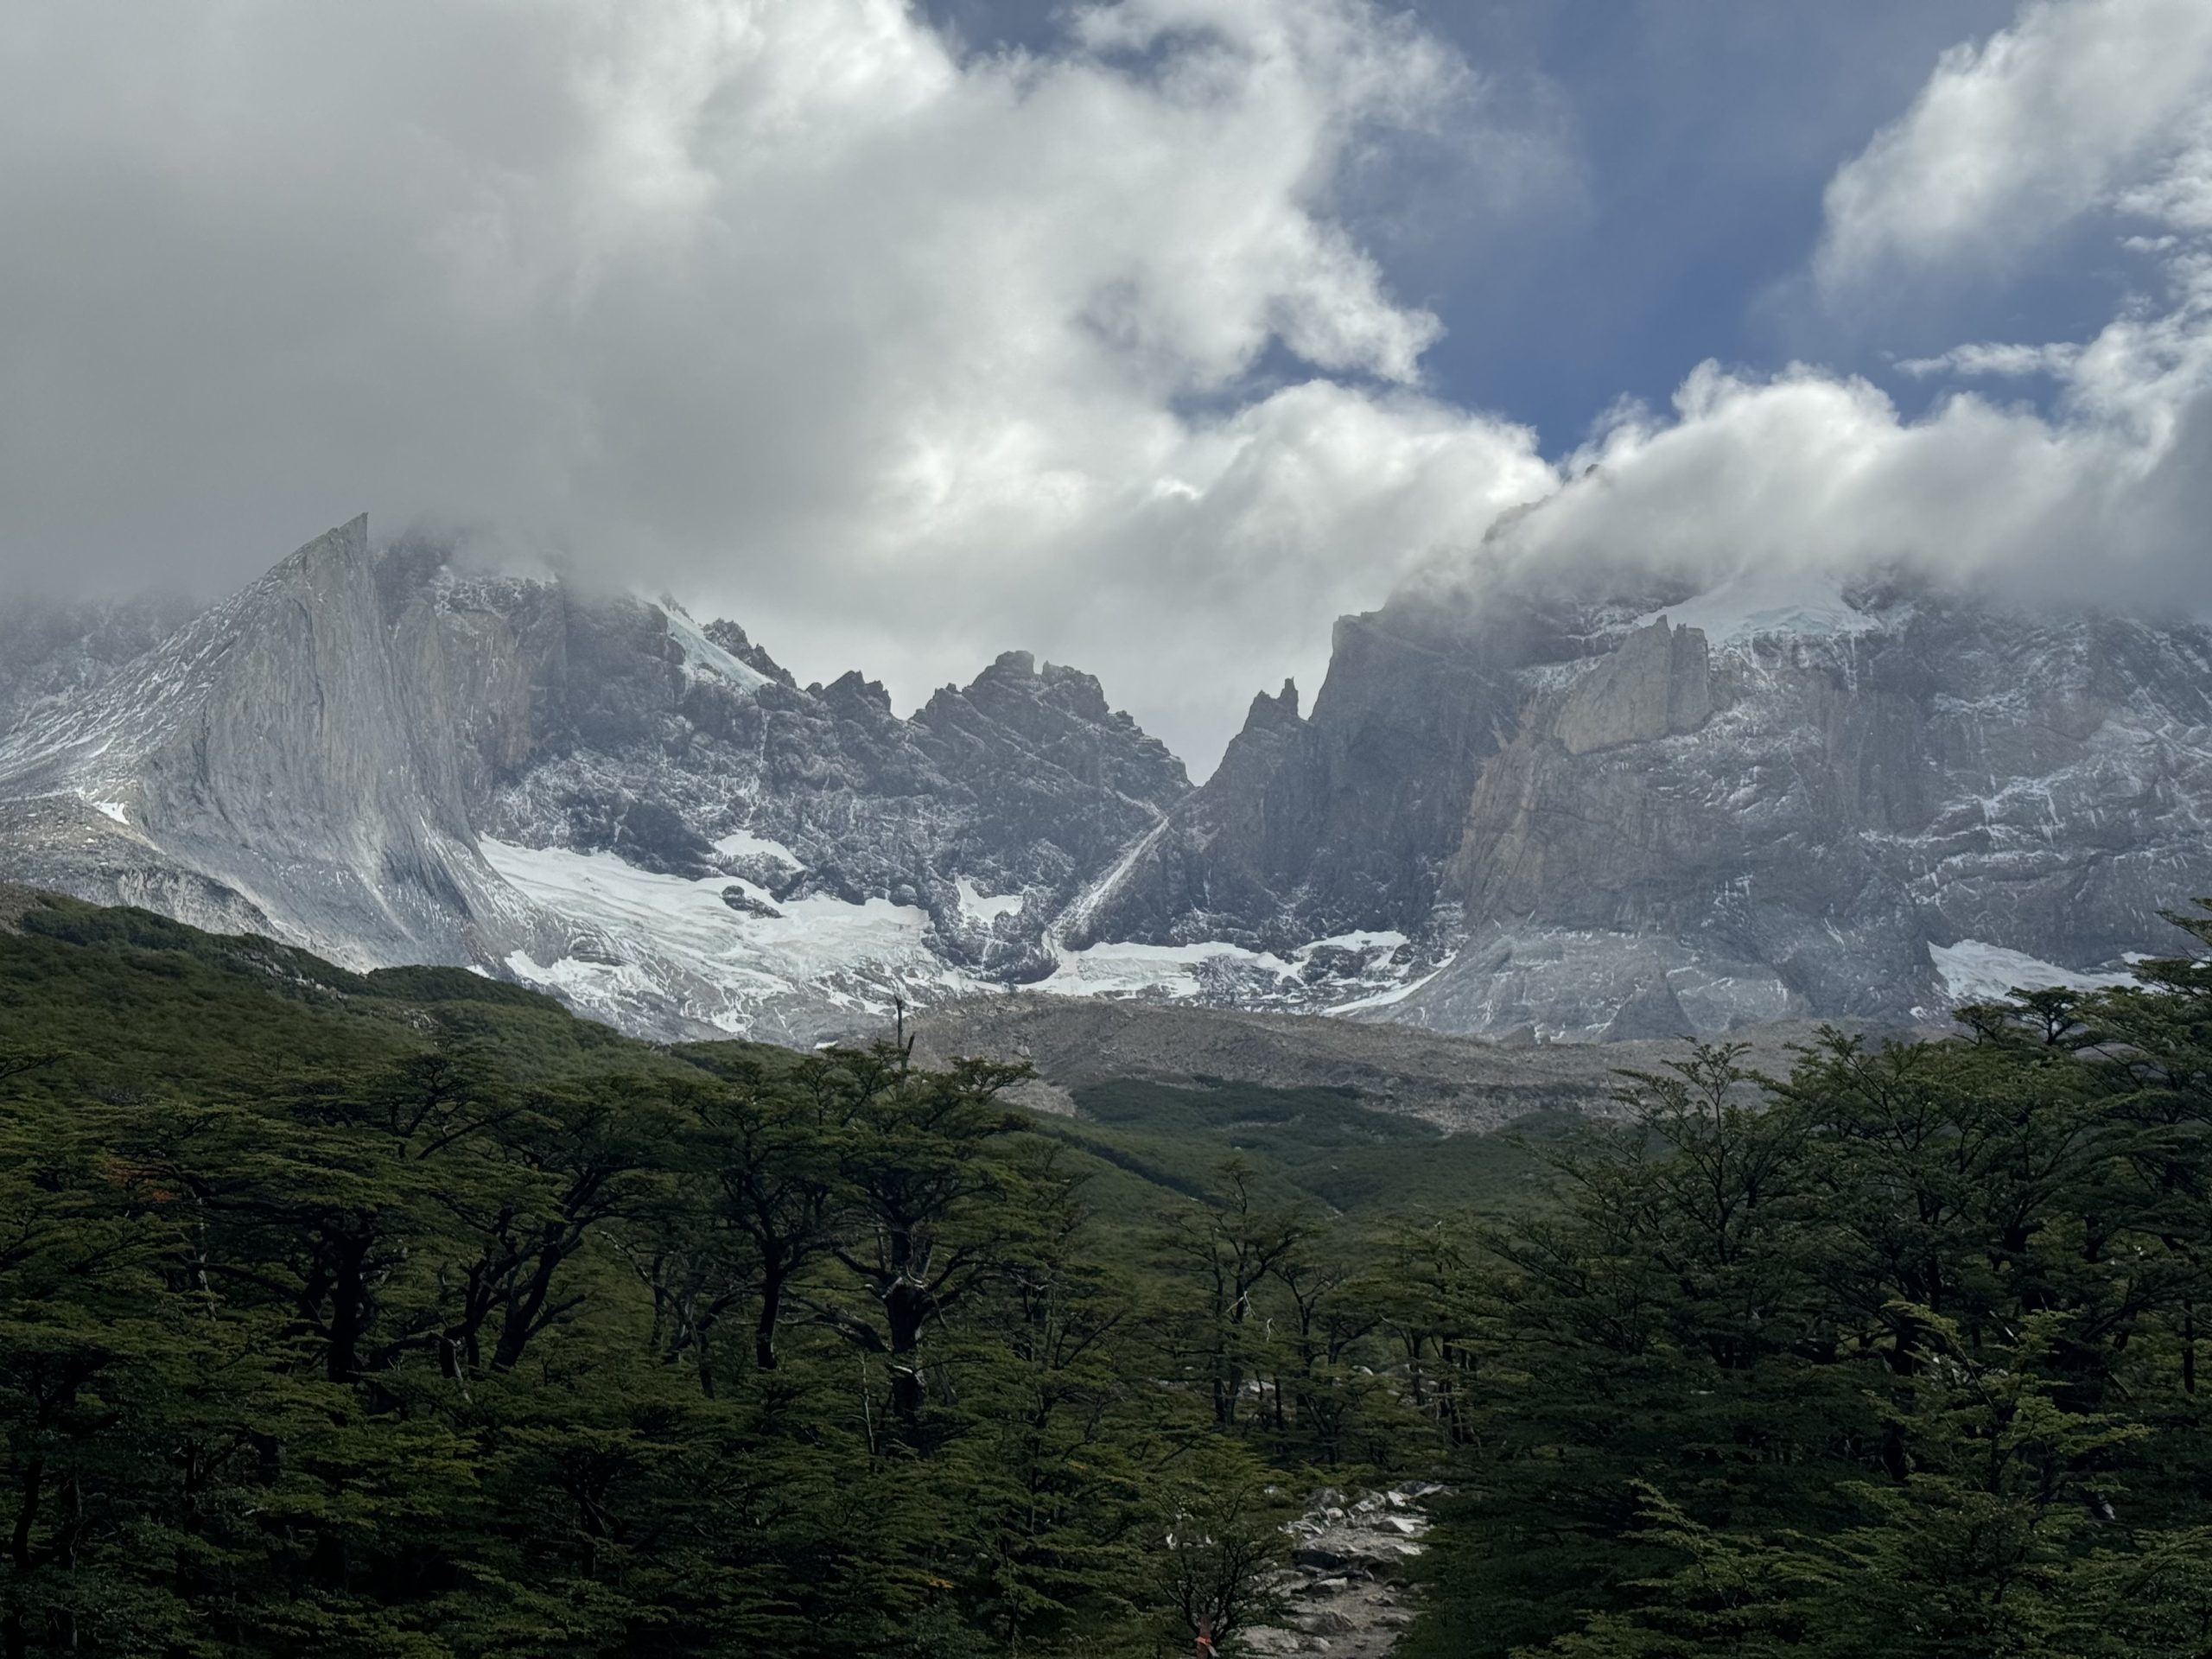
Segment 2: The Frances Valley to Mirador Británico
With our backpacks safely stashed, we headed off toward Mirador Británico. The first climb up to Mirador Frances (the halfway point) was no joke — steep, foggy, rocky — but wow, the view of Glacier Frances was stunning. Totally worth every sweaty step.
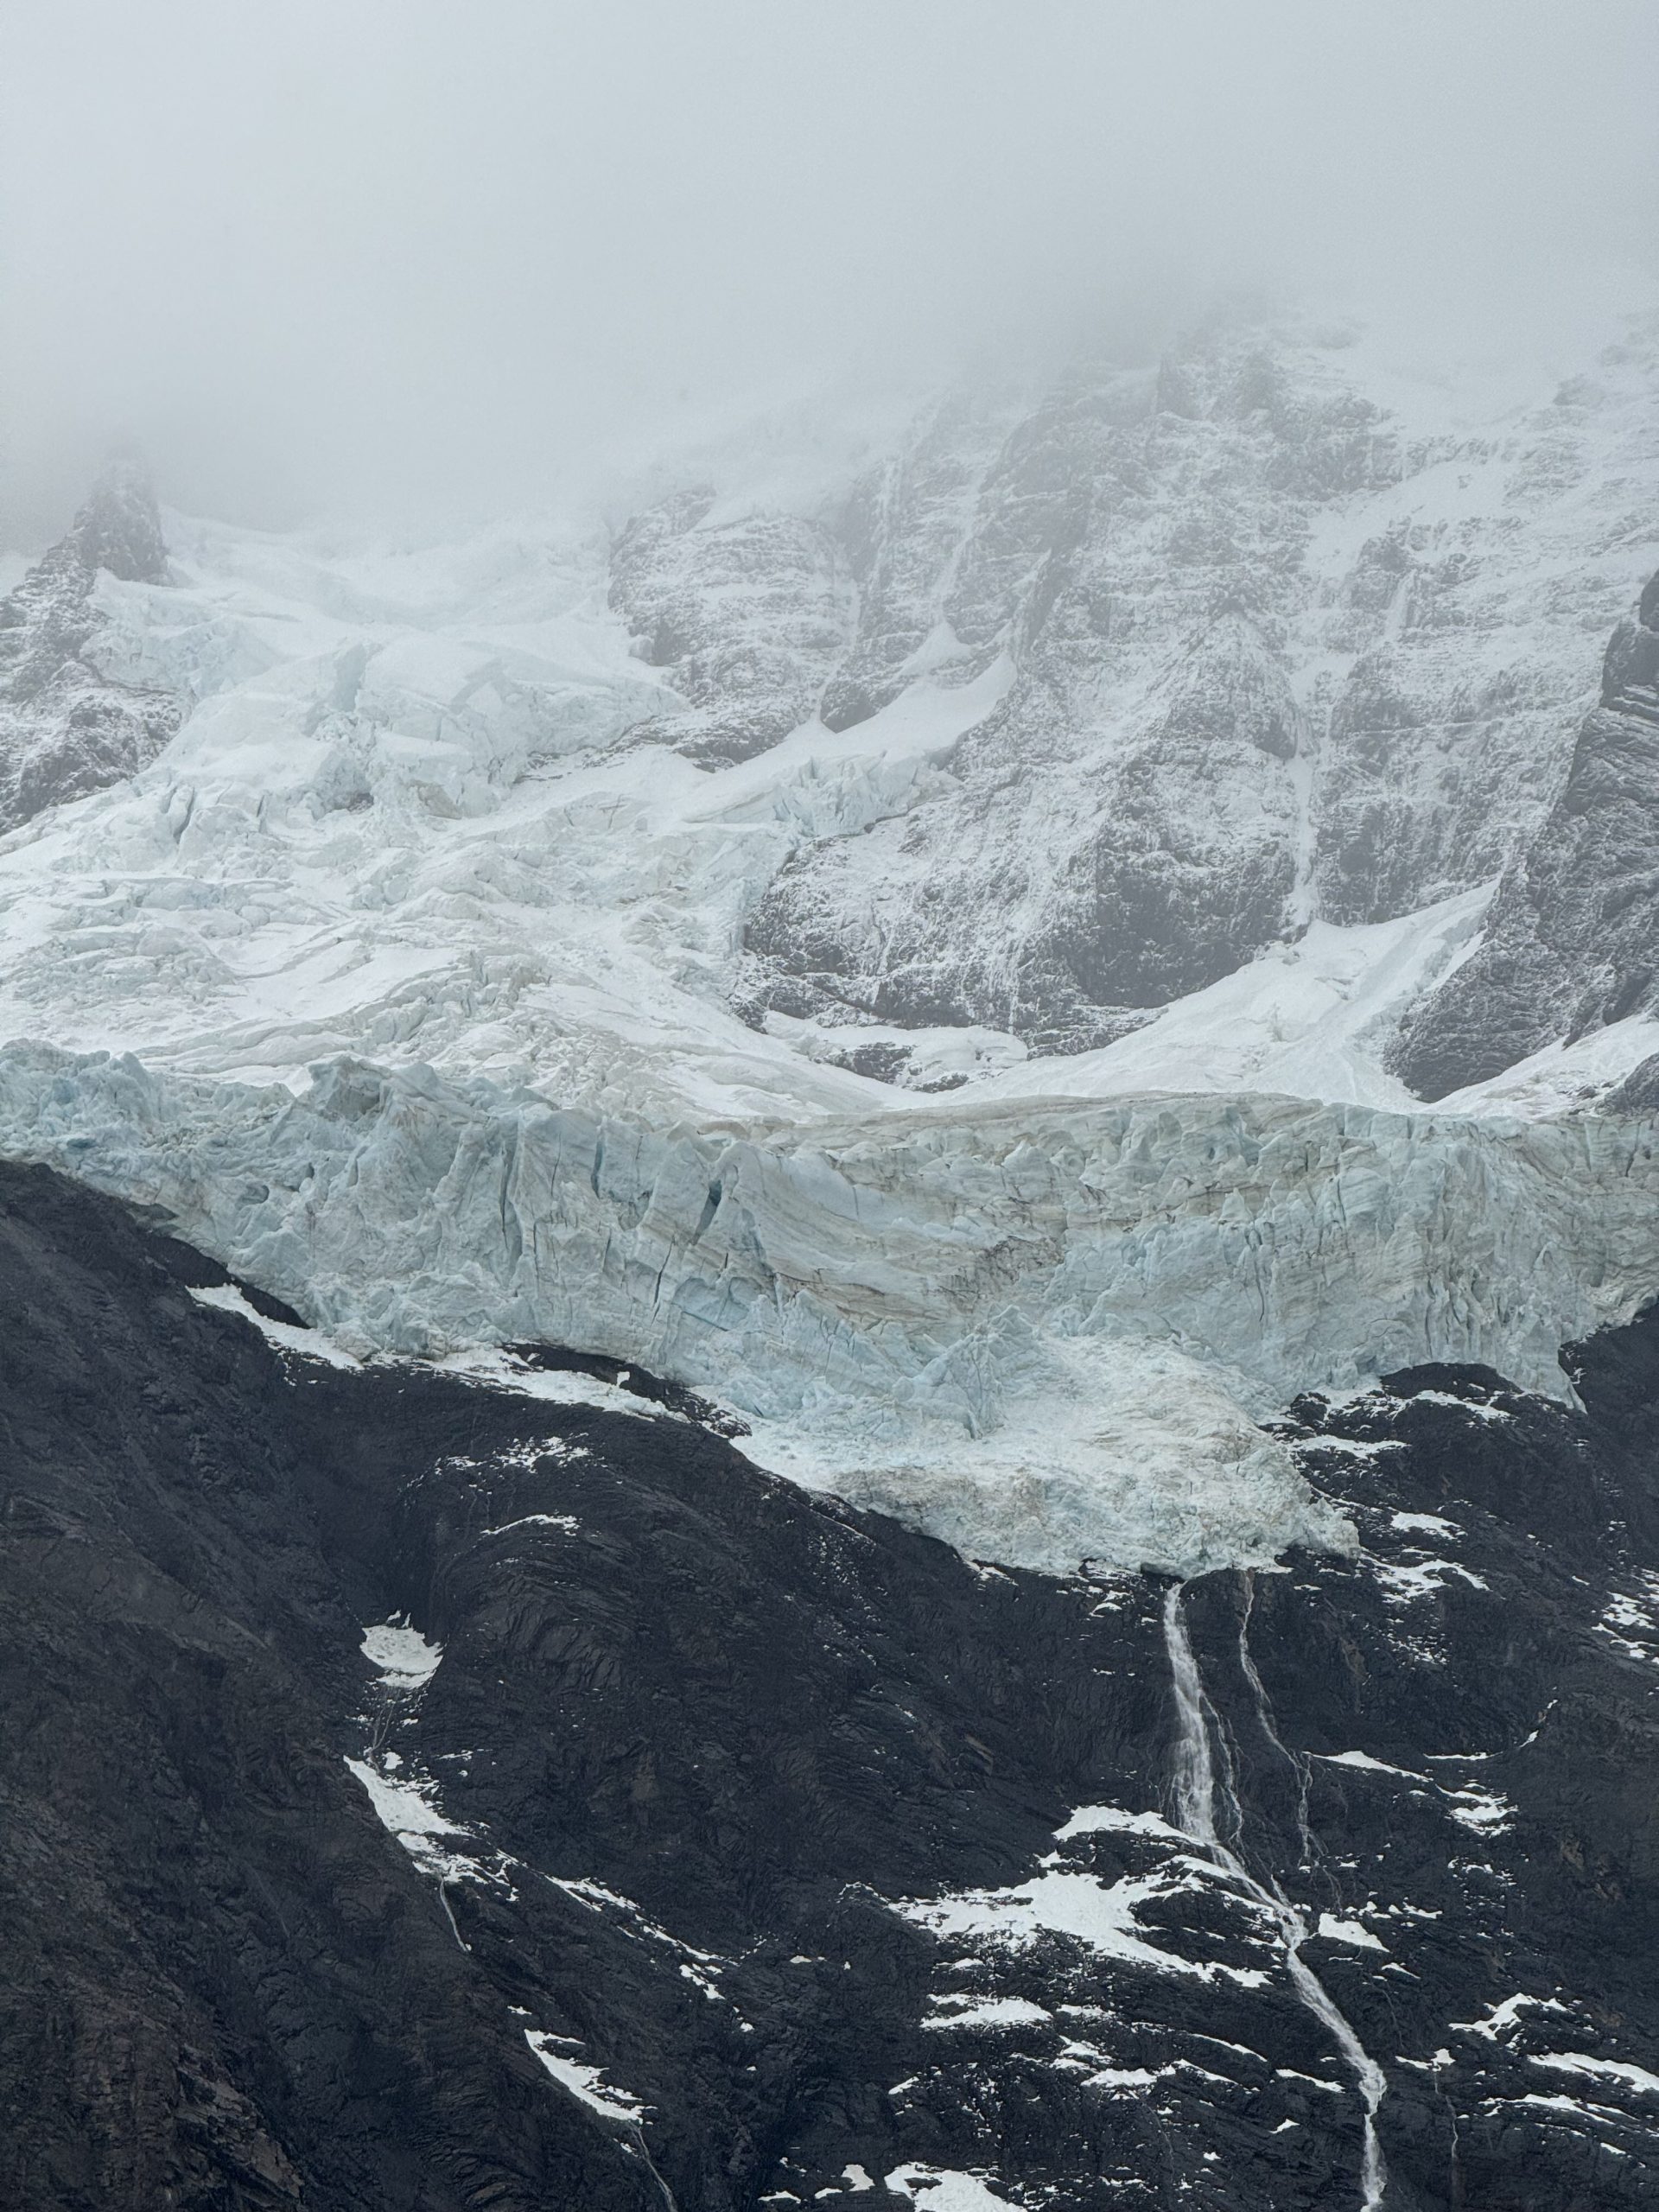
The second half of the trail felt like a breeze in comparison. We hiked through lush forests, past cascading waterfalls, thundering rivers, and towering granite walls on either side of us. It felt like we had wandered into a painting. Even with the clouds, the drama of the landscape was unreal.
We made it back down to Camp Italiano around 2:00 PM, sat down, peeled off our boots, and wolfed down our packed lunches. My legs were still functioning (barely), but I was low-key panicking about whether they’d carry me to the finish line.
Segment 3: Camp Italiano to Refugio Paine Grande
After some much-needed stretching, we began our final push of the day around 3:30 PM. The weather was finally playing nice, and the peaks around us looked magnificent.
We rolled into Paine Grande around 6:00 PM, just in time for a sunset that painted the lake in pastel magic. Paine Grande is a big, bustling Refugio — it can actually be a starting point for the W trek or a basecamp for day hikers. It felt wild to think how far we’d come.
By this point, our legs were done. I walked like a proud, tired penguin into the restaurant and we ordered the cheesiest pizza on the menu and a celebratory pisco sour. We crawled into our sleeping bags that night, clutched our hot water bottles like the survival treasures they were, and passed out with smiles on our faces.
Pro tip: Skip the camp dinner at Paine Grande. It was the least impressive meal of the trip — the pizza was so much better.
Day 4: Paine Grande to Refugio Grey – Glaciers, Stars, and Suspension Bridge Thrills
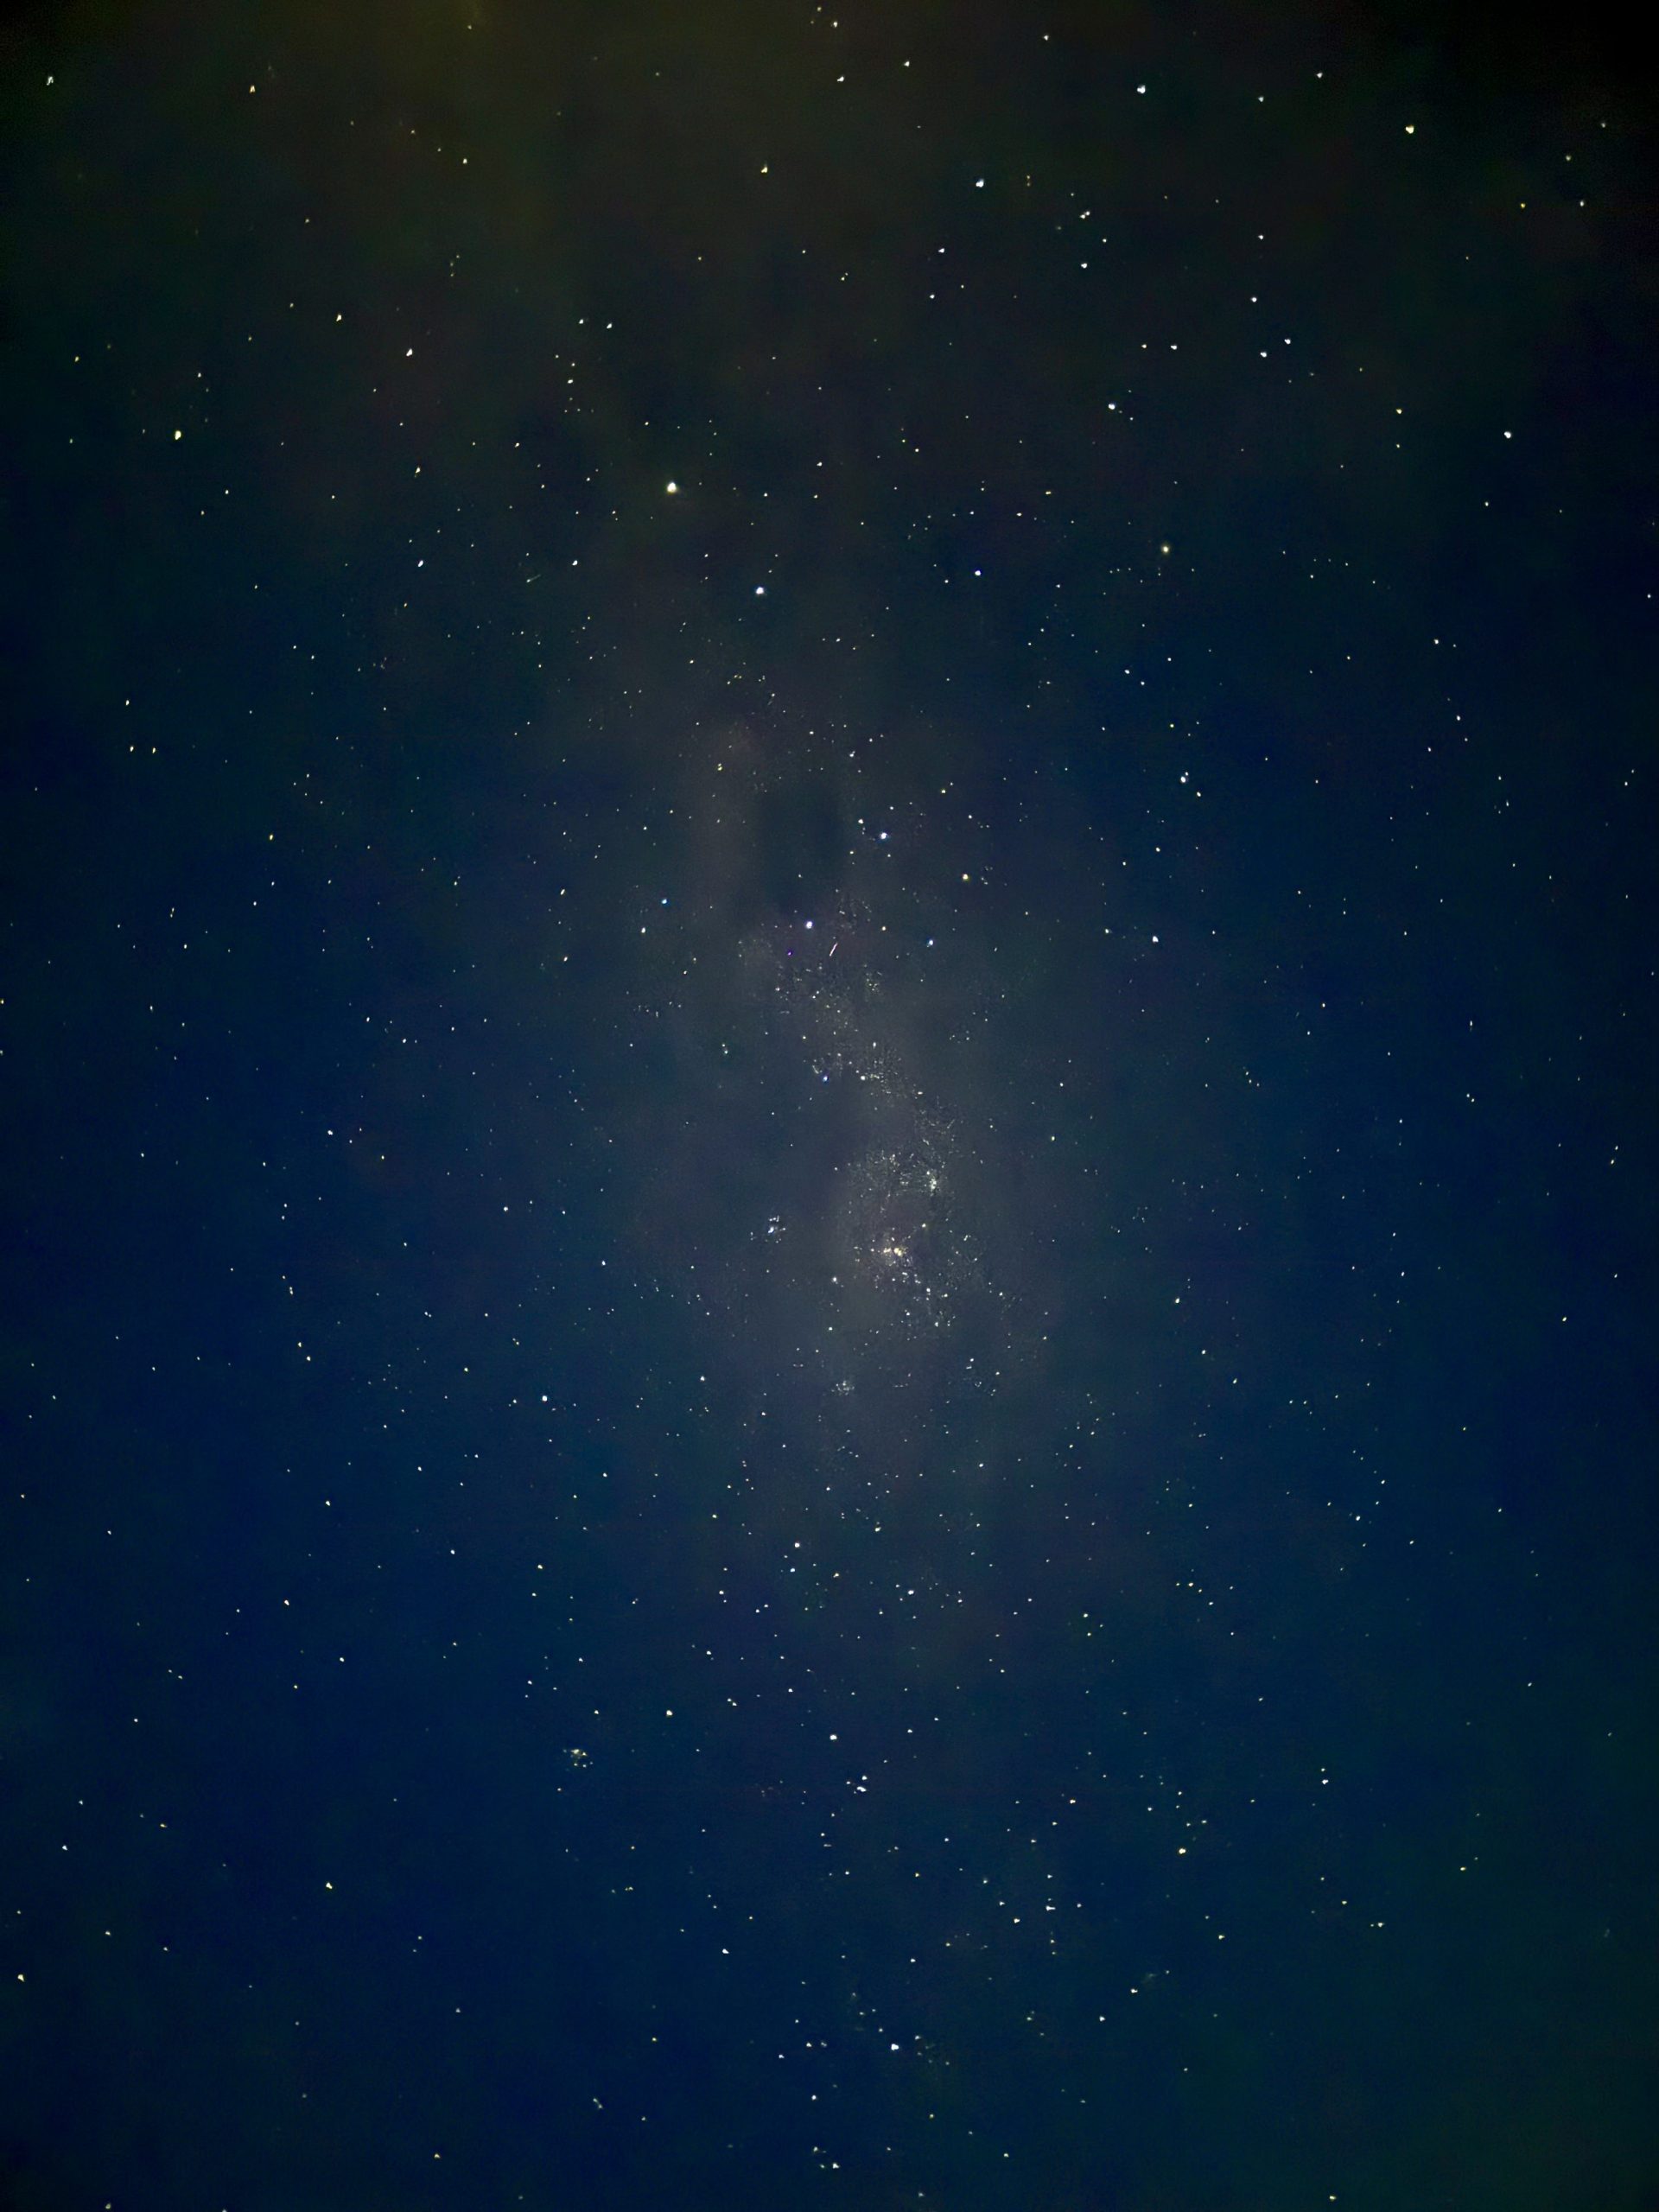
I woke up at 6:00 AM and peeked out of our tent… and my jaw dropped. The sky above was a galaxy of stars, with the Milky Way literally hanging over our tent. At the same time, the eastern horizon was glowing with early twilight. I stood there in disbelief — the Milky Way and sunrise light sharing the same sky? I didn’t even know that was possible. Patagonia really said, “You haven’t seen it all yet.”
I grabbed my camera and wandered over to the lake to soak in the sunrise. Cold fingers, warm heart. After snapping a few shots and standing in quiet awe, I walked back for breakfast. (Which, by the way, wasn’t great — if you’re picky about your morning fuel, bring your own backup snacks.)
After packing up for the day, we were off to our next stop: Refugio Grey.
Segment 1: Paine Grande to Refugio Grey
Distance: ~7.5 miles
Elevation Gain: ~1300 ft
With clear blue skies overhead (a rare treat on this trip!), we could see all the mountain peaks from Paine Grande — including a stunning full view of the Torres del Paine towers way off in the distance. It was one of those moments that makes you pause, stare, and maybe shed a happy tear or two.
The trail hugged the shore of Lago Grey, which — yep, you guessed it — is a grey lake. As we hiked, little icebergs began to appear, bobbing gently in the water. Eventually, we reached Mirador Lago Grey, our first big reveal of the massive Glacier Grey way off in the distance.
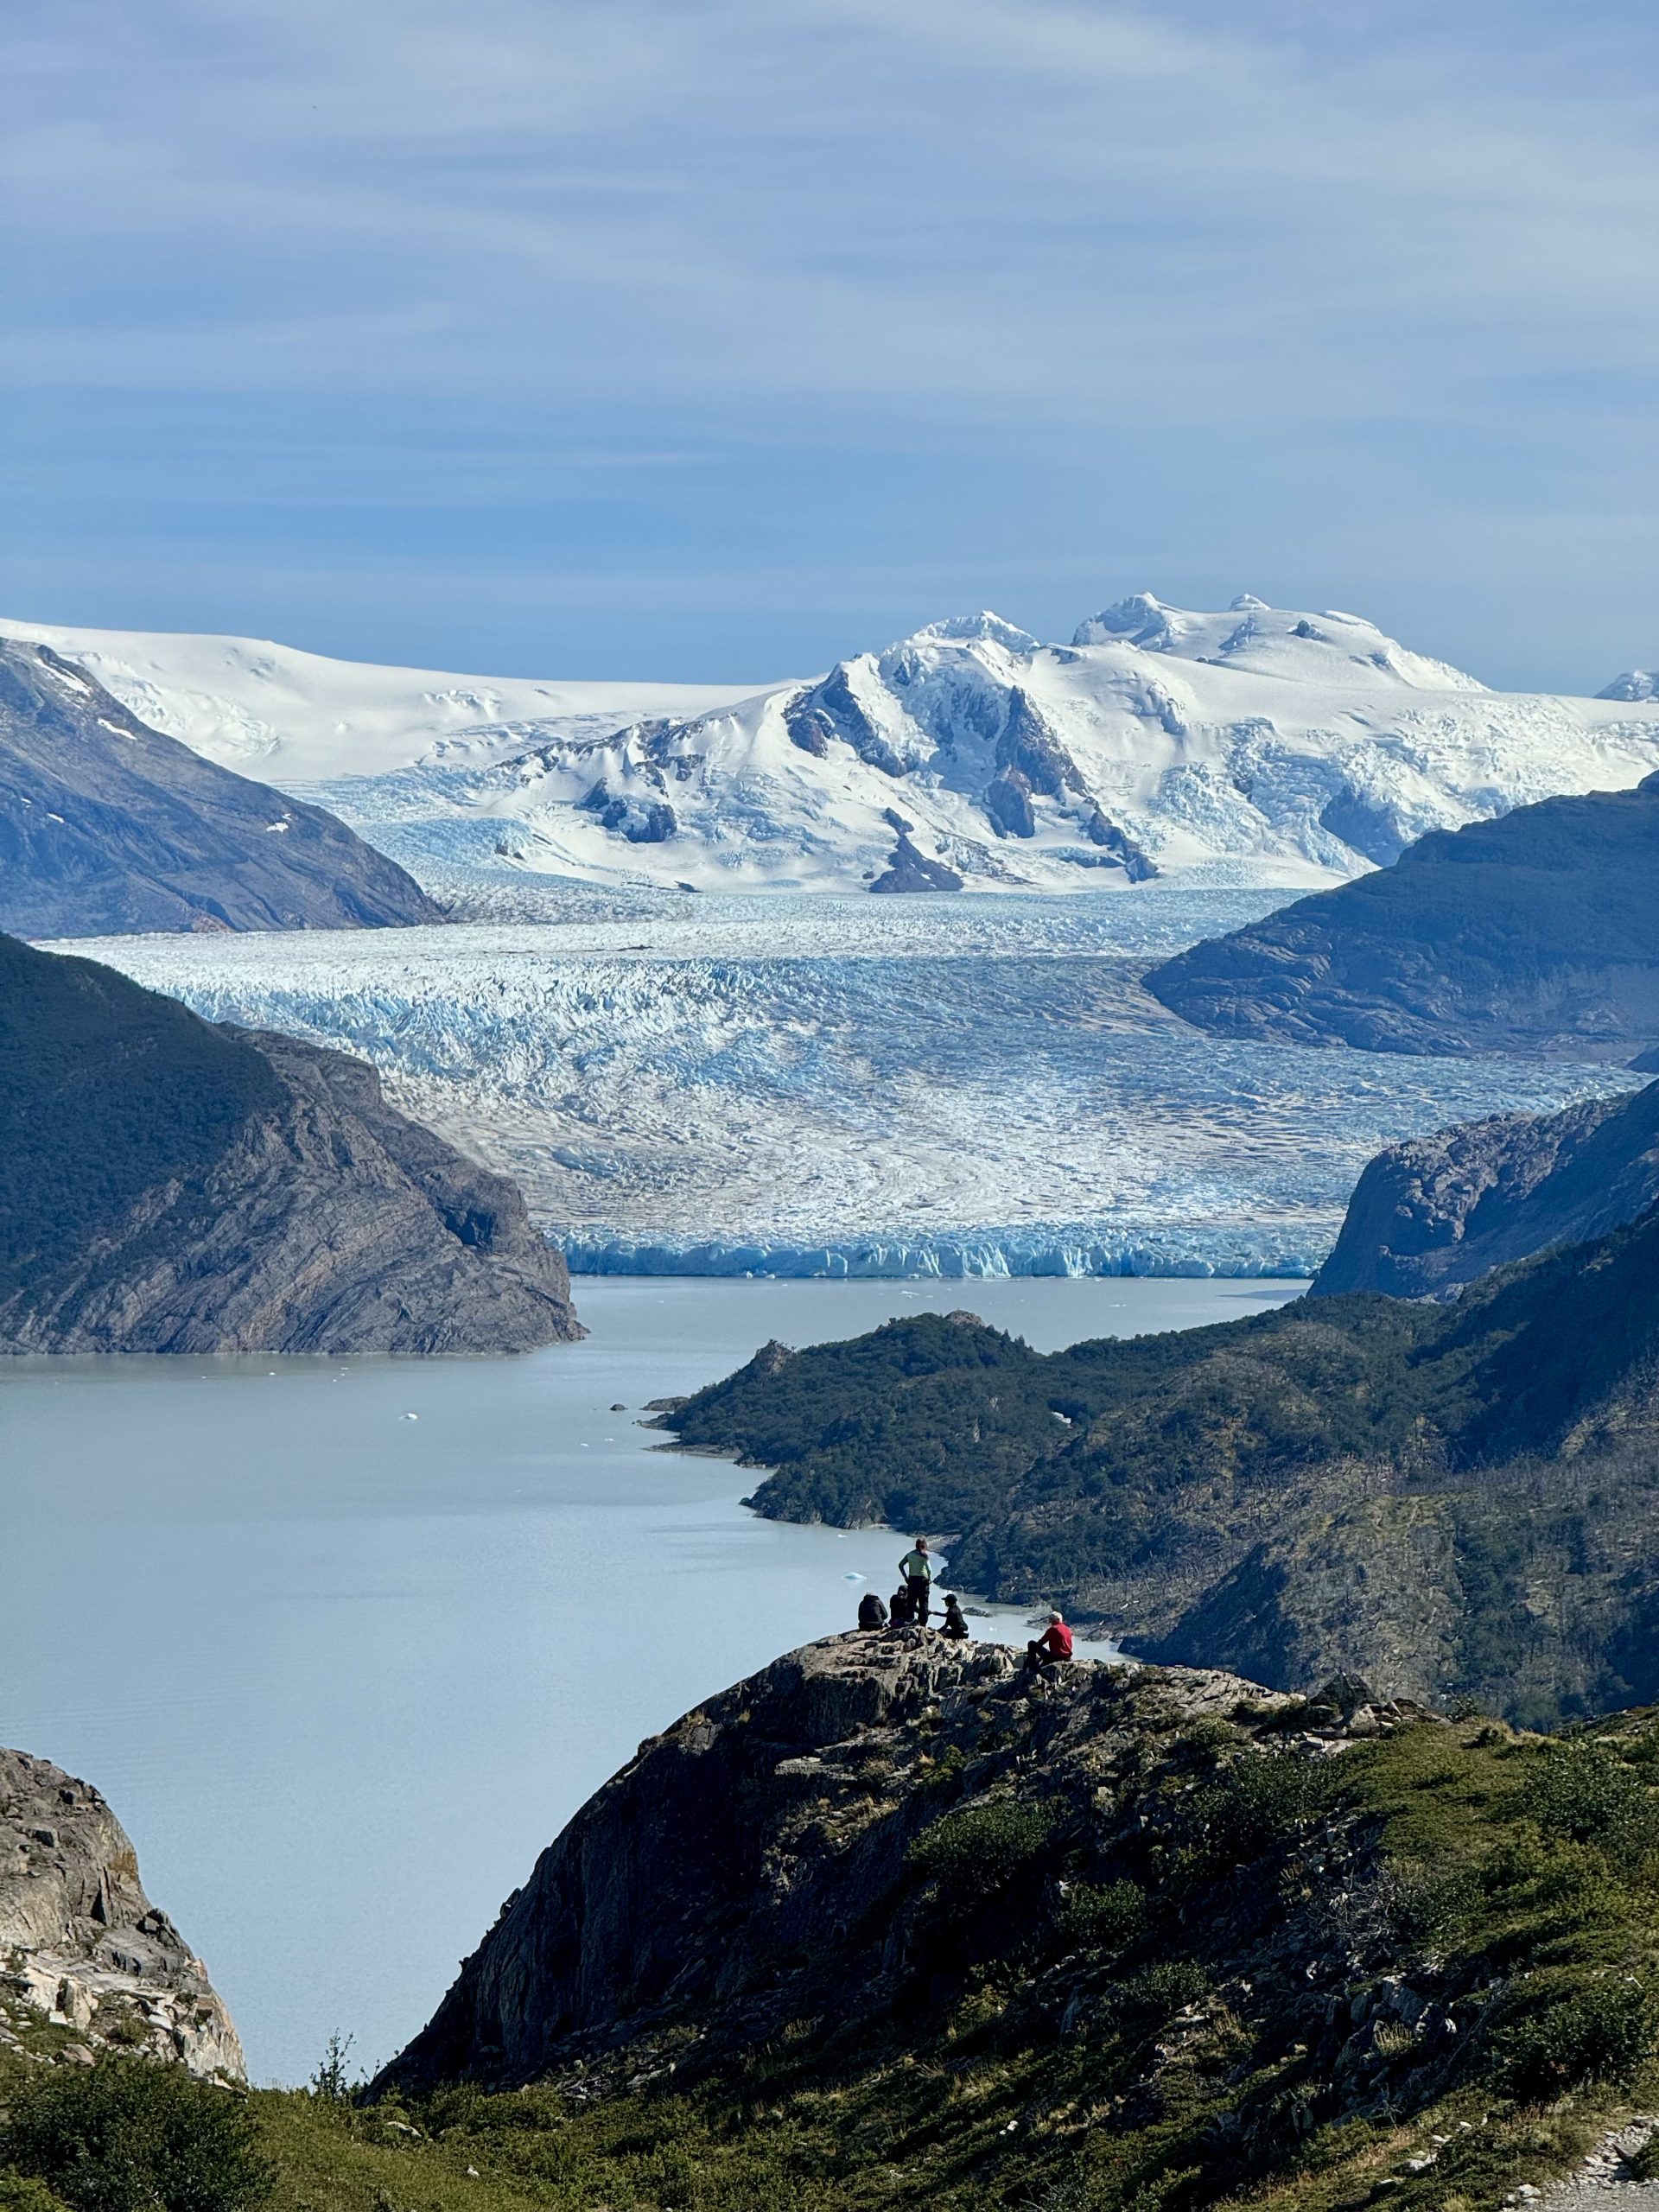
We rolled into Camp Grey around 1:00 PM, checked in, and claimed our tents. At first, we thought about taking the rest of the day off. But then, someone coming back from a day hike told us “That view? Best thing I’ve seen on the entire W.”
Welp. You don’t just not go after hearing something like that.
Segment 2: Camp Grey to Mirador Grey and Back
Distance: ~5.5 miles
Elevation Gain: ~1300 ft
This bonus day hike turned out to be one of the highlights of the trip. The trail took us deeper along Lago Grey, weaving through forest and over two absolutely jaw-dropping suspension bridges.
Now, if you’re afraid of heights — fair warning. These bridges swing, they’re high, and they’re long. I had to coach myself not to look down and just keep walking like a confident mountain goat. Terrifying? A little. Worth it? Absolutely.
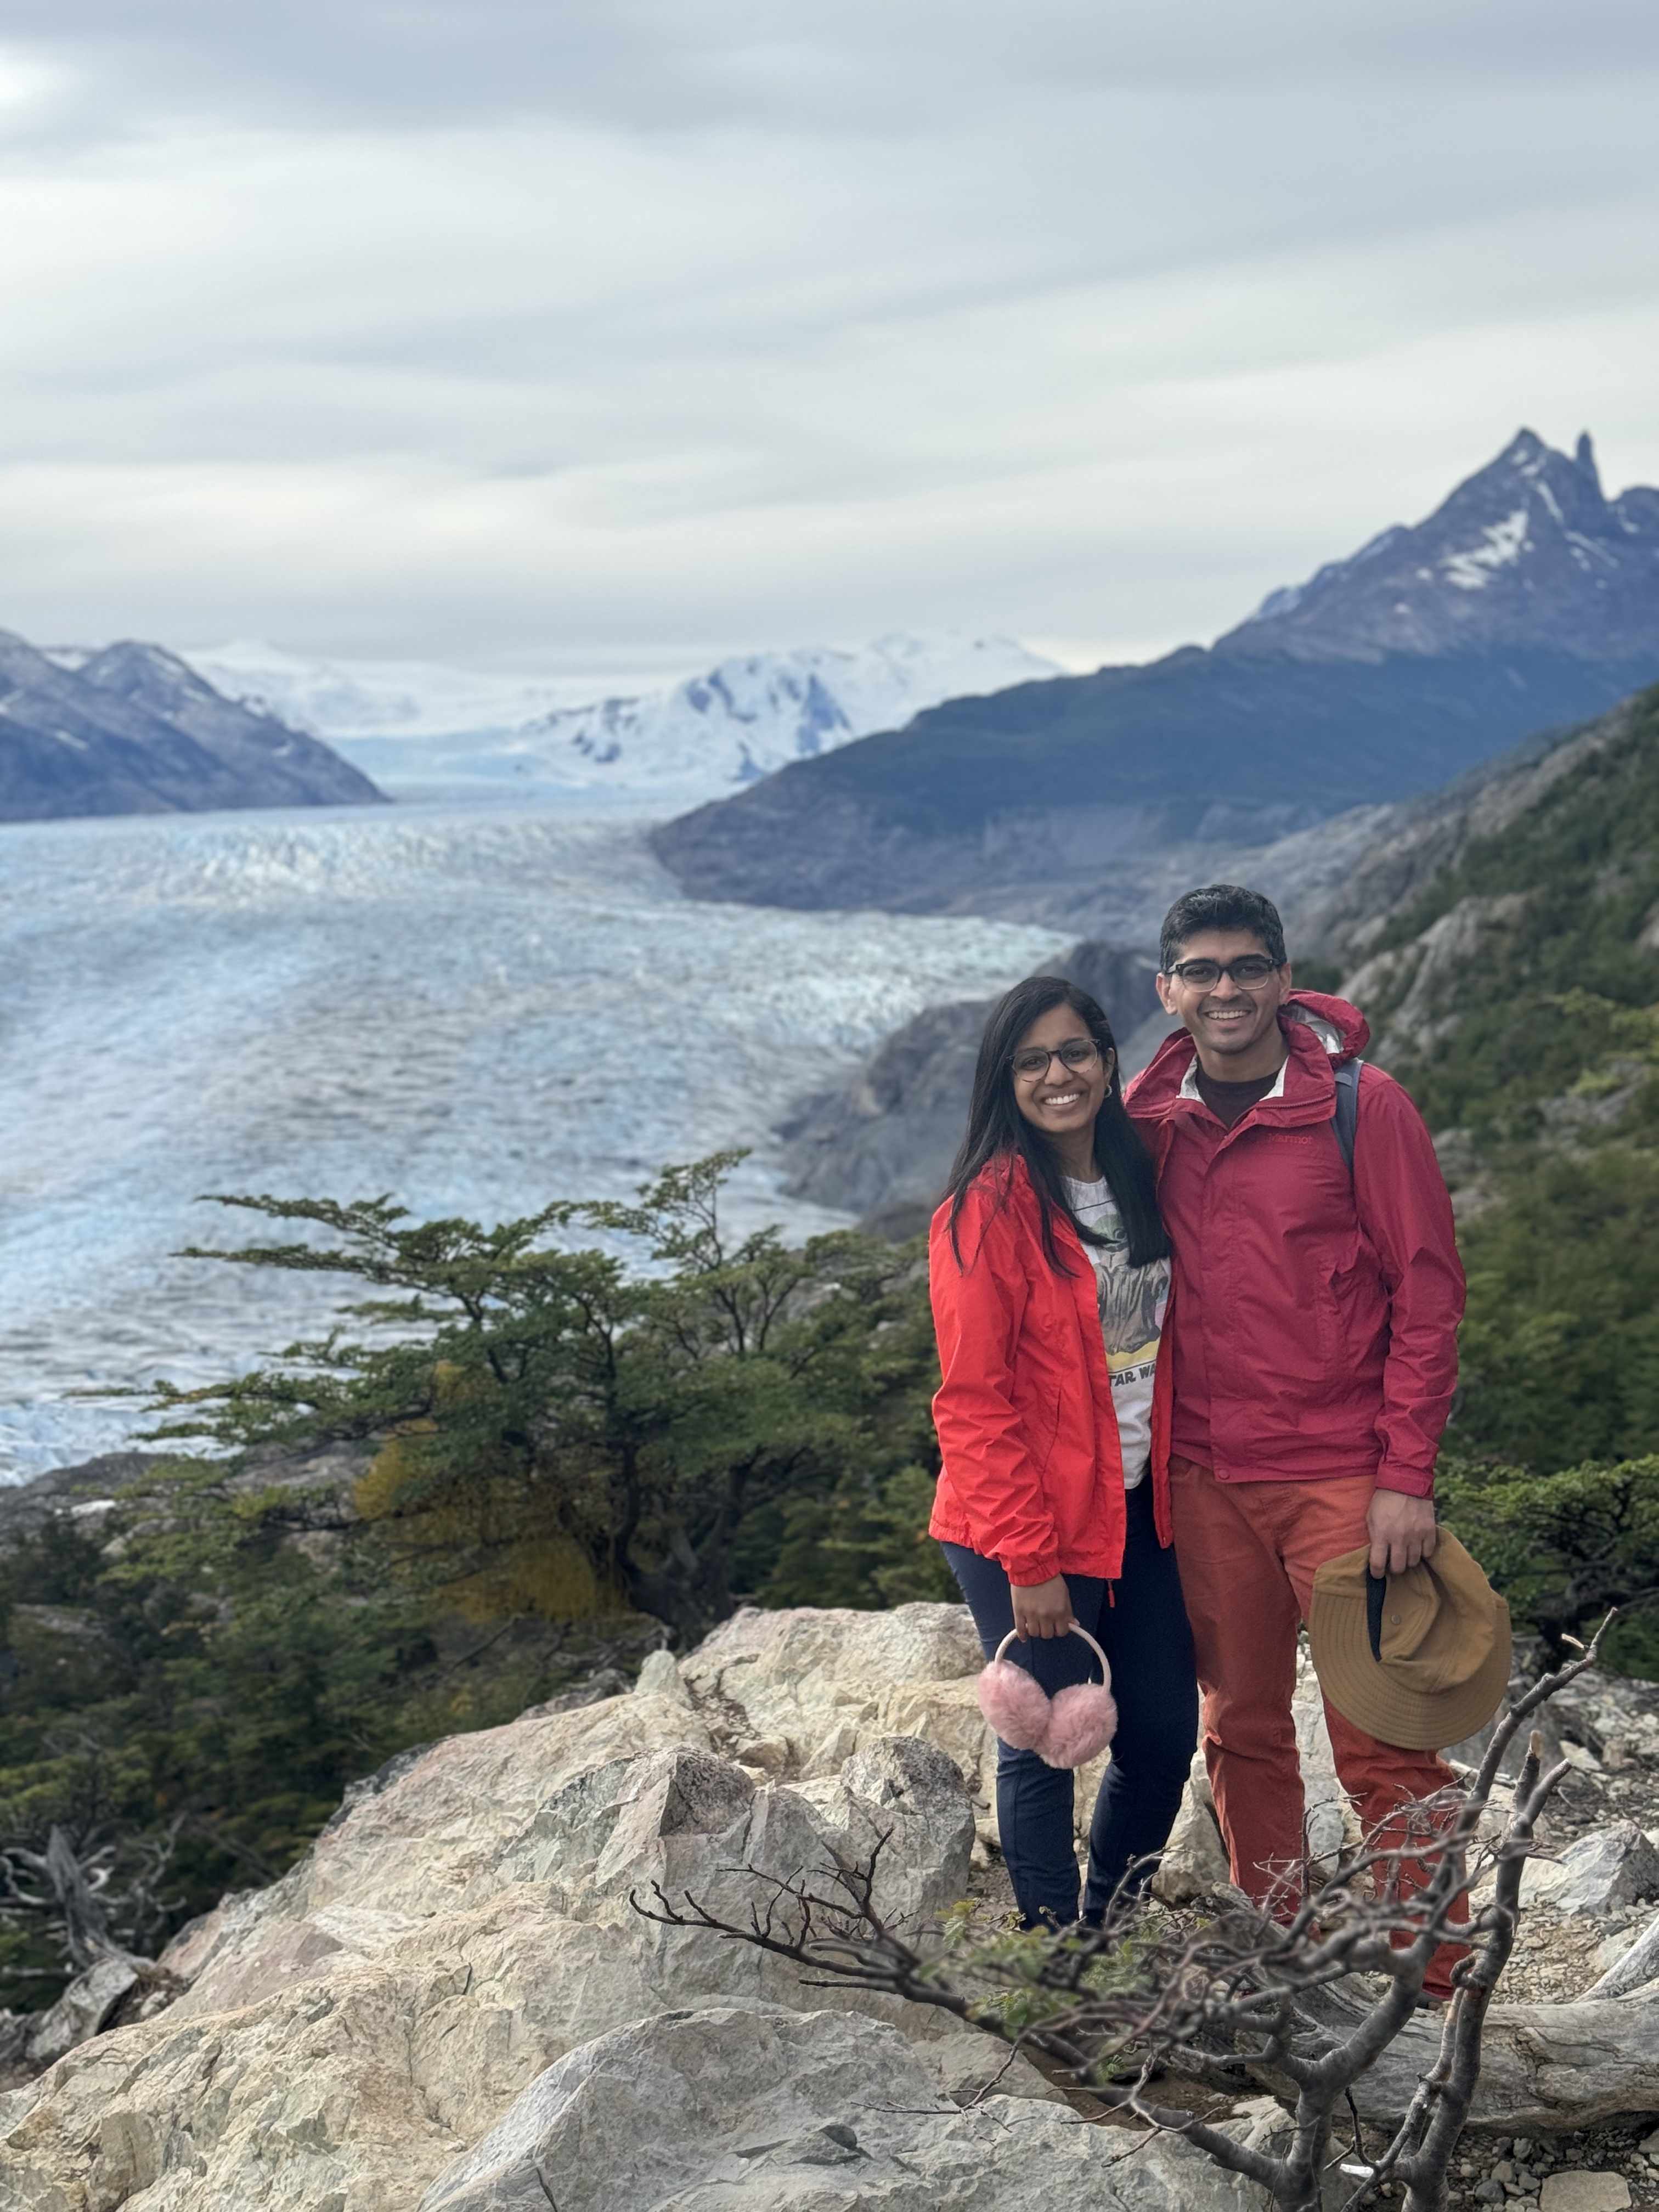
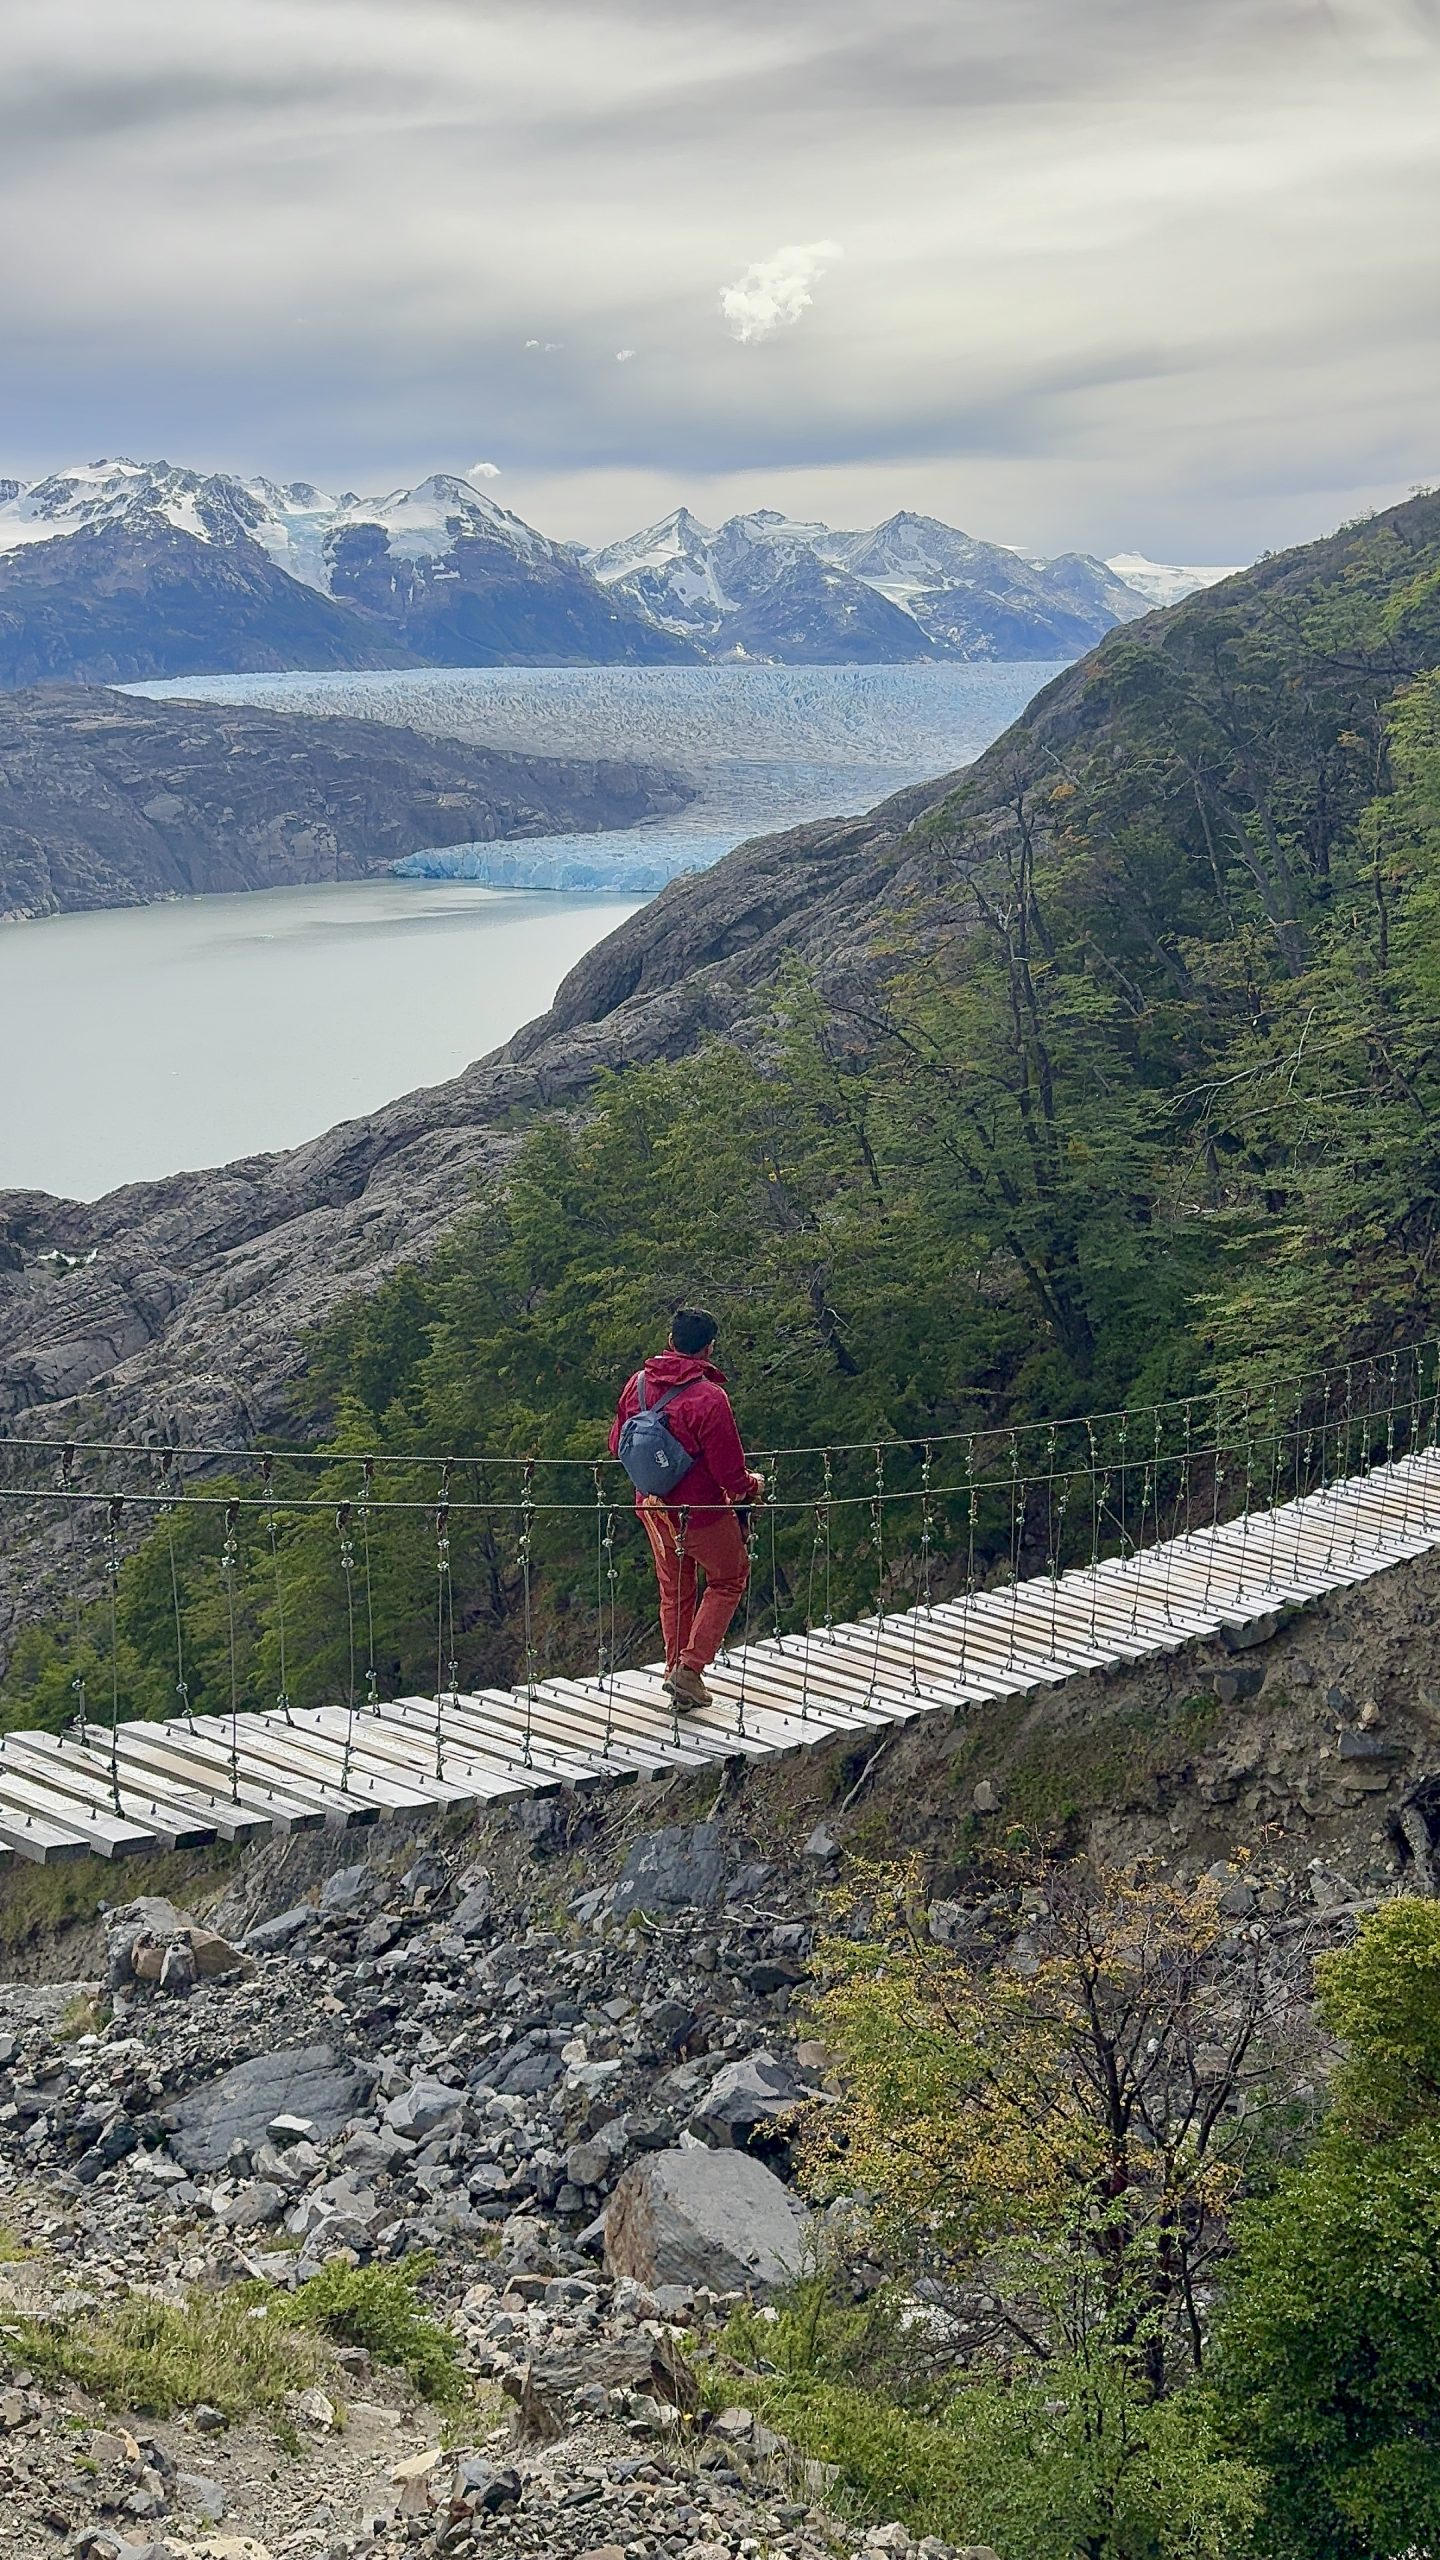
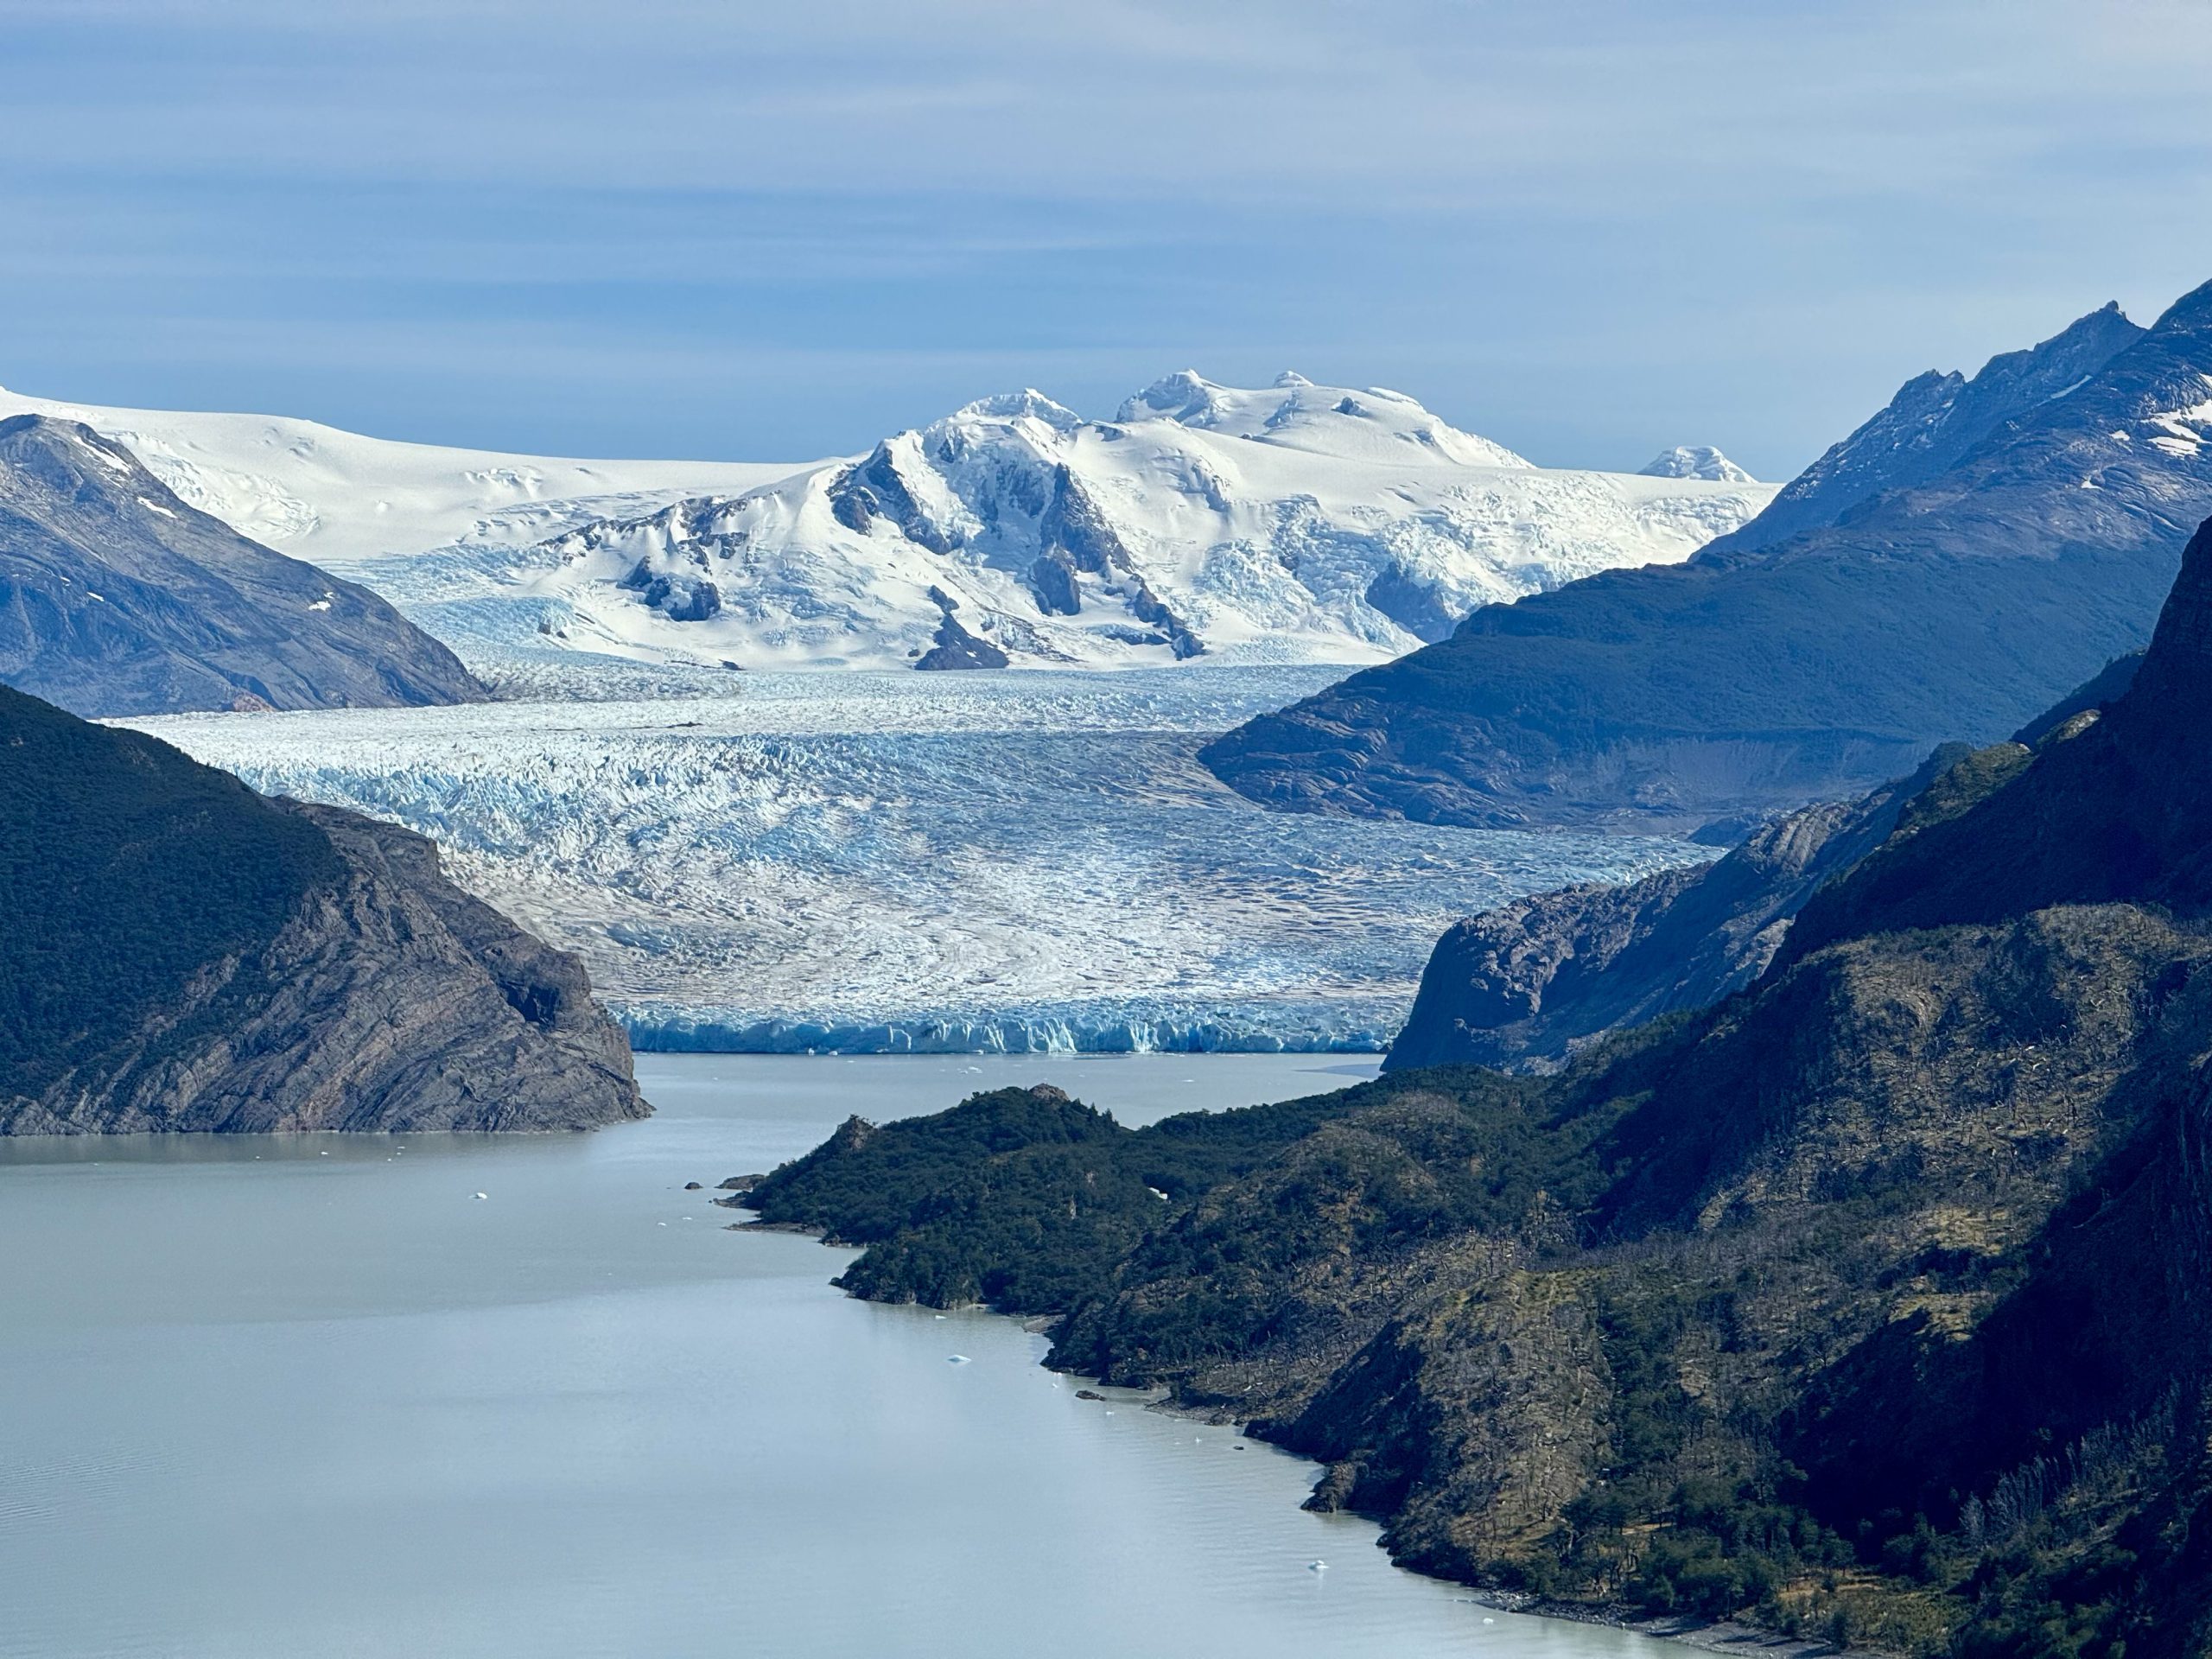
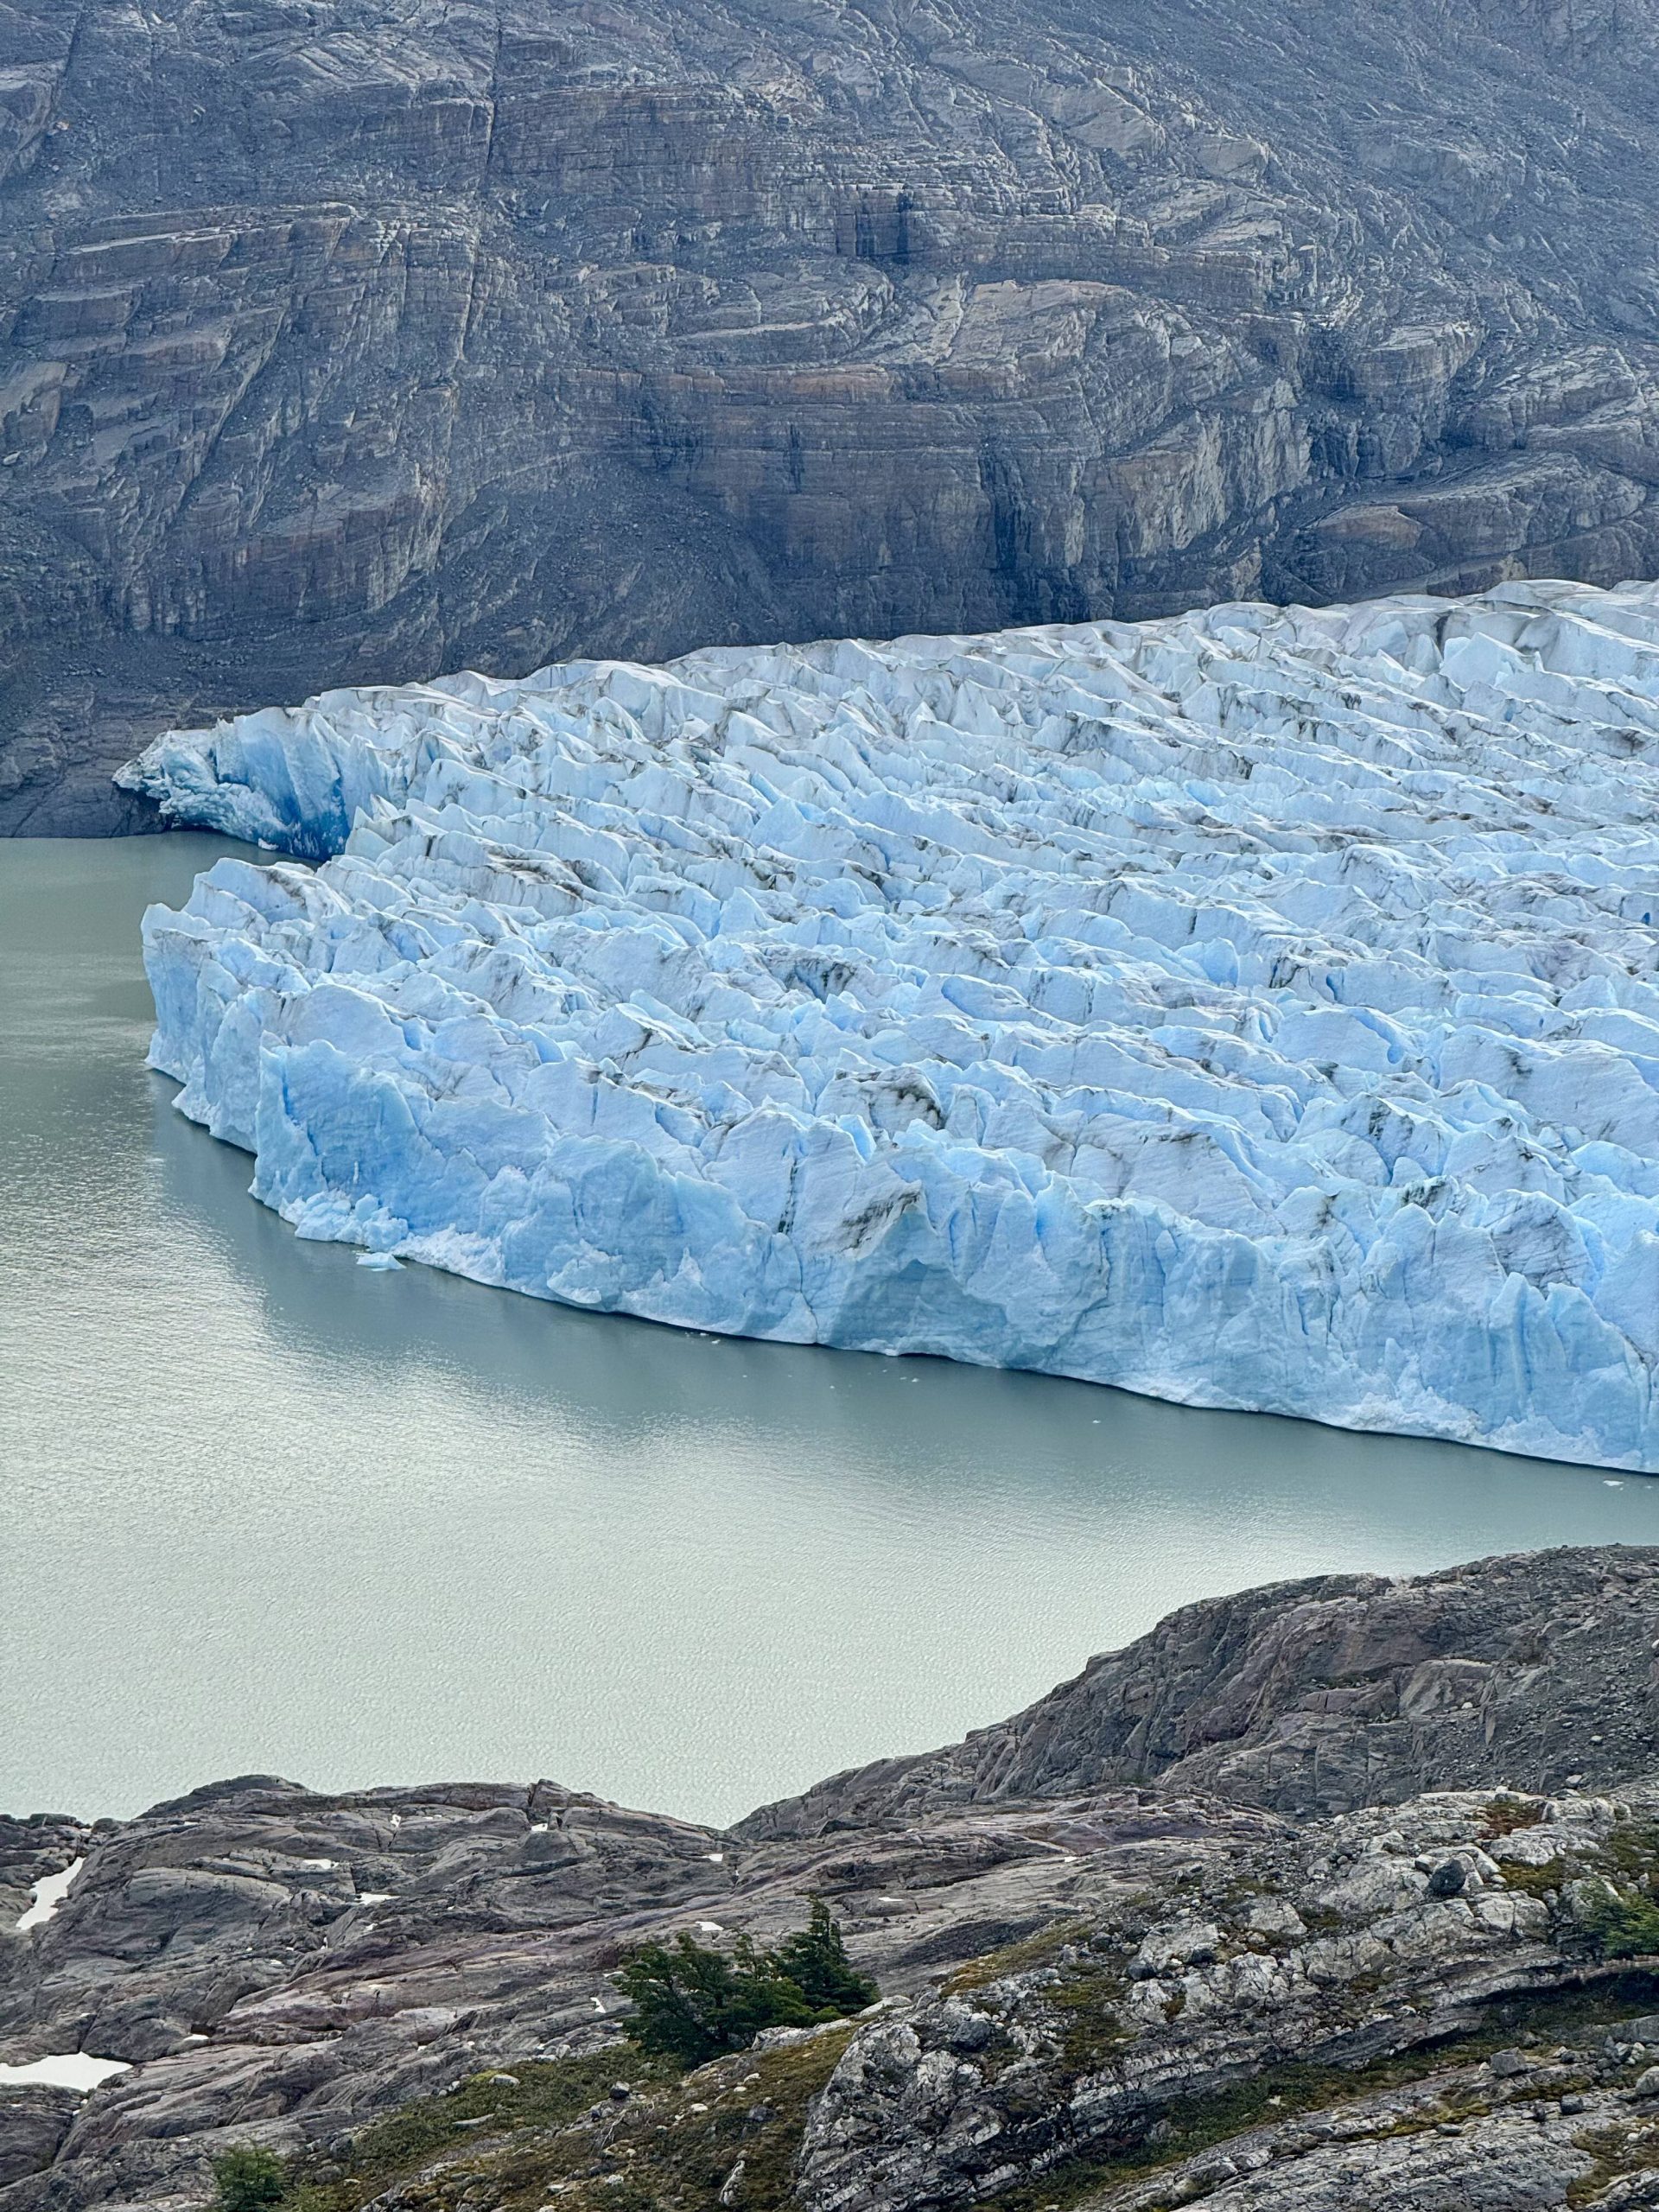
And then — the glacier. You reach this open viewpoint and bam: Glacier Grey in all its icy, sparkling glory. Up close, it’s vast and impossibly blue and just… surreal. We plopped down at the viewpoint and just sat in silence for a while, soaking it all in.
We made our way back to camp in time for dinner, feeling physically destroyed and emotionally full. Sleep came fast that night.
Tip: Refugio Grey tents are on the ground with no platform. Bring your sleeping pads if you have a problem with sleeping on the rocks.
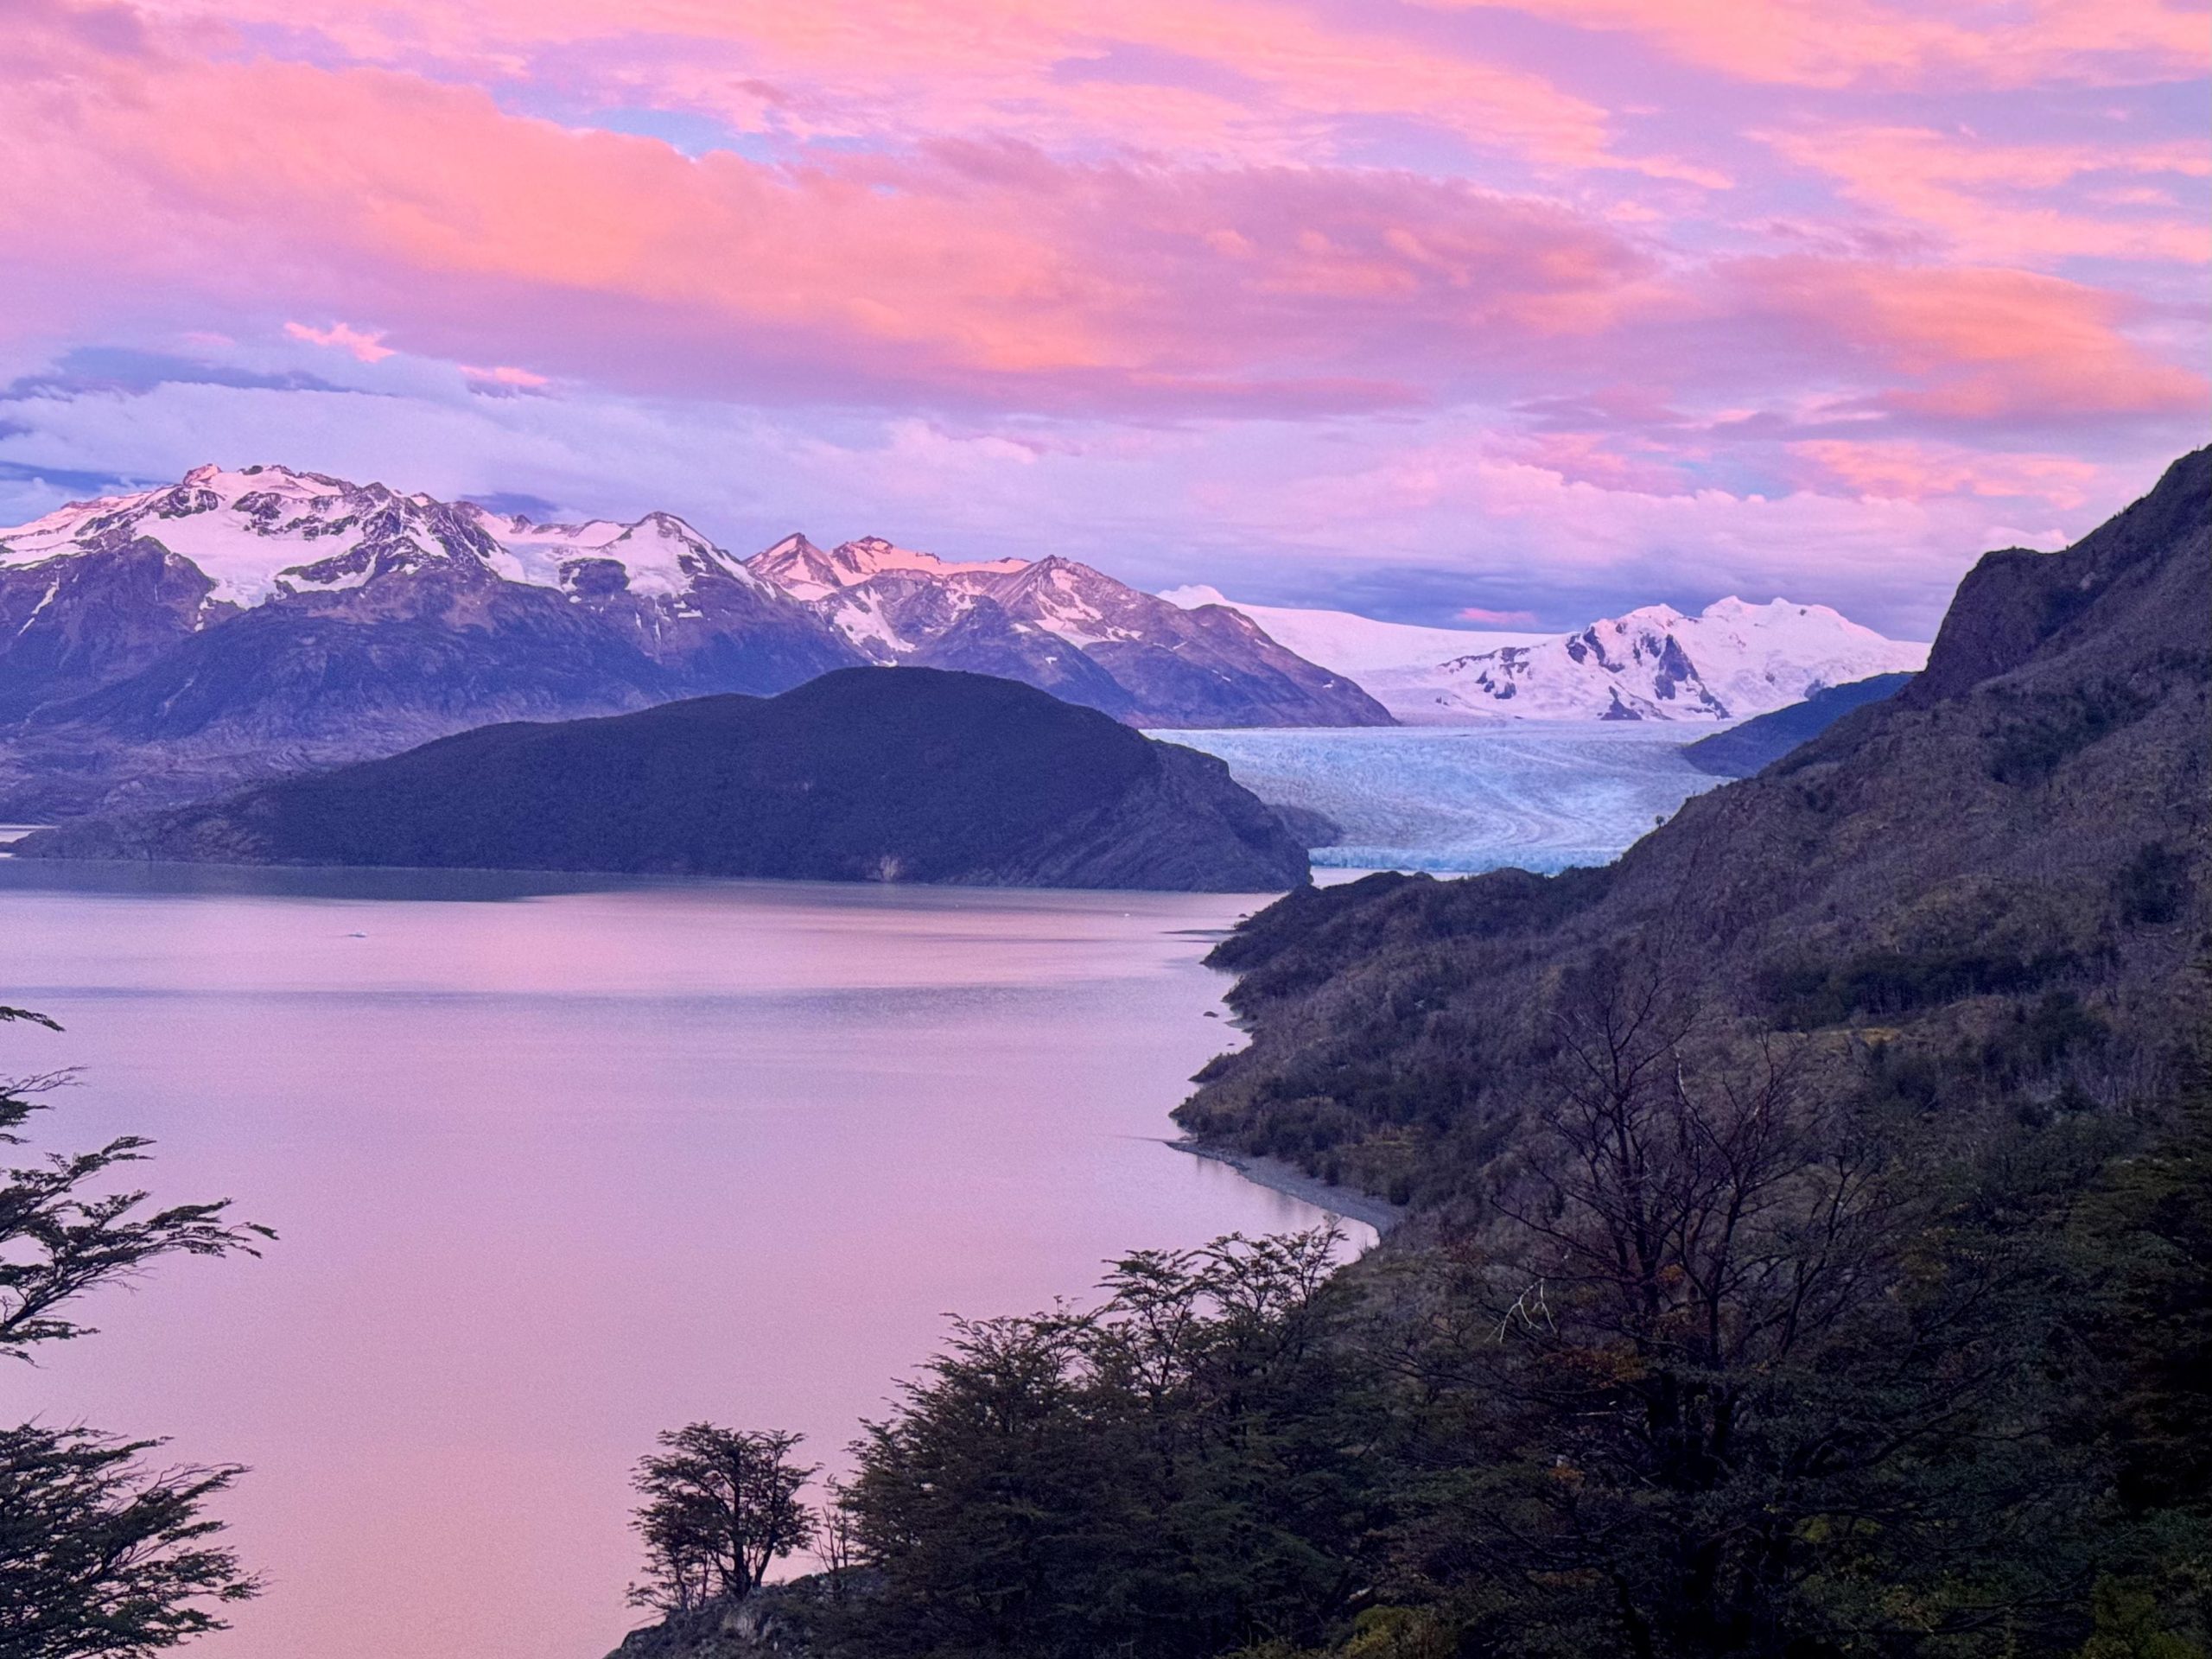
Day 5: Refugio Grey to Puerto Natales – Cotton Candy Skies & One Last Look at Patagonia
Our final day on the trail. Bittersweet, for sure — but we still had one last magical sunrise and a grand finale ferry ride ahead of us.
We had an early plan: hike back from Refugio Grey to Paine Grande, then take the ferry across Lago Pehoé, catch a bus back to Puerto Natales, and finally hop on a night bus to Punta Arenas. A full day of transit, but first — one last trail moment.
We were on the trail by 6:00 AM, headlamps on and sleepy eyes still adjusting. And just like on Day 3, Patagonia gave us another ridiculous sunrise. This one was soft and pink, like the sky had been swirled with cotton candy.
We cruised through the 7-mile hike and made it to Paine Grande by 11:00 AM — just in time to catch the 11:50 AM catamaran across Lago Pehoé. Heads up: you can’t pre-book this catamaran. It’s first come, first serve, so make sure to get in line early. We paid 25,000 CLP per person in cash (yep, cash only!), so plan accordingly. You can check the latest schedule on hipsur.com.
If you’ve made it this far in the blog, you already know – Patagonia never stops showing off. The ride across Lago Pehoé gave us a greatest-hits reel of the entire W Trek: turquoise water, jagged peaks, wide valleys, and a sense of wonder that words barely do justice. Honestly, even if you don’t hike the full W Circuit, I’d still recommend this catamaran ride. Take it to Paine Grande, spend a night or two there, do a couple day hikes, and soak in the views. It’s an experience all on its own.
After the catamaran ride, we boarded the bus back to Puerto Natales (booked with Recorrido), grabbed one last dinner at La Guanaca (because of course we did — tradition!), and then caught our night bus to Punta Arenas.
Tired, dusty, a little sunburned, a lot sore, and so very full of stories — we left Torres del Paine with our hearts stretched wide open.
If you enjoyed this blog post, Subscribe to the blog to get free adventures right to your inbox. Or follow us on IG (@weekendwanderersinc) for more recommendations and adventures.
If you’re in the mood to read about other backpacking trips, check out our 3 day backpacking adventure in Japan along one of the most historic and beautiful trails.