Exploring the beautiful Mount Tamalpais State Park in 8 Hours
Every time I think of Mount Tamalpais, I’m reminded of the first time we visited—years ago on a whim. We left that day saying, “We need to come back soon.” And then, like so many plans, we never followed up.
Living on the SF Peninsula or South Bay, Mt. Tam always feels just a little too far for a casual day trip. It often gets pushed aside for easier-to-reach spots, and most people just stop at Muir Woods anyway, not realizing what’s waiting just a bit higher up.
But when Aditya’s parents were visiting and we started running out of fresh places to take them without repeating ourselves, Mt. Tam popped back into our minds. We finally committed to it—planned a spontaneous 8-hour visit—and I’m so happy we did. The day had everything: peaceful trails, a cozy bakery stop, and even the rare and breathtaking cloud inversion that made us feel like we were standing on top of the world.

If Mt. Tam has been sitting on your “someday” list too, consider this your sign. In this guide, I’ll walk you through exactly how to spend a perfect day at Mt. Tamalpais State Park—including the best time to visit, how to plan your day to spot a cloud inversion, the most scenic trails and overlooks, and a few magical spots that are still on our bucket list for next time.
Table of Contents
When is the best time to visit Mount Tamalpais State Park?
If you ask me, the best times to visit Mt. Tamalpais are either in early spring (March–April) or mid-to-late summer (July–August)—and for very different reasons.
Spring in Mt. Tam is magical. After the winter rains, the golden hills transform into rolling waves of green, making the landscape look fresh, alive, and photogenic. The air feels crisp, wildflowers begin to dot the trails and best of all, the seasonal waterfalls are flowing. Popular spots like Cataract Falls are at their fullest this time of year, and the cooler temperatures make hiking a dream.
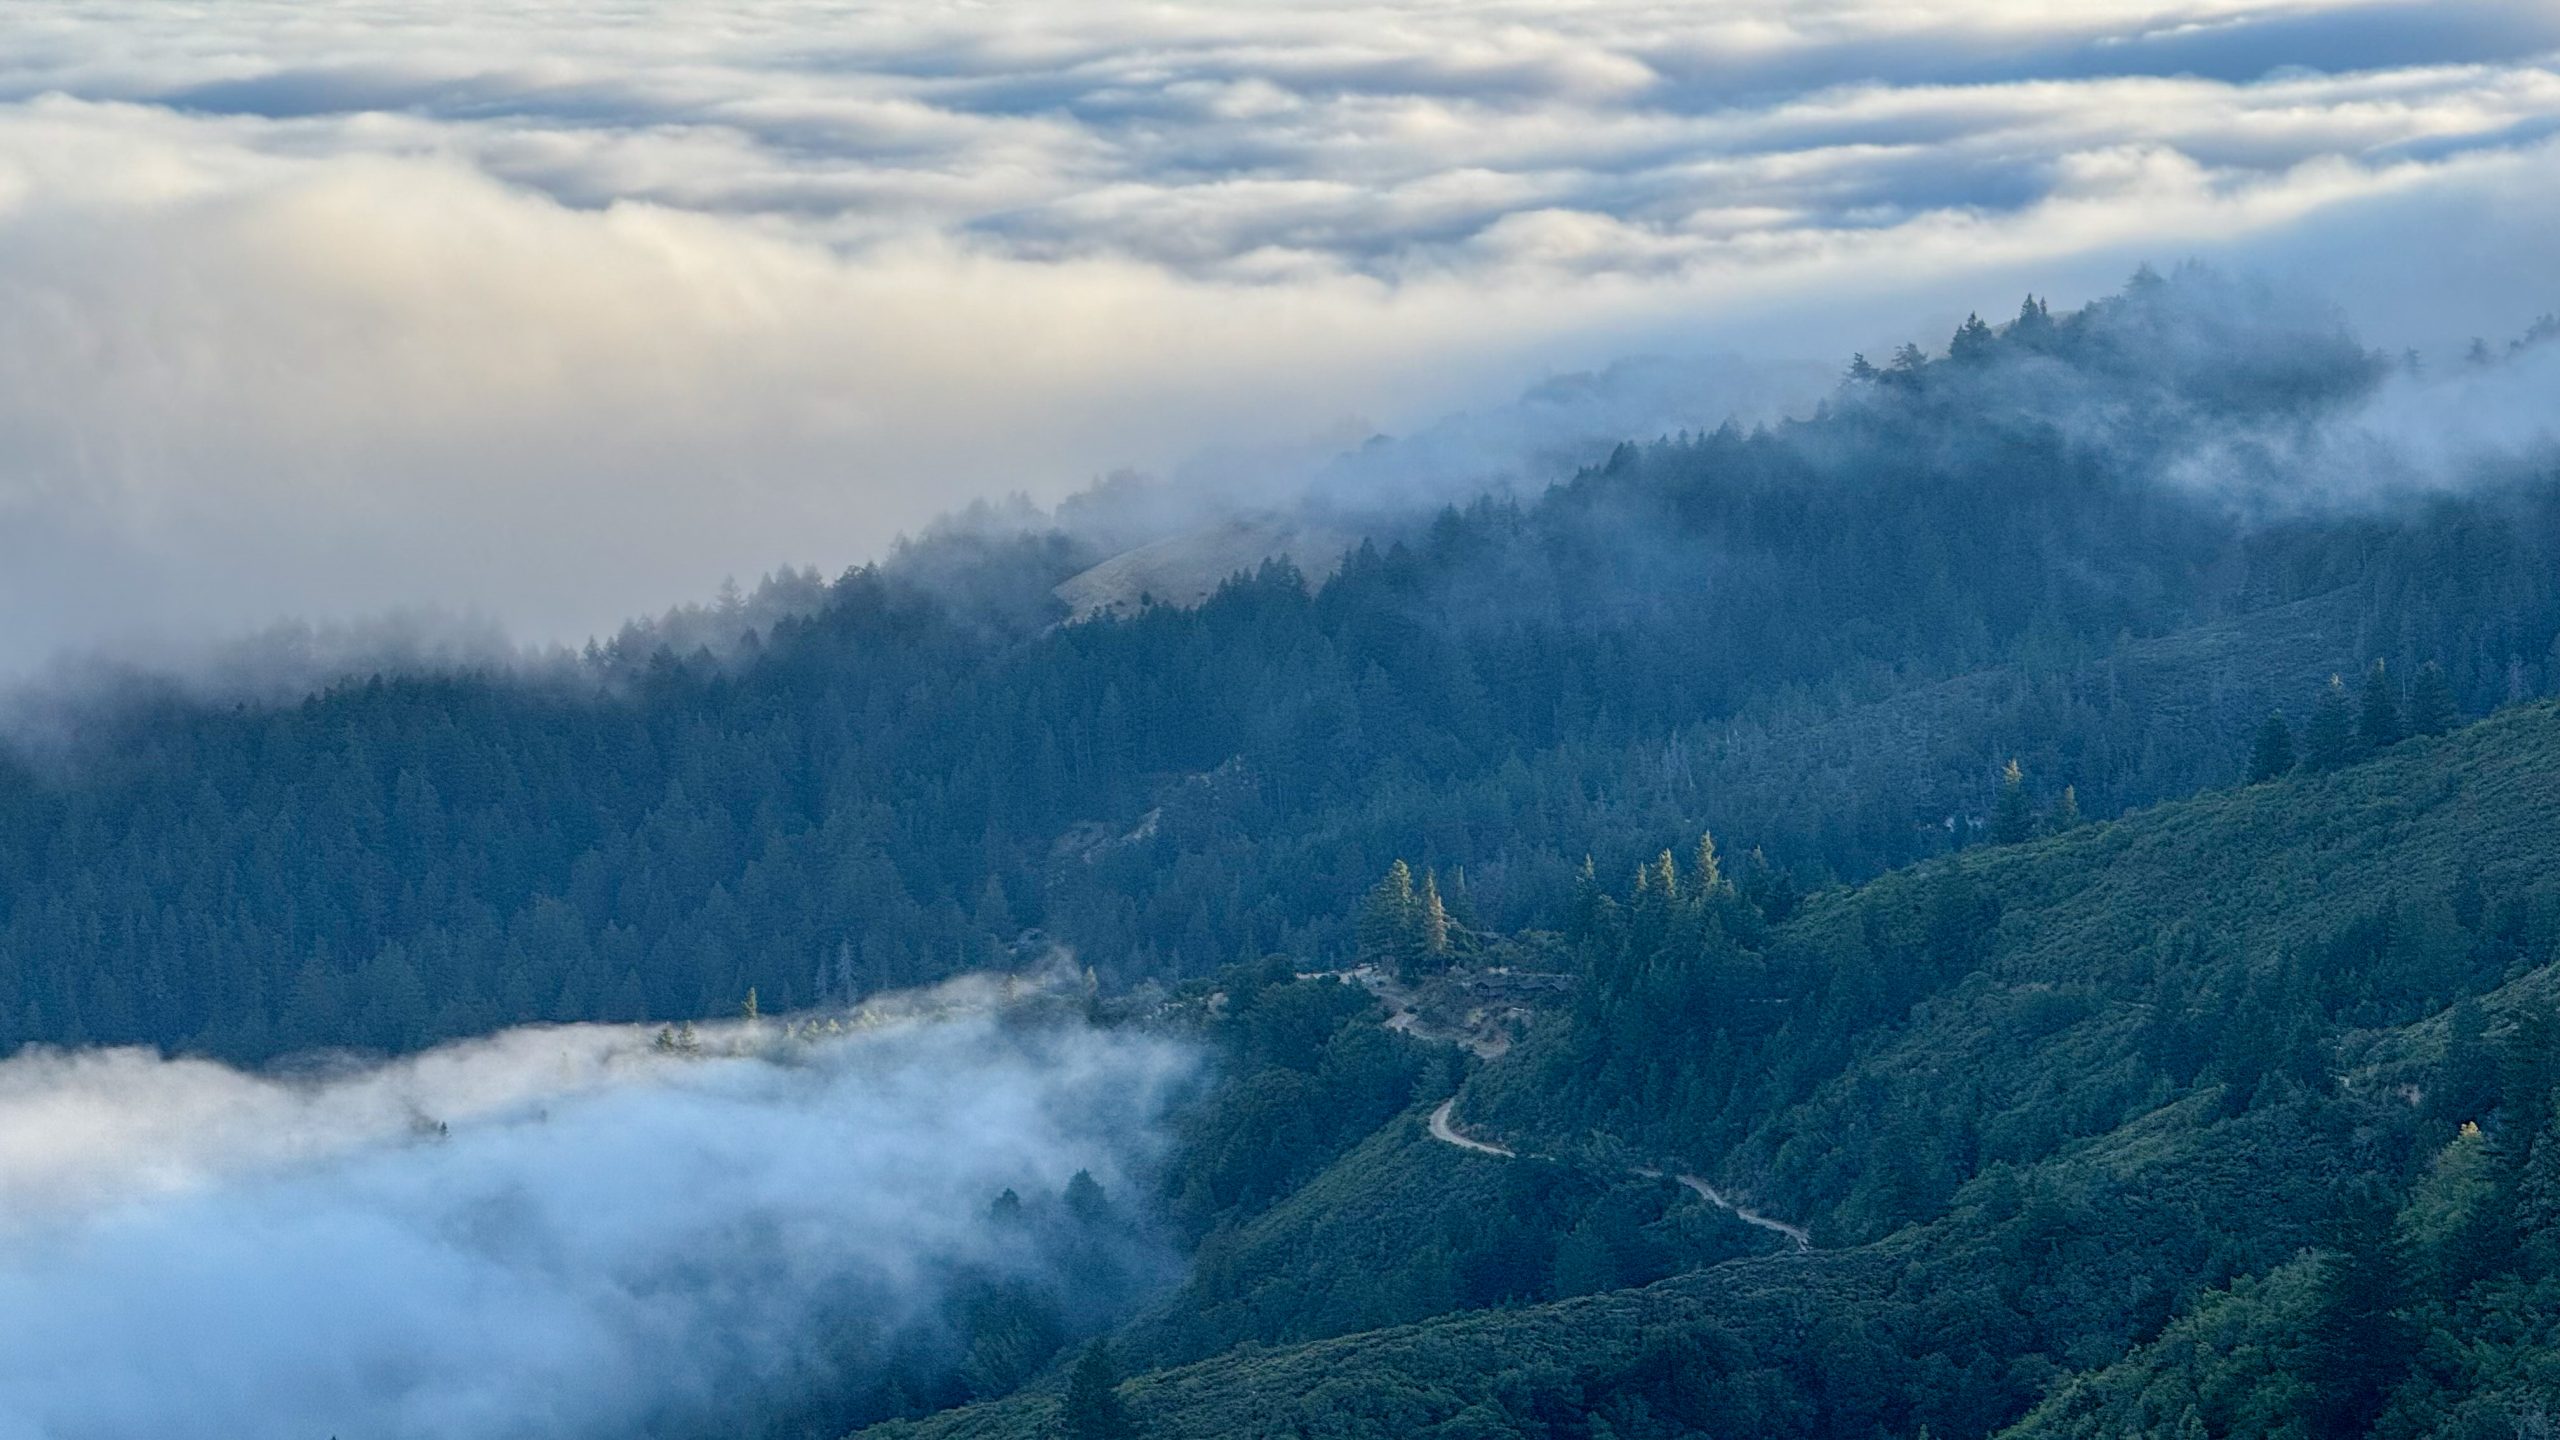
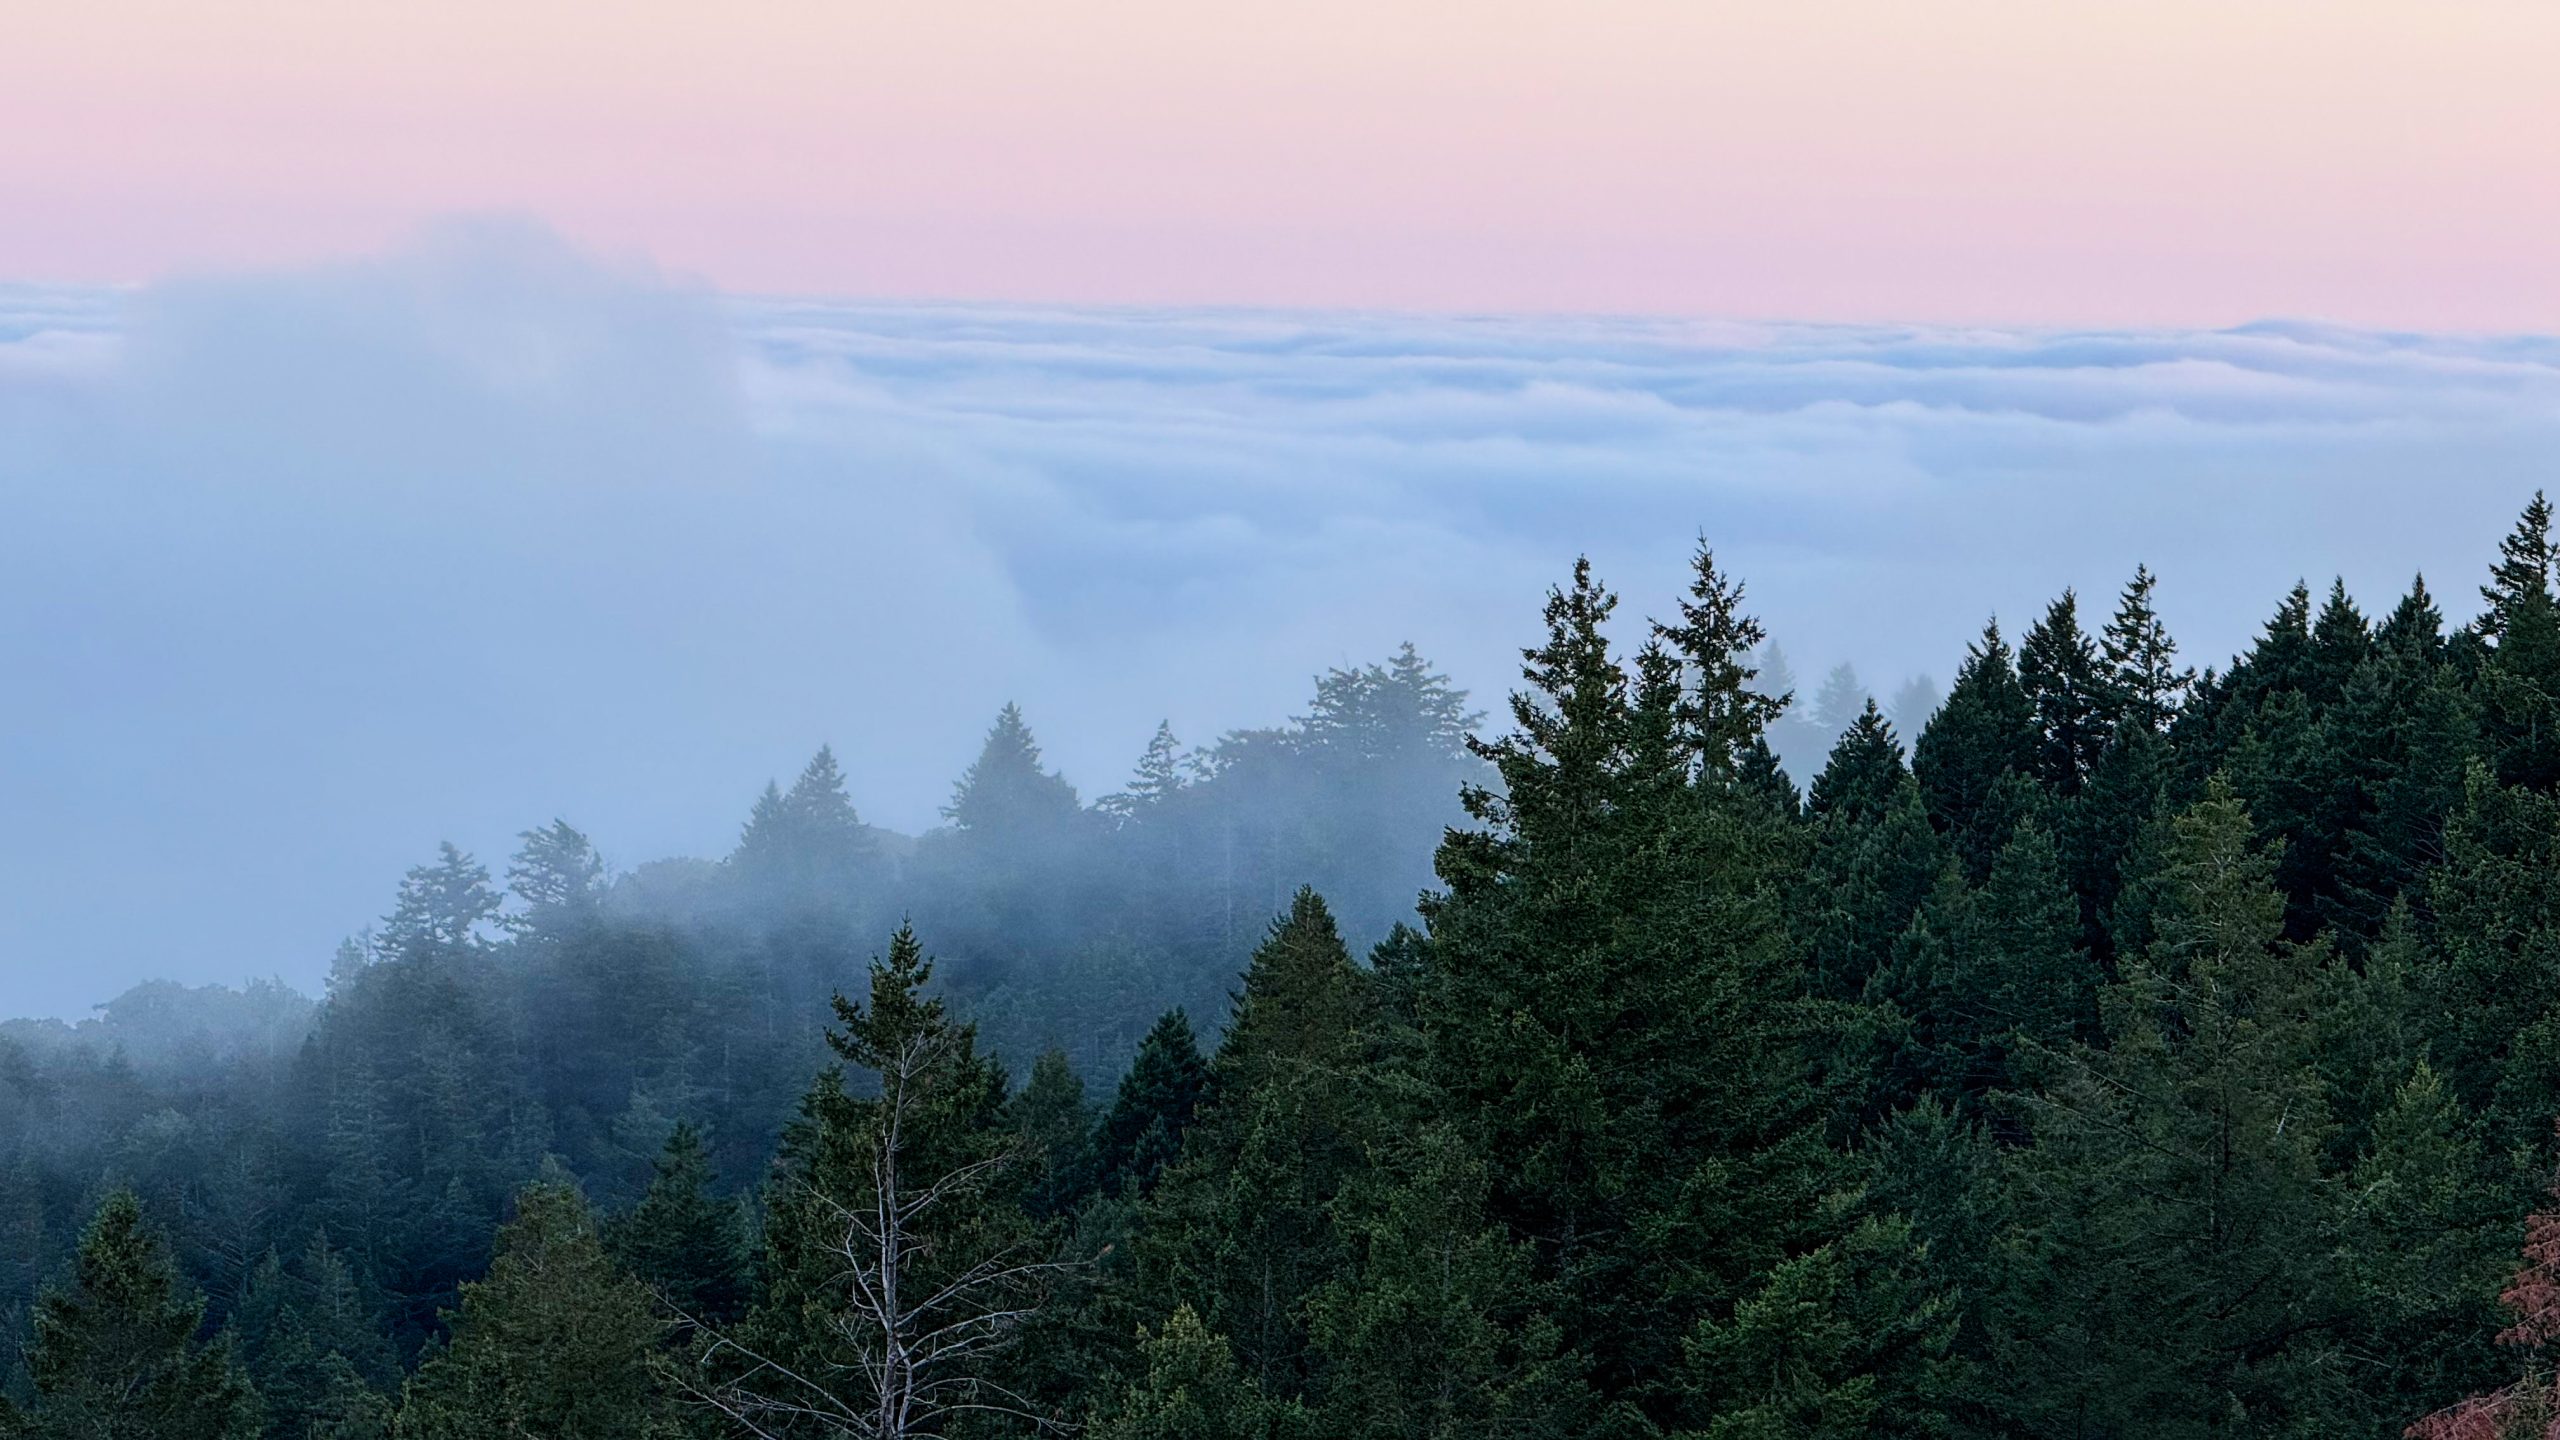
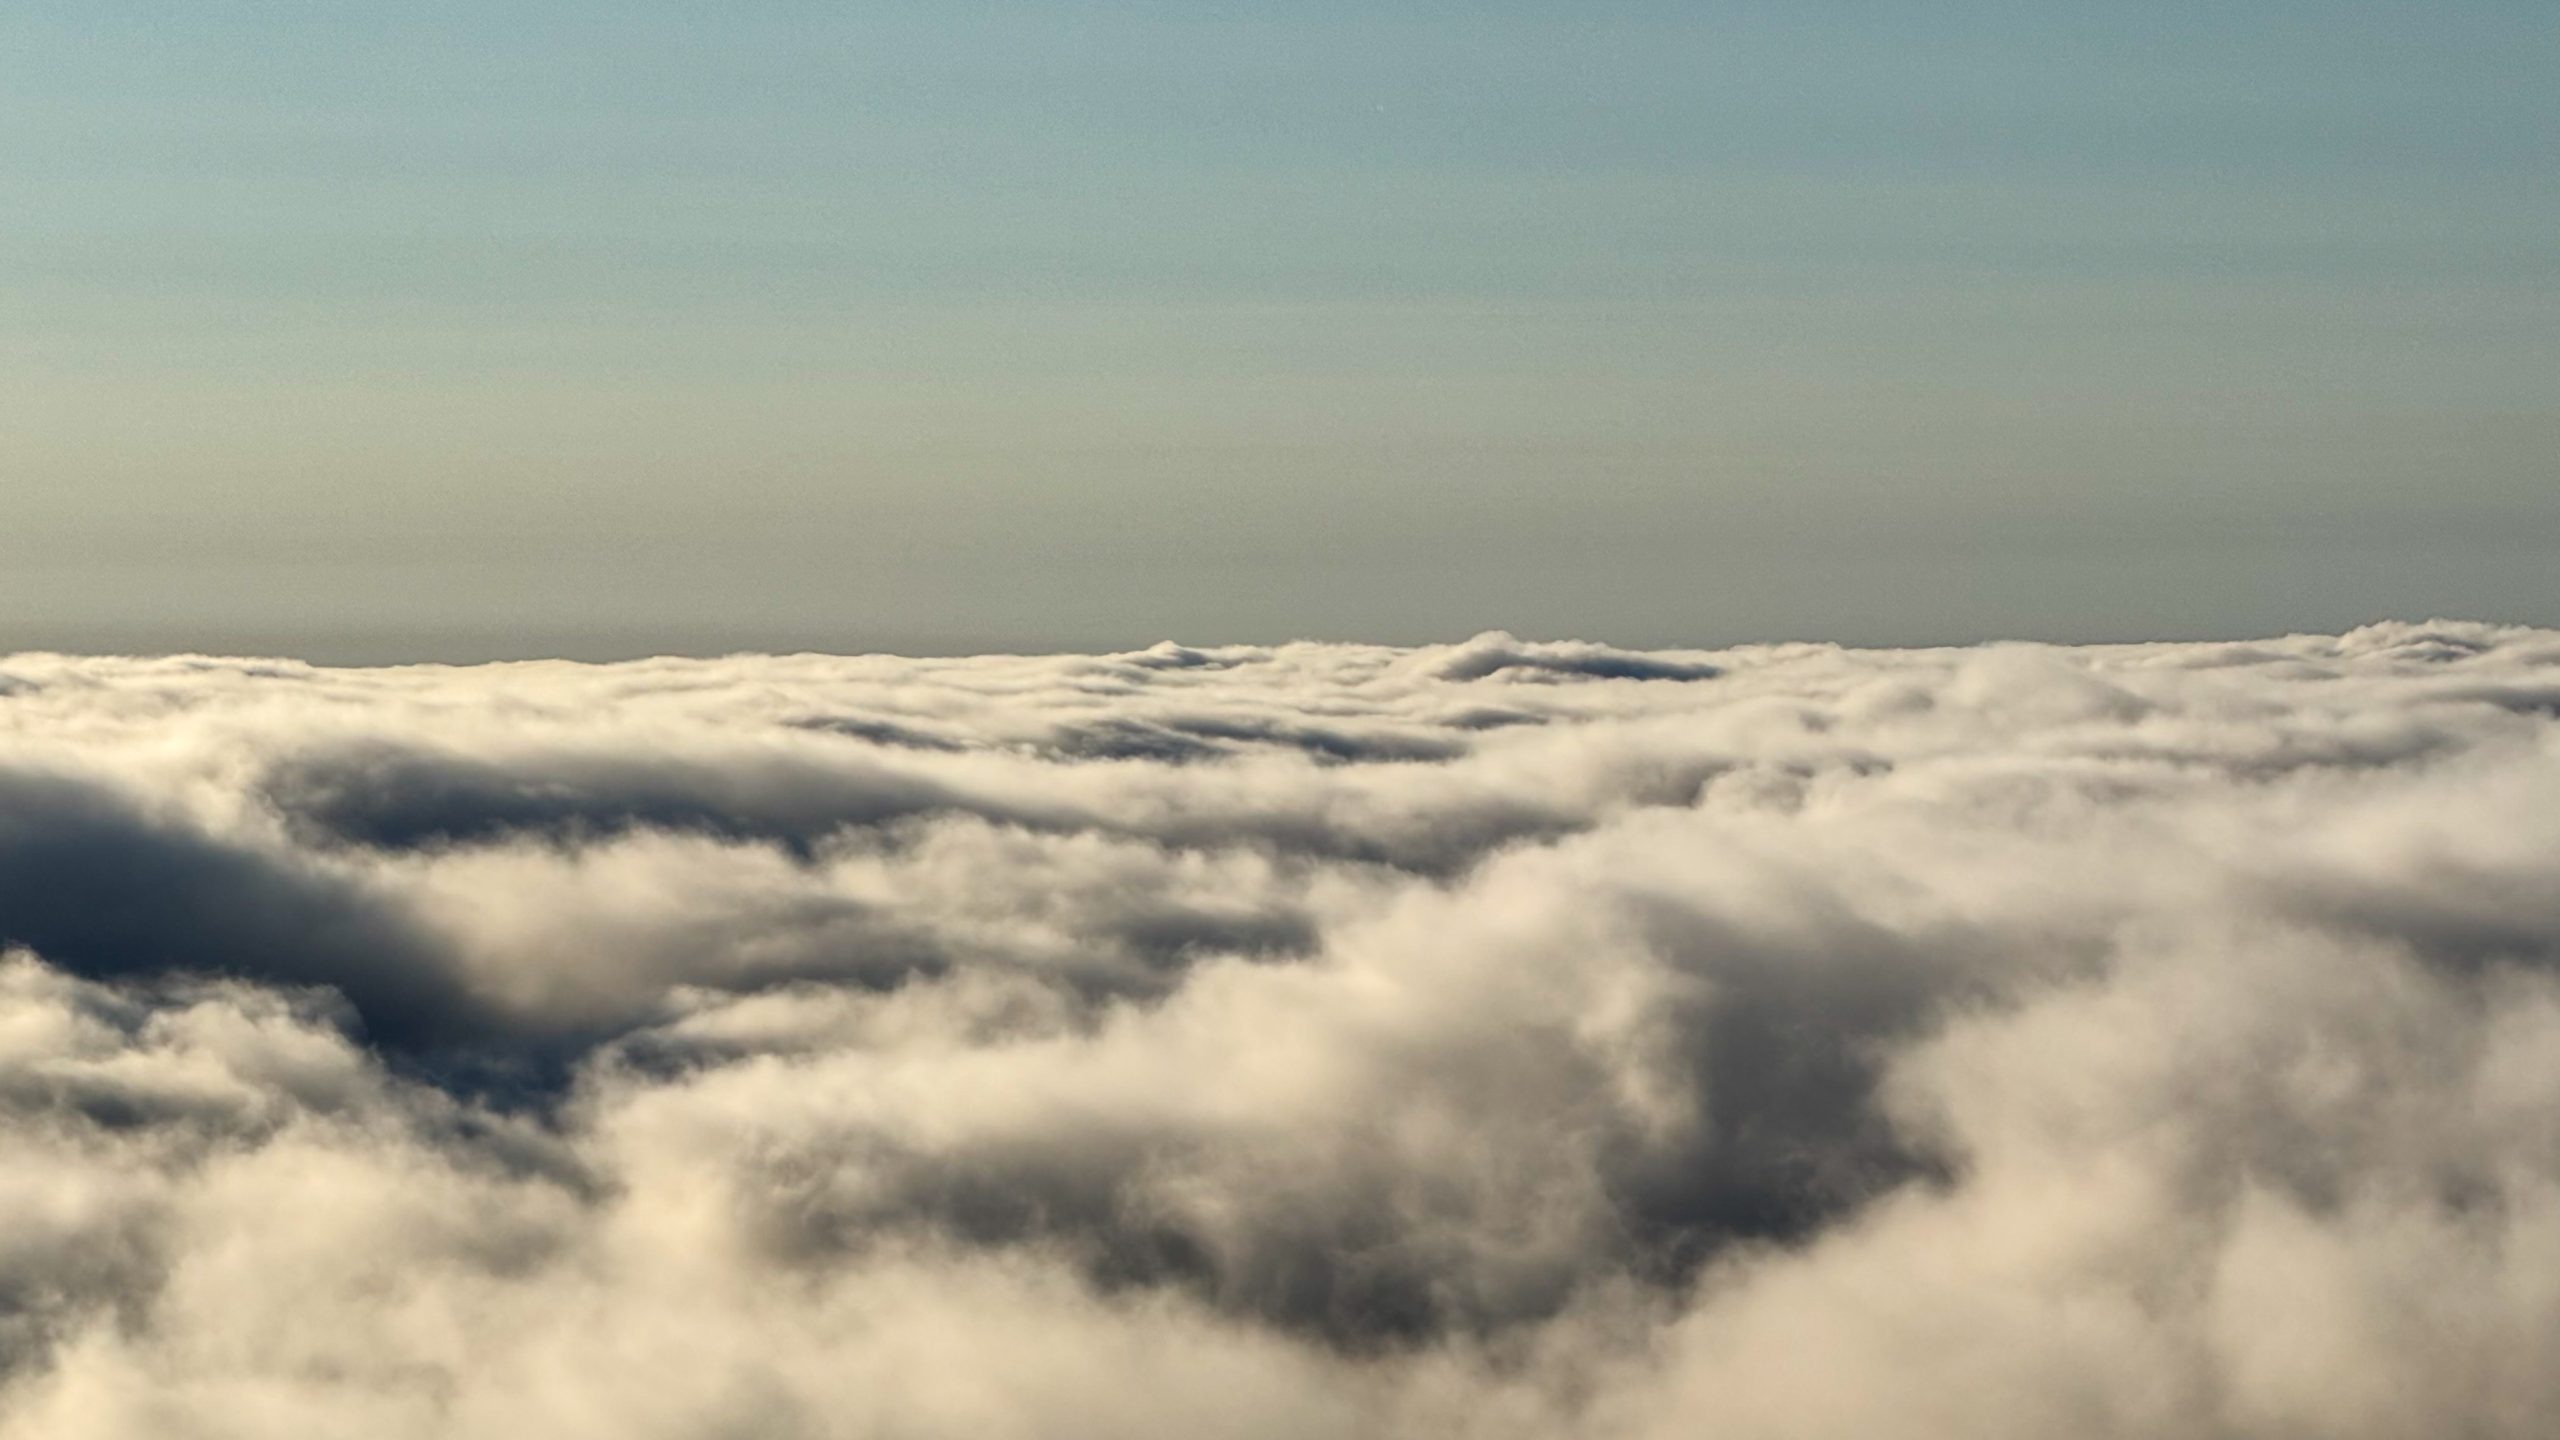
On the other hand, summer brings something rare and unforgettable: the popular Mt. Tam cloud inversion. Usually occurring in July and August, this phenomenon happens when a dense layer of marine fog—commonly known as coastal stratus—rolls inland from the Pacific in the early mornings or late afternoons. Because Mt. Tam sits at a higher elevation than this fog layer, the peaks and ridge lines rise above the clouds, creating a surreal scene where you feel like you’re floating in a sea of clouds.
How to see the Cloud Inversion at Mount Tamalpais?
Timing the perfect cloud inversion at Mt. Tamalpais can feel like chasing a dream—fleeting and dependent on a bunch of moody coastal variables. But July and August give you the best shot at catching that surreal moment when a sea of clouds swirls below you and the mountaintop rises above it all, golden in the sun.
Over time, I’ve seen three different strategies that people use to try and predict when the fog will put on a show. Here’s a breakdown.
#1 Use Weather Apps like AccuWeather (With a Grain of Salt)
One of the easiest ways to start is by checking the cloud coverage and cloud ceiling on AccuWeather or similar apps. If the cloud ceiling is below 1,500 ft, there’s a good chance you’ll get the cloud inversion at the summit of Mt. Tam, which is just over 2,500 ft in elevation.
That’s what I went off of the first time—and while it did help, I also realized something important:
Apps like AccuWeather don’t always capture the marine layer properly. Sometimes, they show a high cloud ceiling (like 30,000 ft) even when there’s still dense fog hugging the coast. That’s because they’re often referring to mid- or high-level cloud layers rather than the low stratus marine layer that creates that inversion magic.
So—helpful, but not foolproof.
#2 Use the Golden Gate Bridge as a Real-Life Fog Indicator
If you’re already in San Francisco (less than an hour’s drive from Mt. Tam), the Golden Gate Bridge is your best on-the-ground fog predictor.
When you see a thick, dreamy blanket of fog rolling in with just the bridge towers peeking out—that’s a great sign. It usually means the marine layer is low enough to create an inversion at Mt. Tam, and the summit will be above the clouds. It’s basically nature’s way of giving you a green light.
Even if you’re not in the city, you can still check the Golden Gate Bridge webcam (or just search “Golden Gate Bridge webcam”) to get a live visual of current fog conditions.
#3 Show Up and Adjust: Let the Fog Guide You
If you’re coming from farther away or planning a day trip where you can’t be fog-chasing on a whim, here’s the best advice I can offer:
Visit in July or August, then adjust your viewpoint based on the height of the fog once you arrive.
There are two key elevation zones to keep in mind.
- If the fog is very low: Head to Trojan Point. It’s lower in elevation than the East Peak, but when the clouds are beneath it, this spot can feel otherworldly. The view is wide and open—and in my opinion, even more beautiful than the summit when the inversion lines up just right.
- If the fog is higher: Don’t turn around if Trojan Point is fully socked in. Drive all the way up to the East Peak and the Fire Lookout. That’s what we did—and it paid off! We popped right above the fog line and found ourselves surrounded by a glowing white ocean stretching all the way to the horizon.
Let’s now start with the itinerary, We started our day a little after lunch—a deliberate choice. In the summer, sunsets stretch late into the evening, and our goal was to catch the cloud inversion during golden hour. So instead of rushing in the morning, we paced ourselves.
Muir Beach Overlook
Time required: 30 minutes
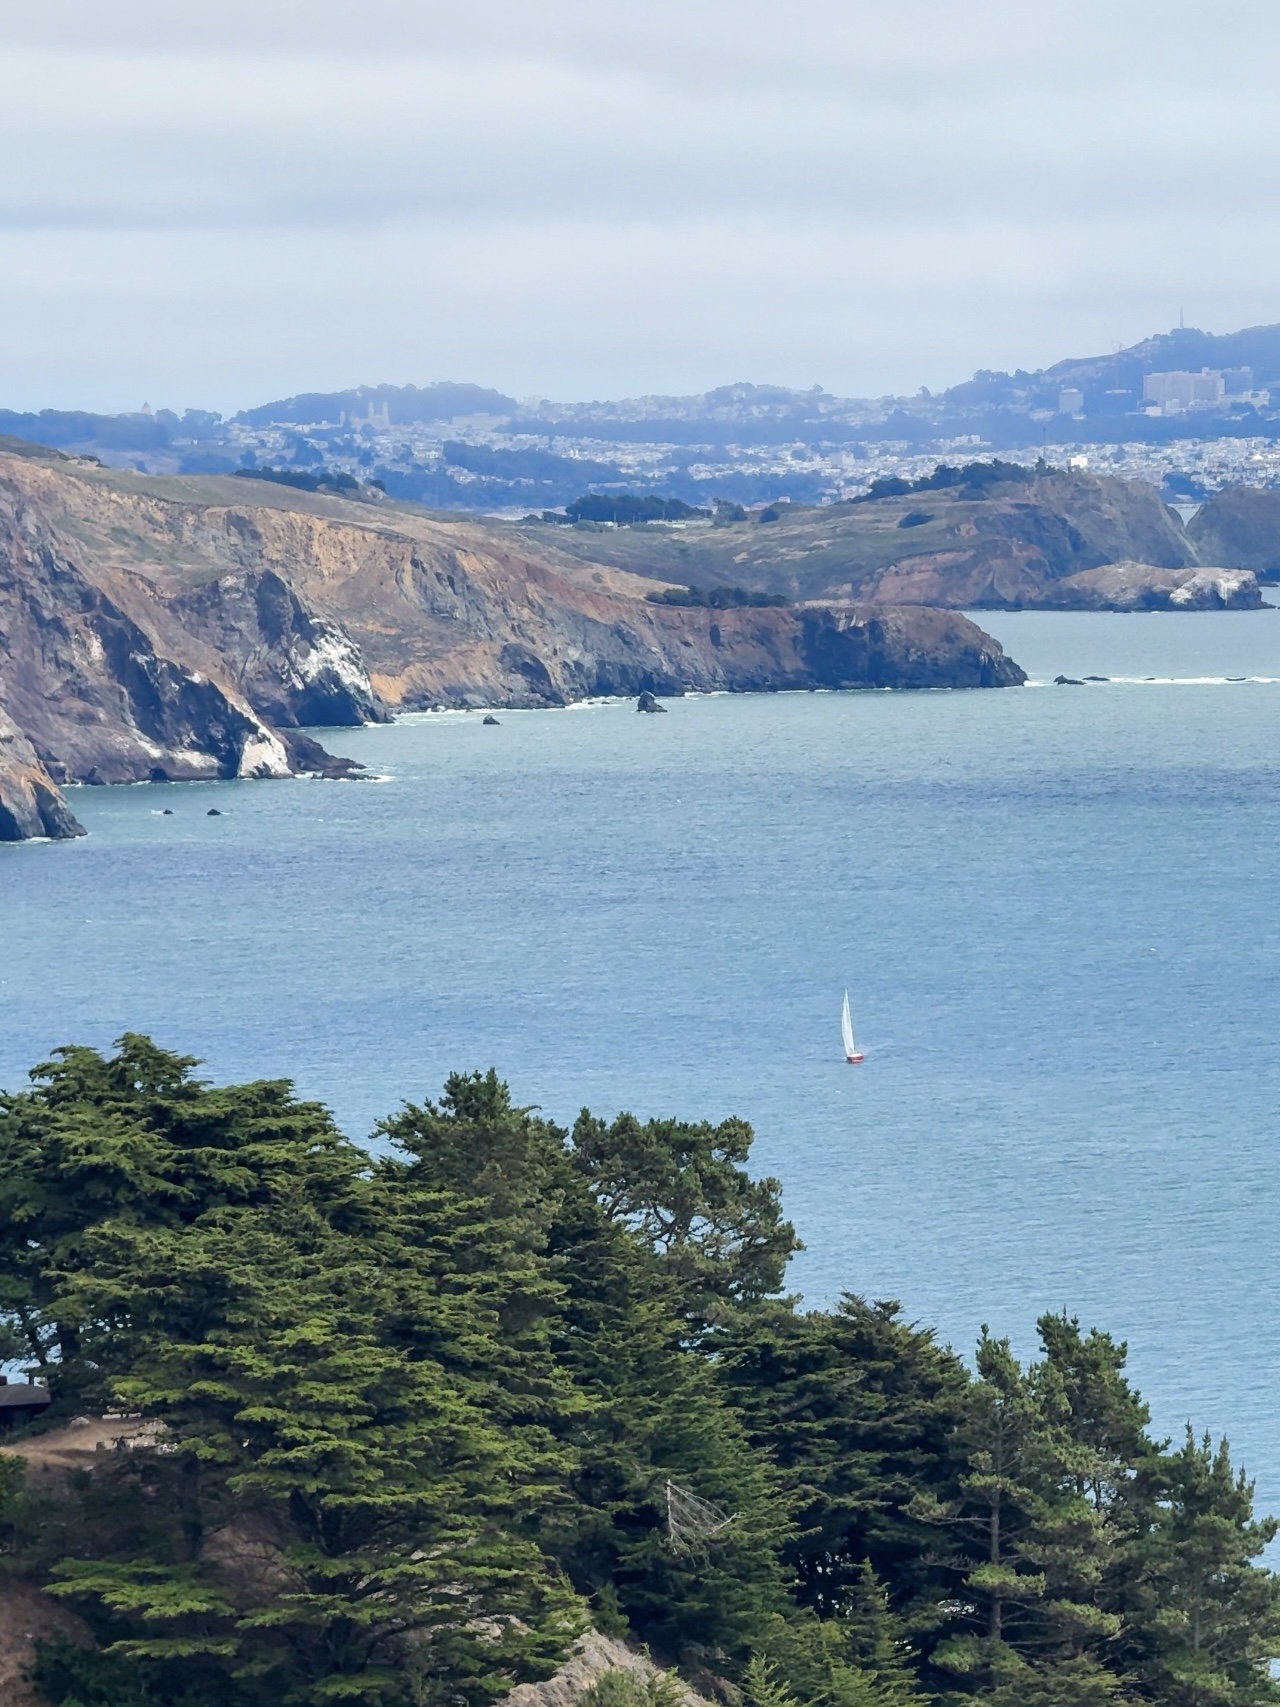
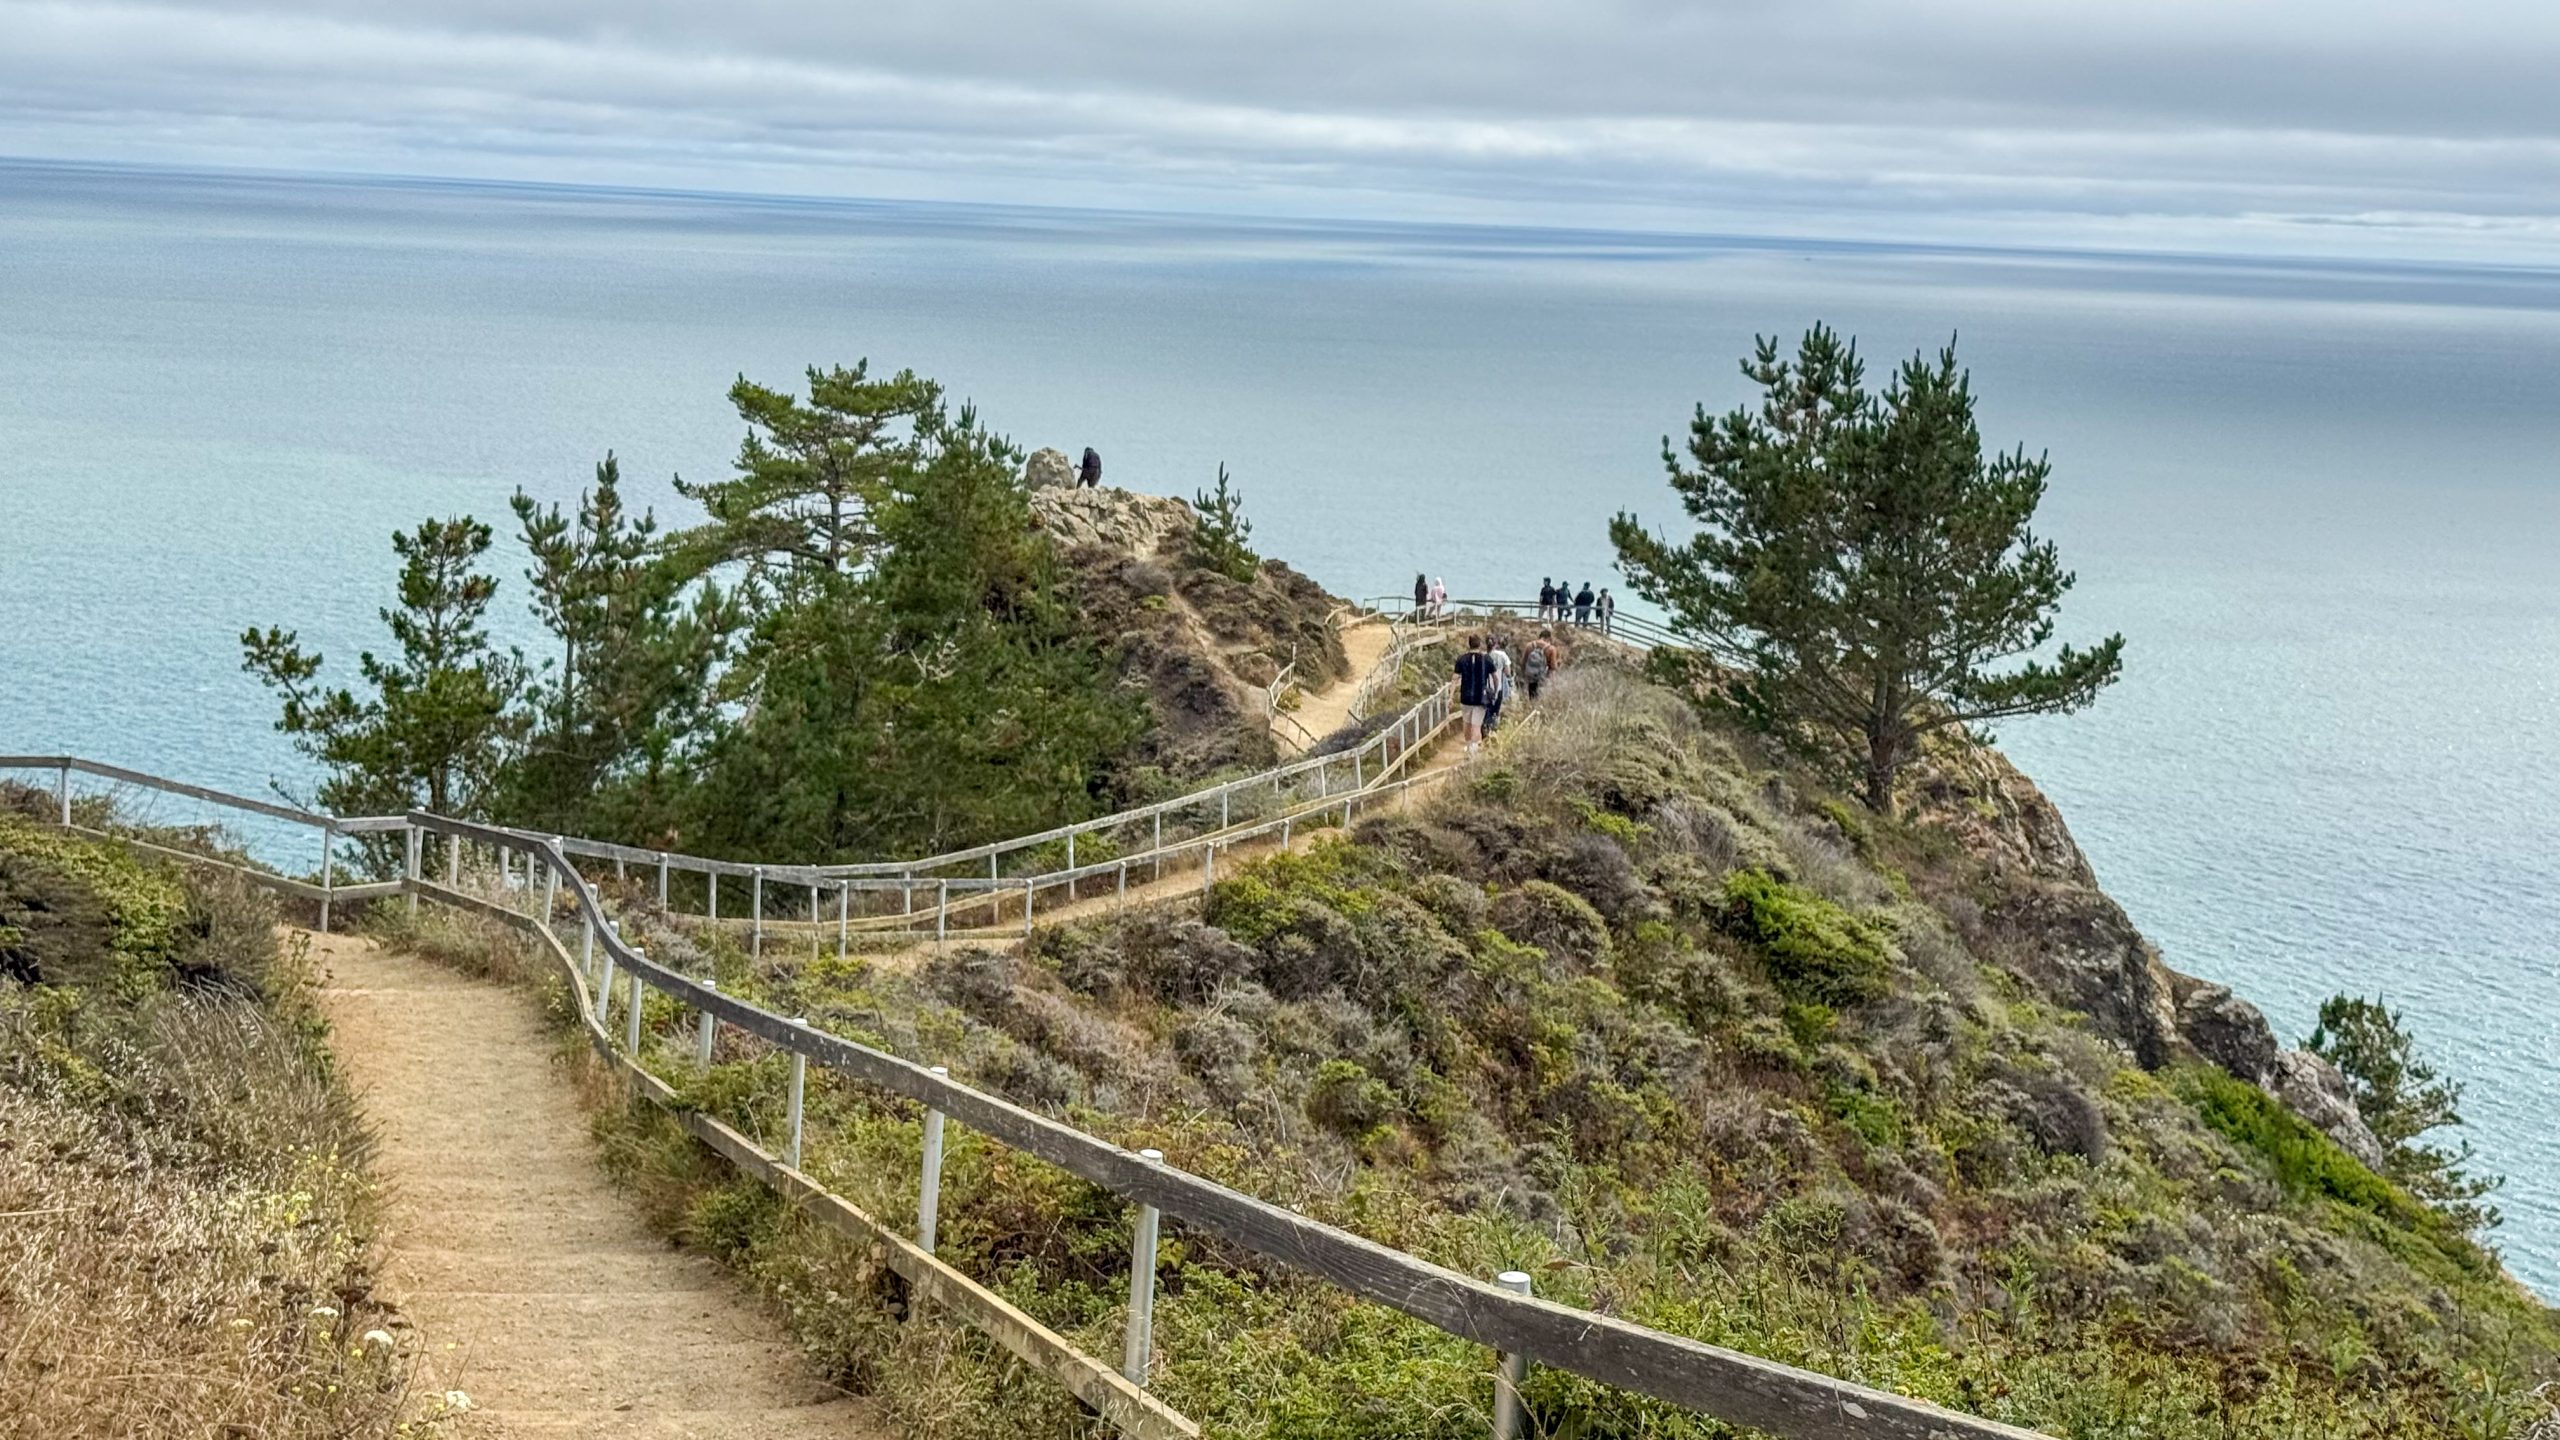
On the winding drive up to Mt. Tam, our first stop was the Muir Beach Overlook. This spot is easy to miss, but it’s well worth pulling over for. A short trail takes you to a wooden platform with sweeping views of Muir Beach, coastal bluffs, and the endless Pacific.
It’s a great stop if the morning fog has cleared—you’ll be treated to dramatic views of the cliffs plunging into the ocean. Even when the fog lingers, there’s something peaceful and eerie about the waves disappearing into the mist.
Parkside Bakery
Time required: 1 hour

Before heading out for a hike, we made a quick pit stop at Parkside Bakery in Stinson Beach to grab a bite. Tucked beside a small park and just a short walk from the beach, this spot is part of a charming trio: a sit-down café, a snack bar, and the bakery itself.
The café offers a full menu—great if you’re looking for a proper lunch or early dinner with indoor or patio seating. The snack bar has a more casual vibe, serving hot dogs, burgers, fries, and other quick beach-town fare.
But we stopped there for the bakery, which had a lovely selection of fresh croissants, muffins, and other baked goods. We grabbed a few pastries and found a shady spot in the adjacent park to sit and snack. It was the perfect low-key refuel before we made our way up into the hills.
Hiking around Mount Tamalpais
Time required: 3 hours
Next, we made our way into Mount Tamalpais State Park for a hike—and honestly, this was one of the highlights of our day.
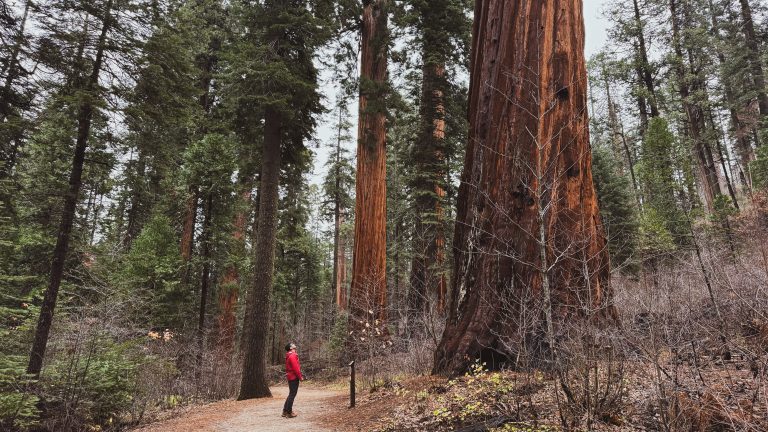
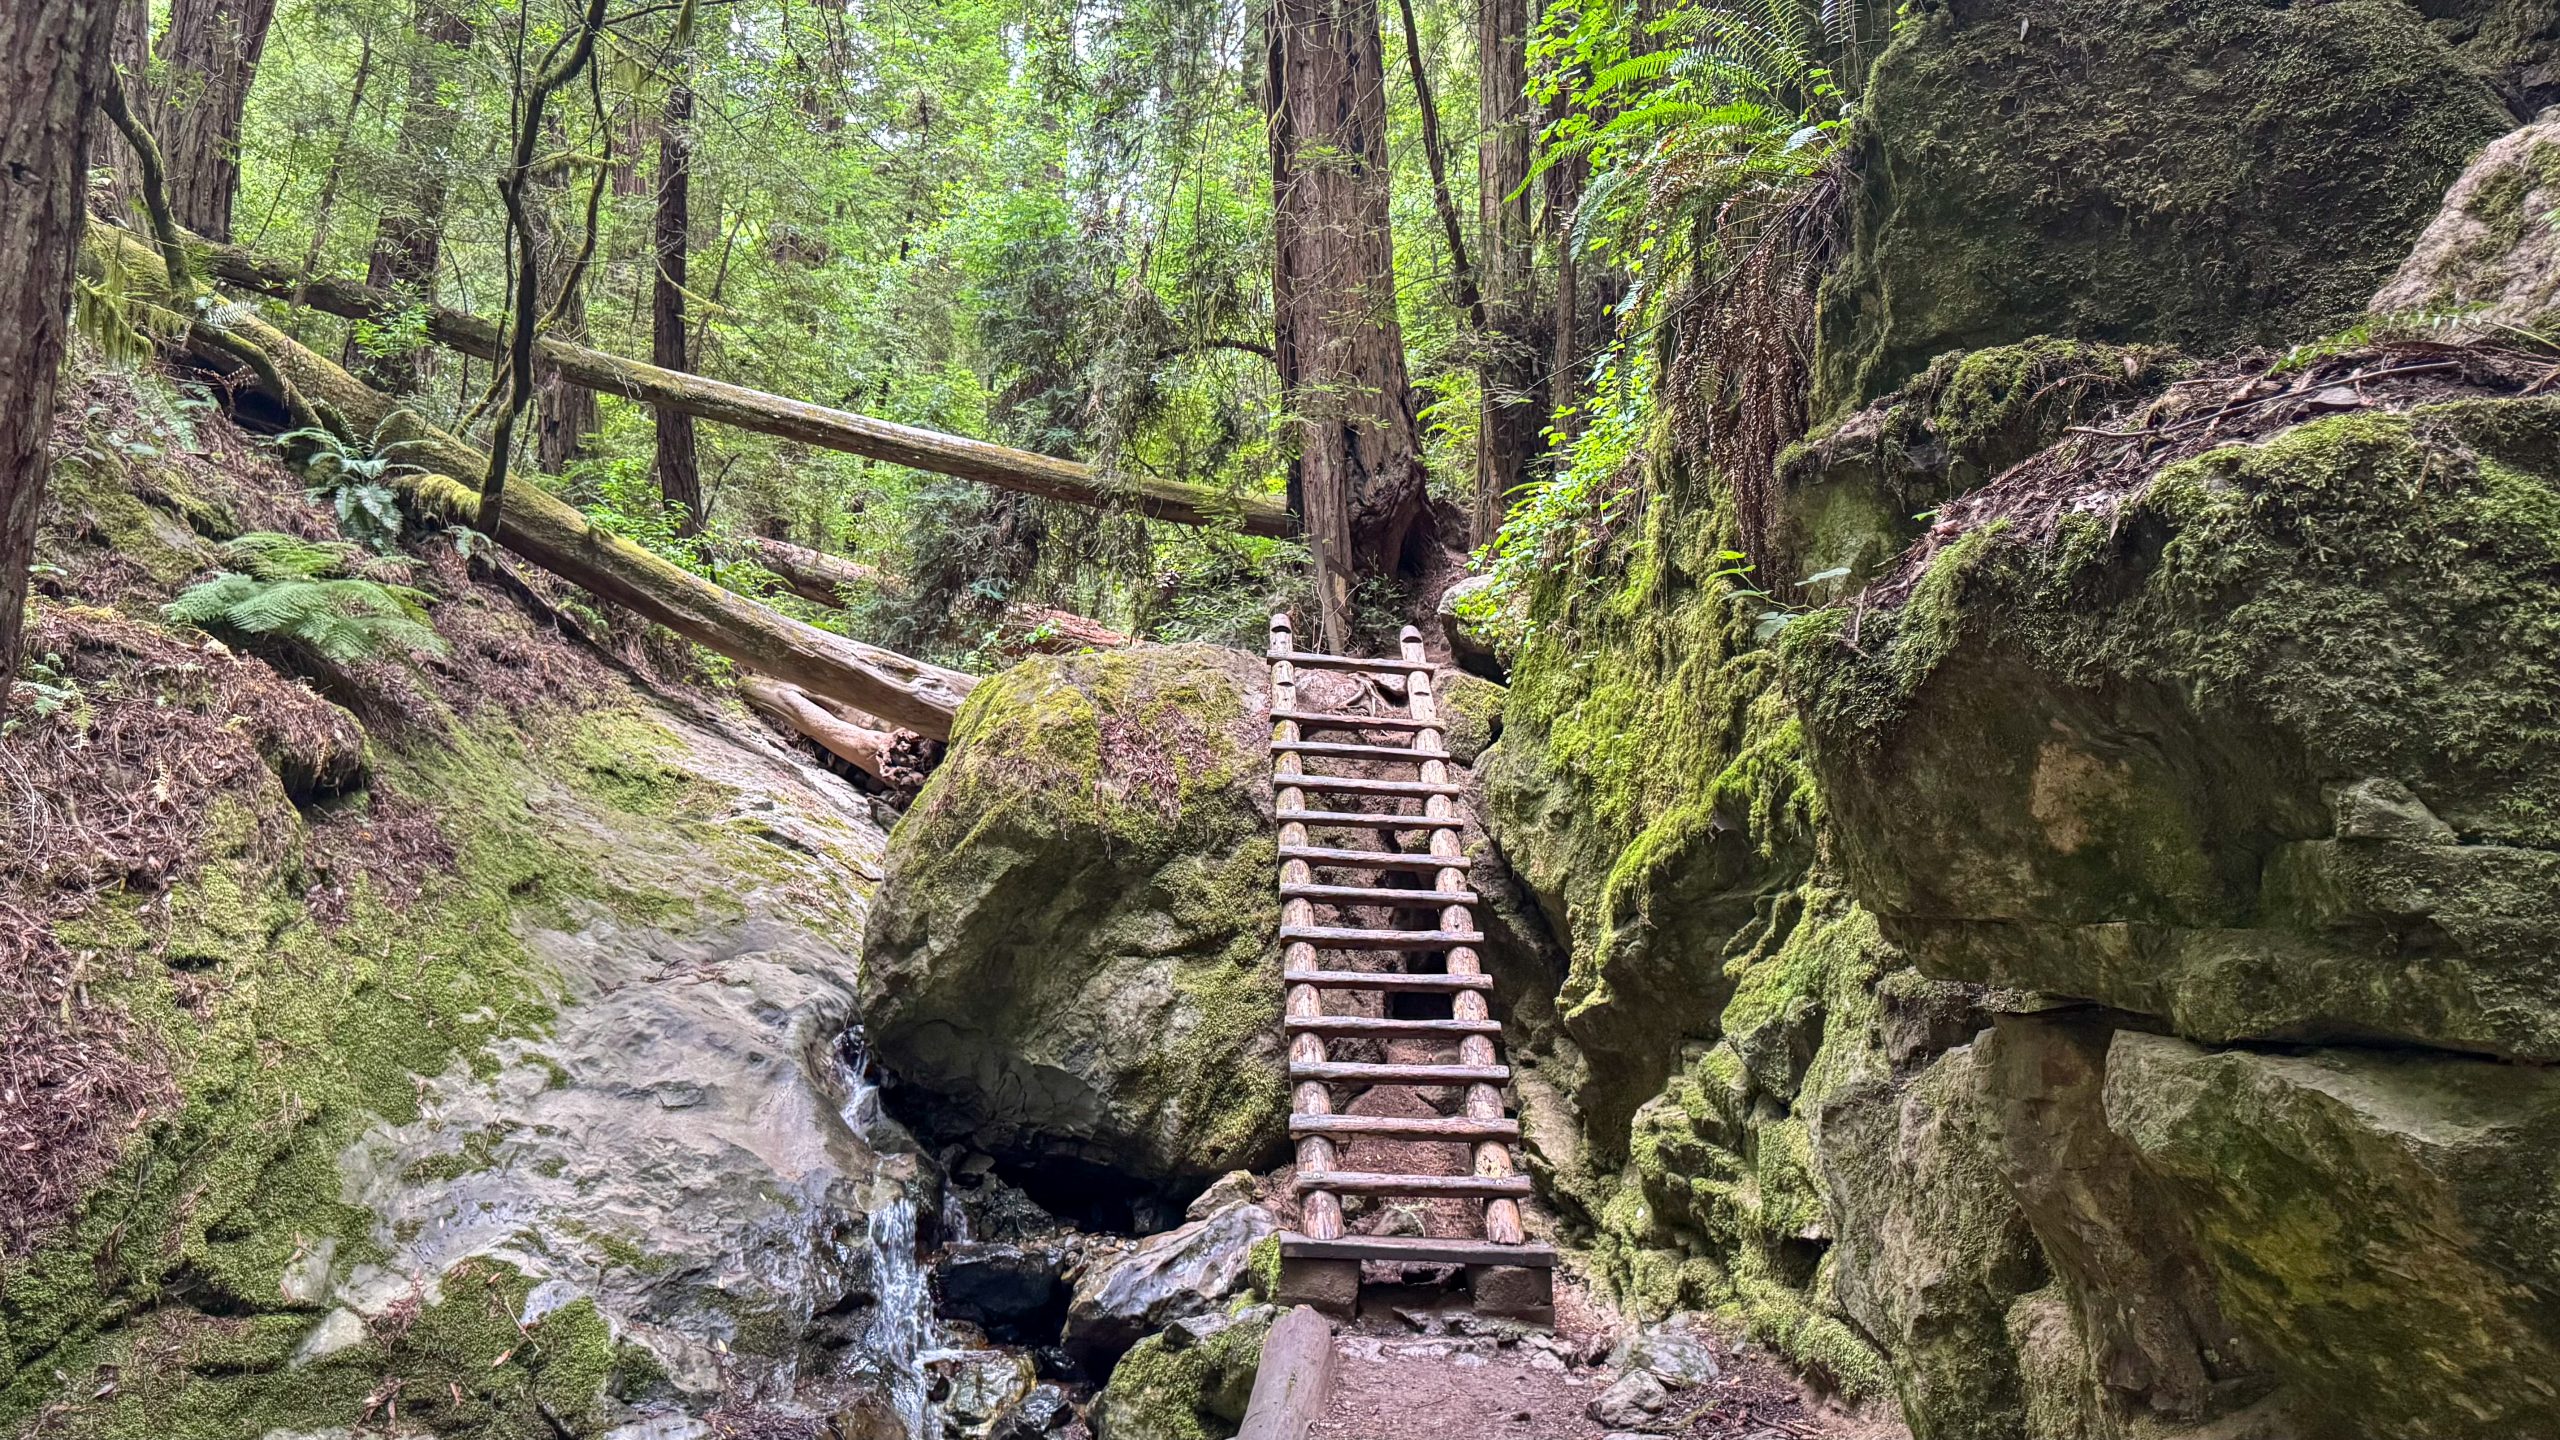
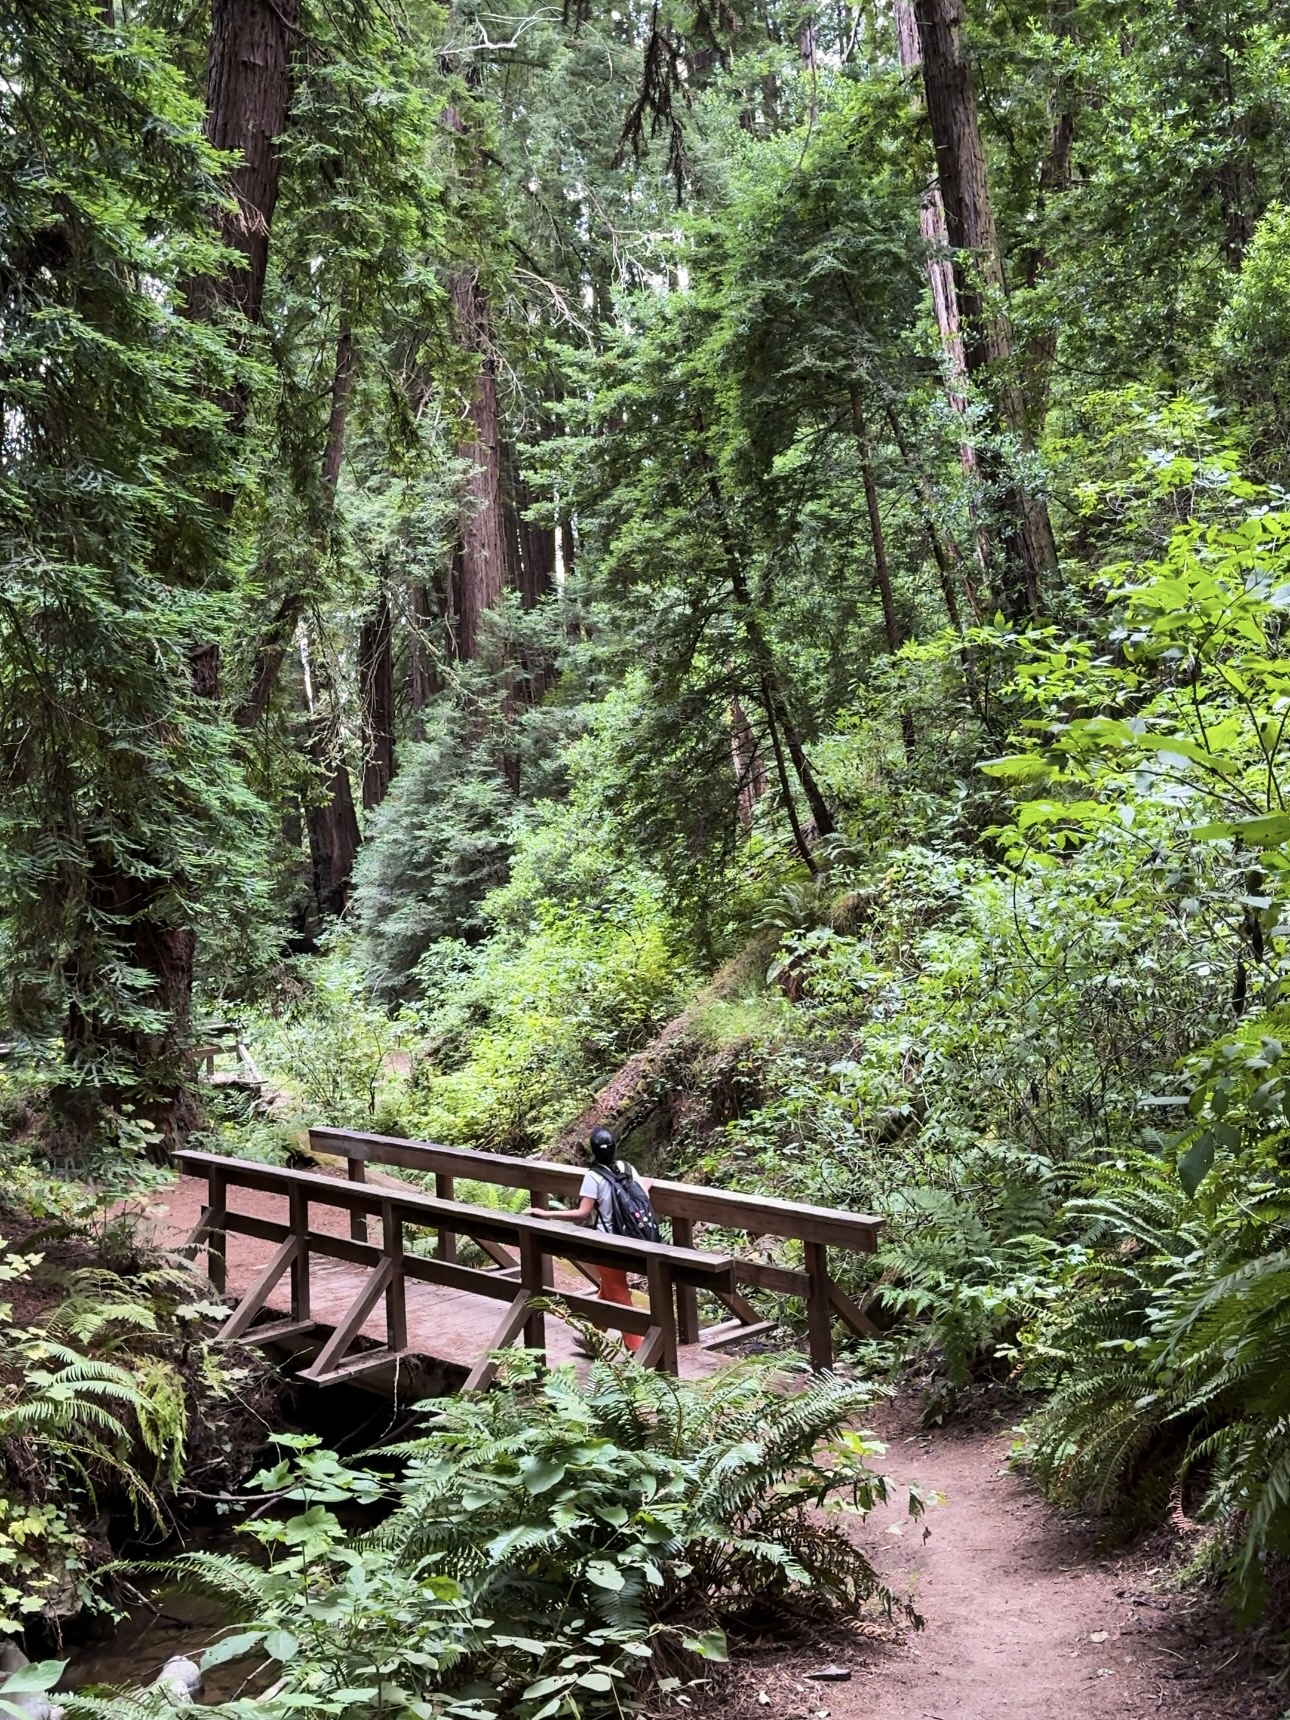
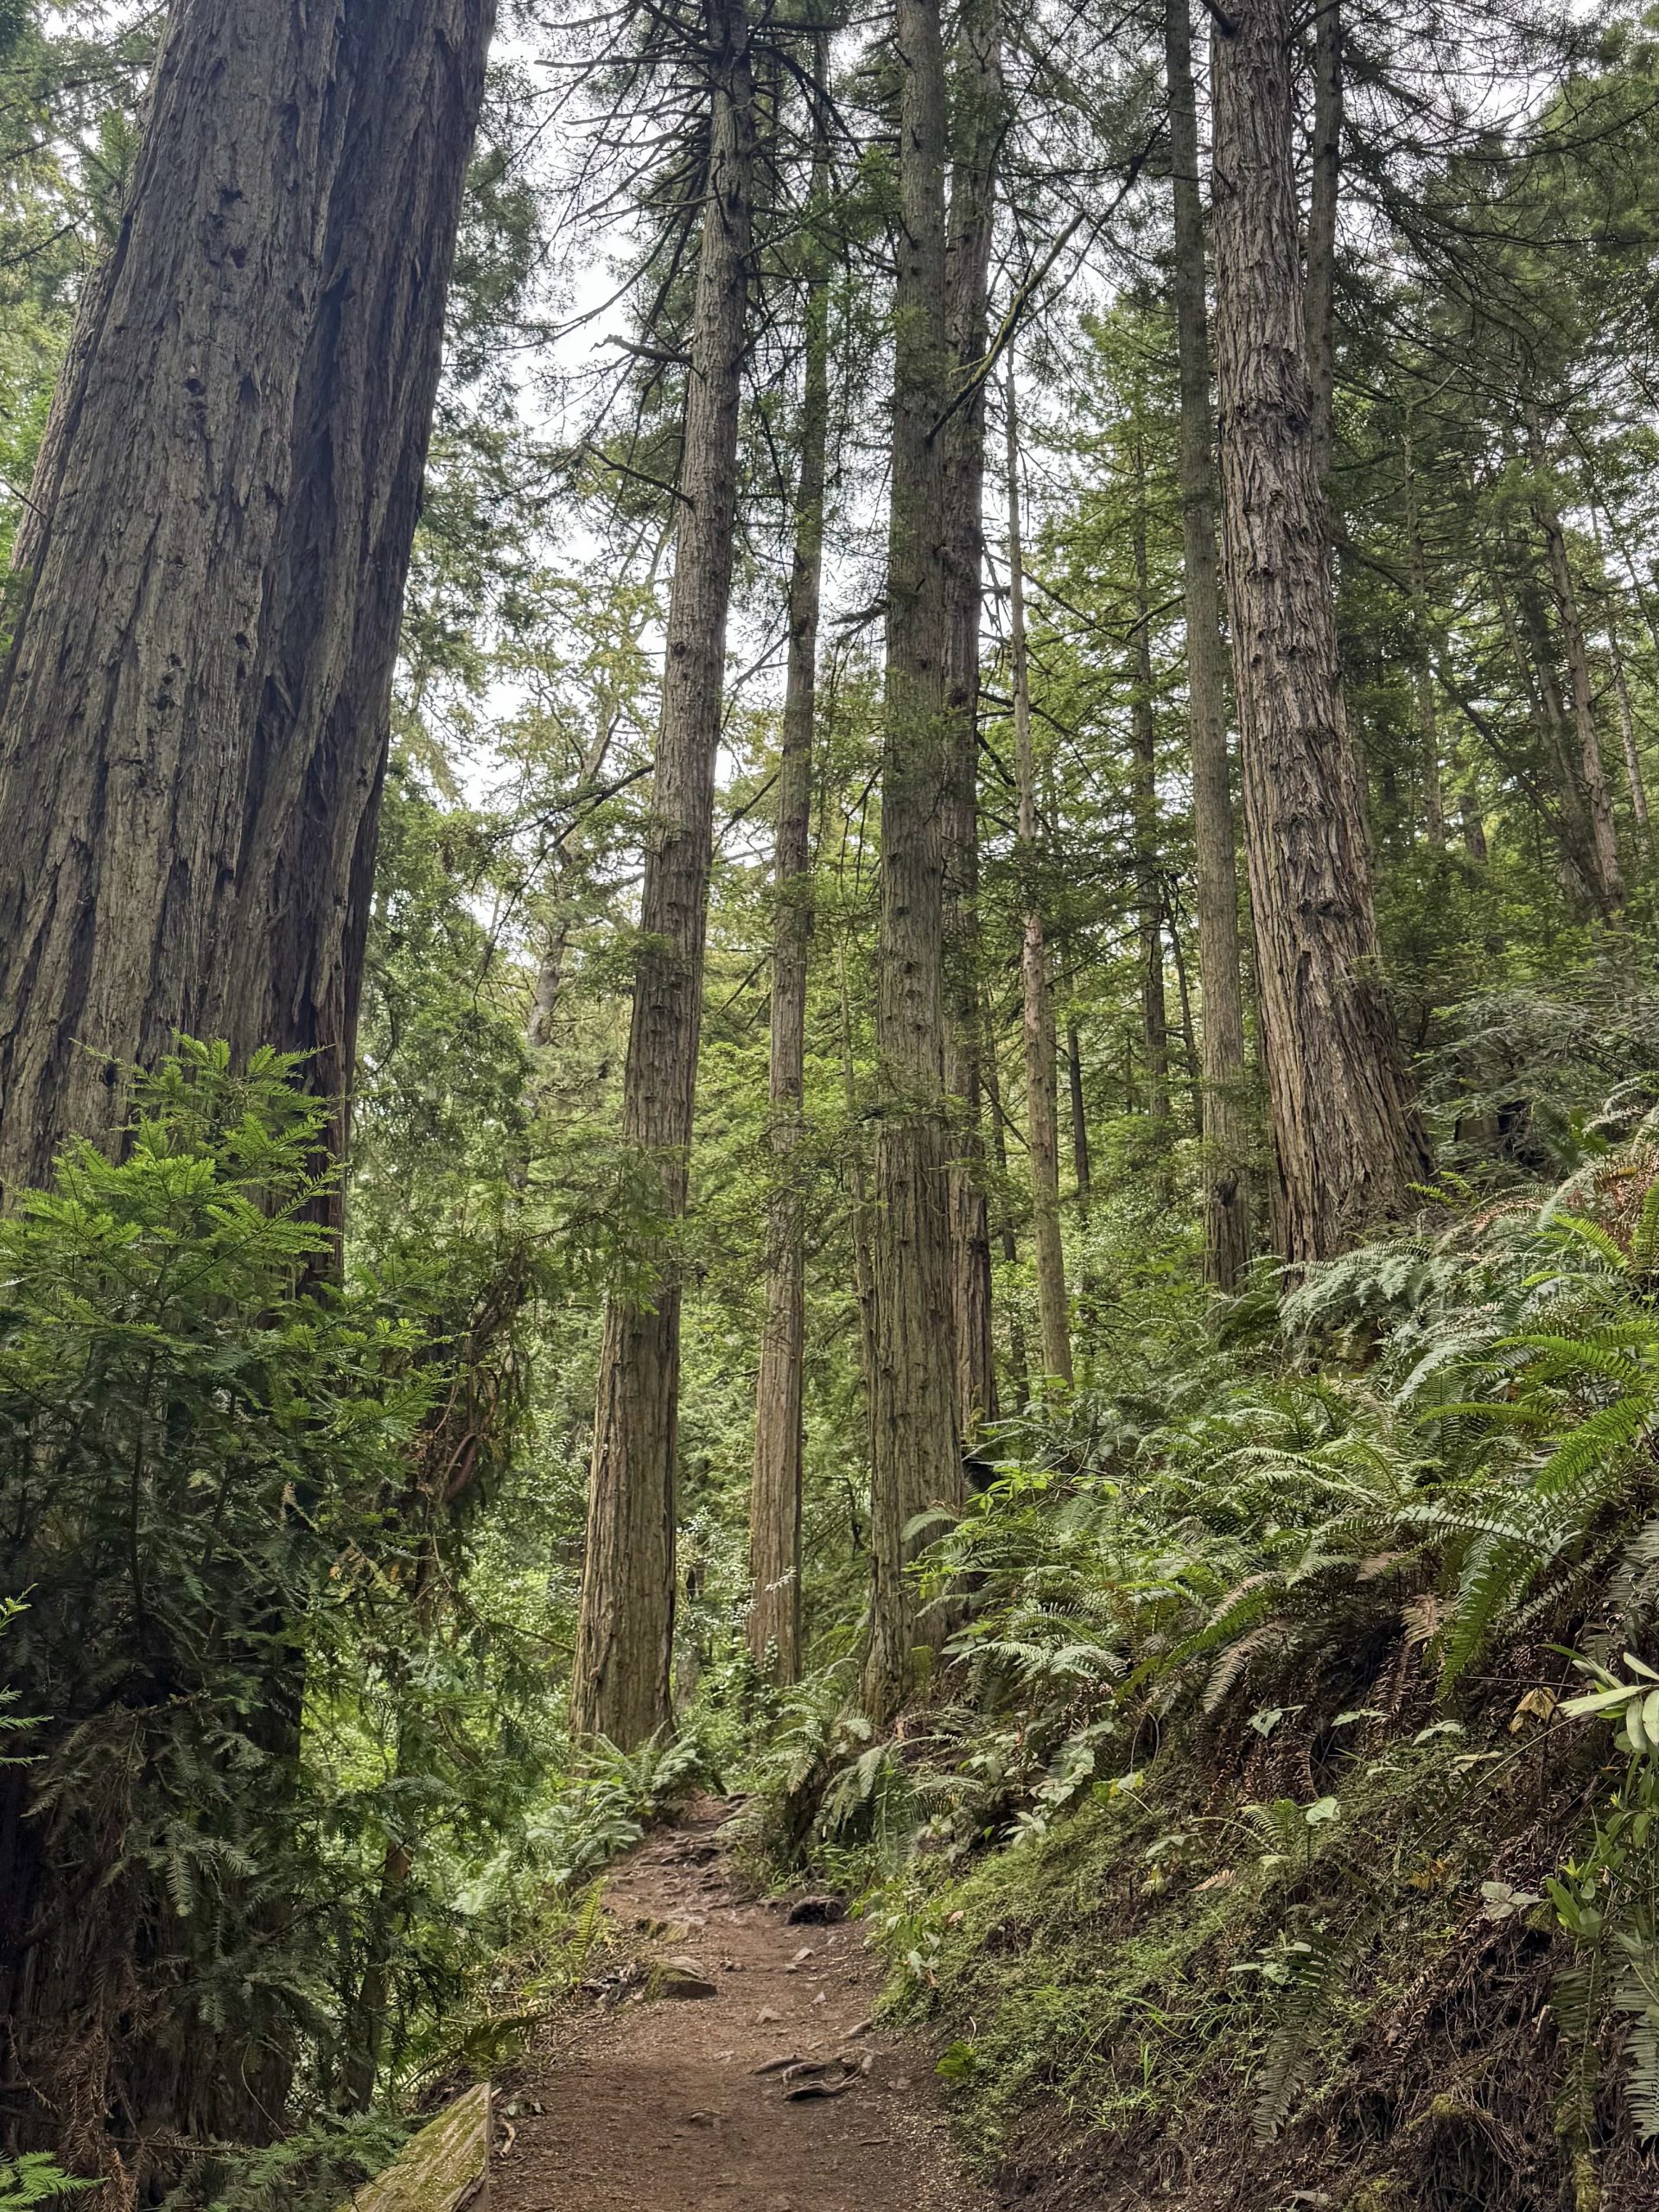
There are several incredible trails in the Mt Tam area, and some of the most popular ones include Cataract Falls, the Dipsea Trail, and the Steep Ravine Trail. We opted for a section of Steep Ravine, a trail that winds along a babbling creek, shaded by towering redwoods and lined with lush green ferns. It’s the kind of trail that makes you feel like you’ve stepped into a fairytale.
Since we were hiking with our parents, we kept it light. We started from the Whitegate Ranch trailhead and hiked to the trail’s most iconic spot: the wooden ladder by the waterfall. This little stretch includes wooden bridges that crisscross the creek and a serene forest canopy that stays cool even in summer.
Tip: If you can, I’d recommend a longer hike – you can continue on Steep Ravine and even make a loop with the Dipsea Trail.
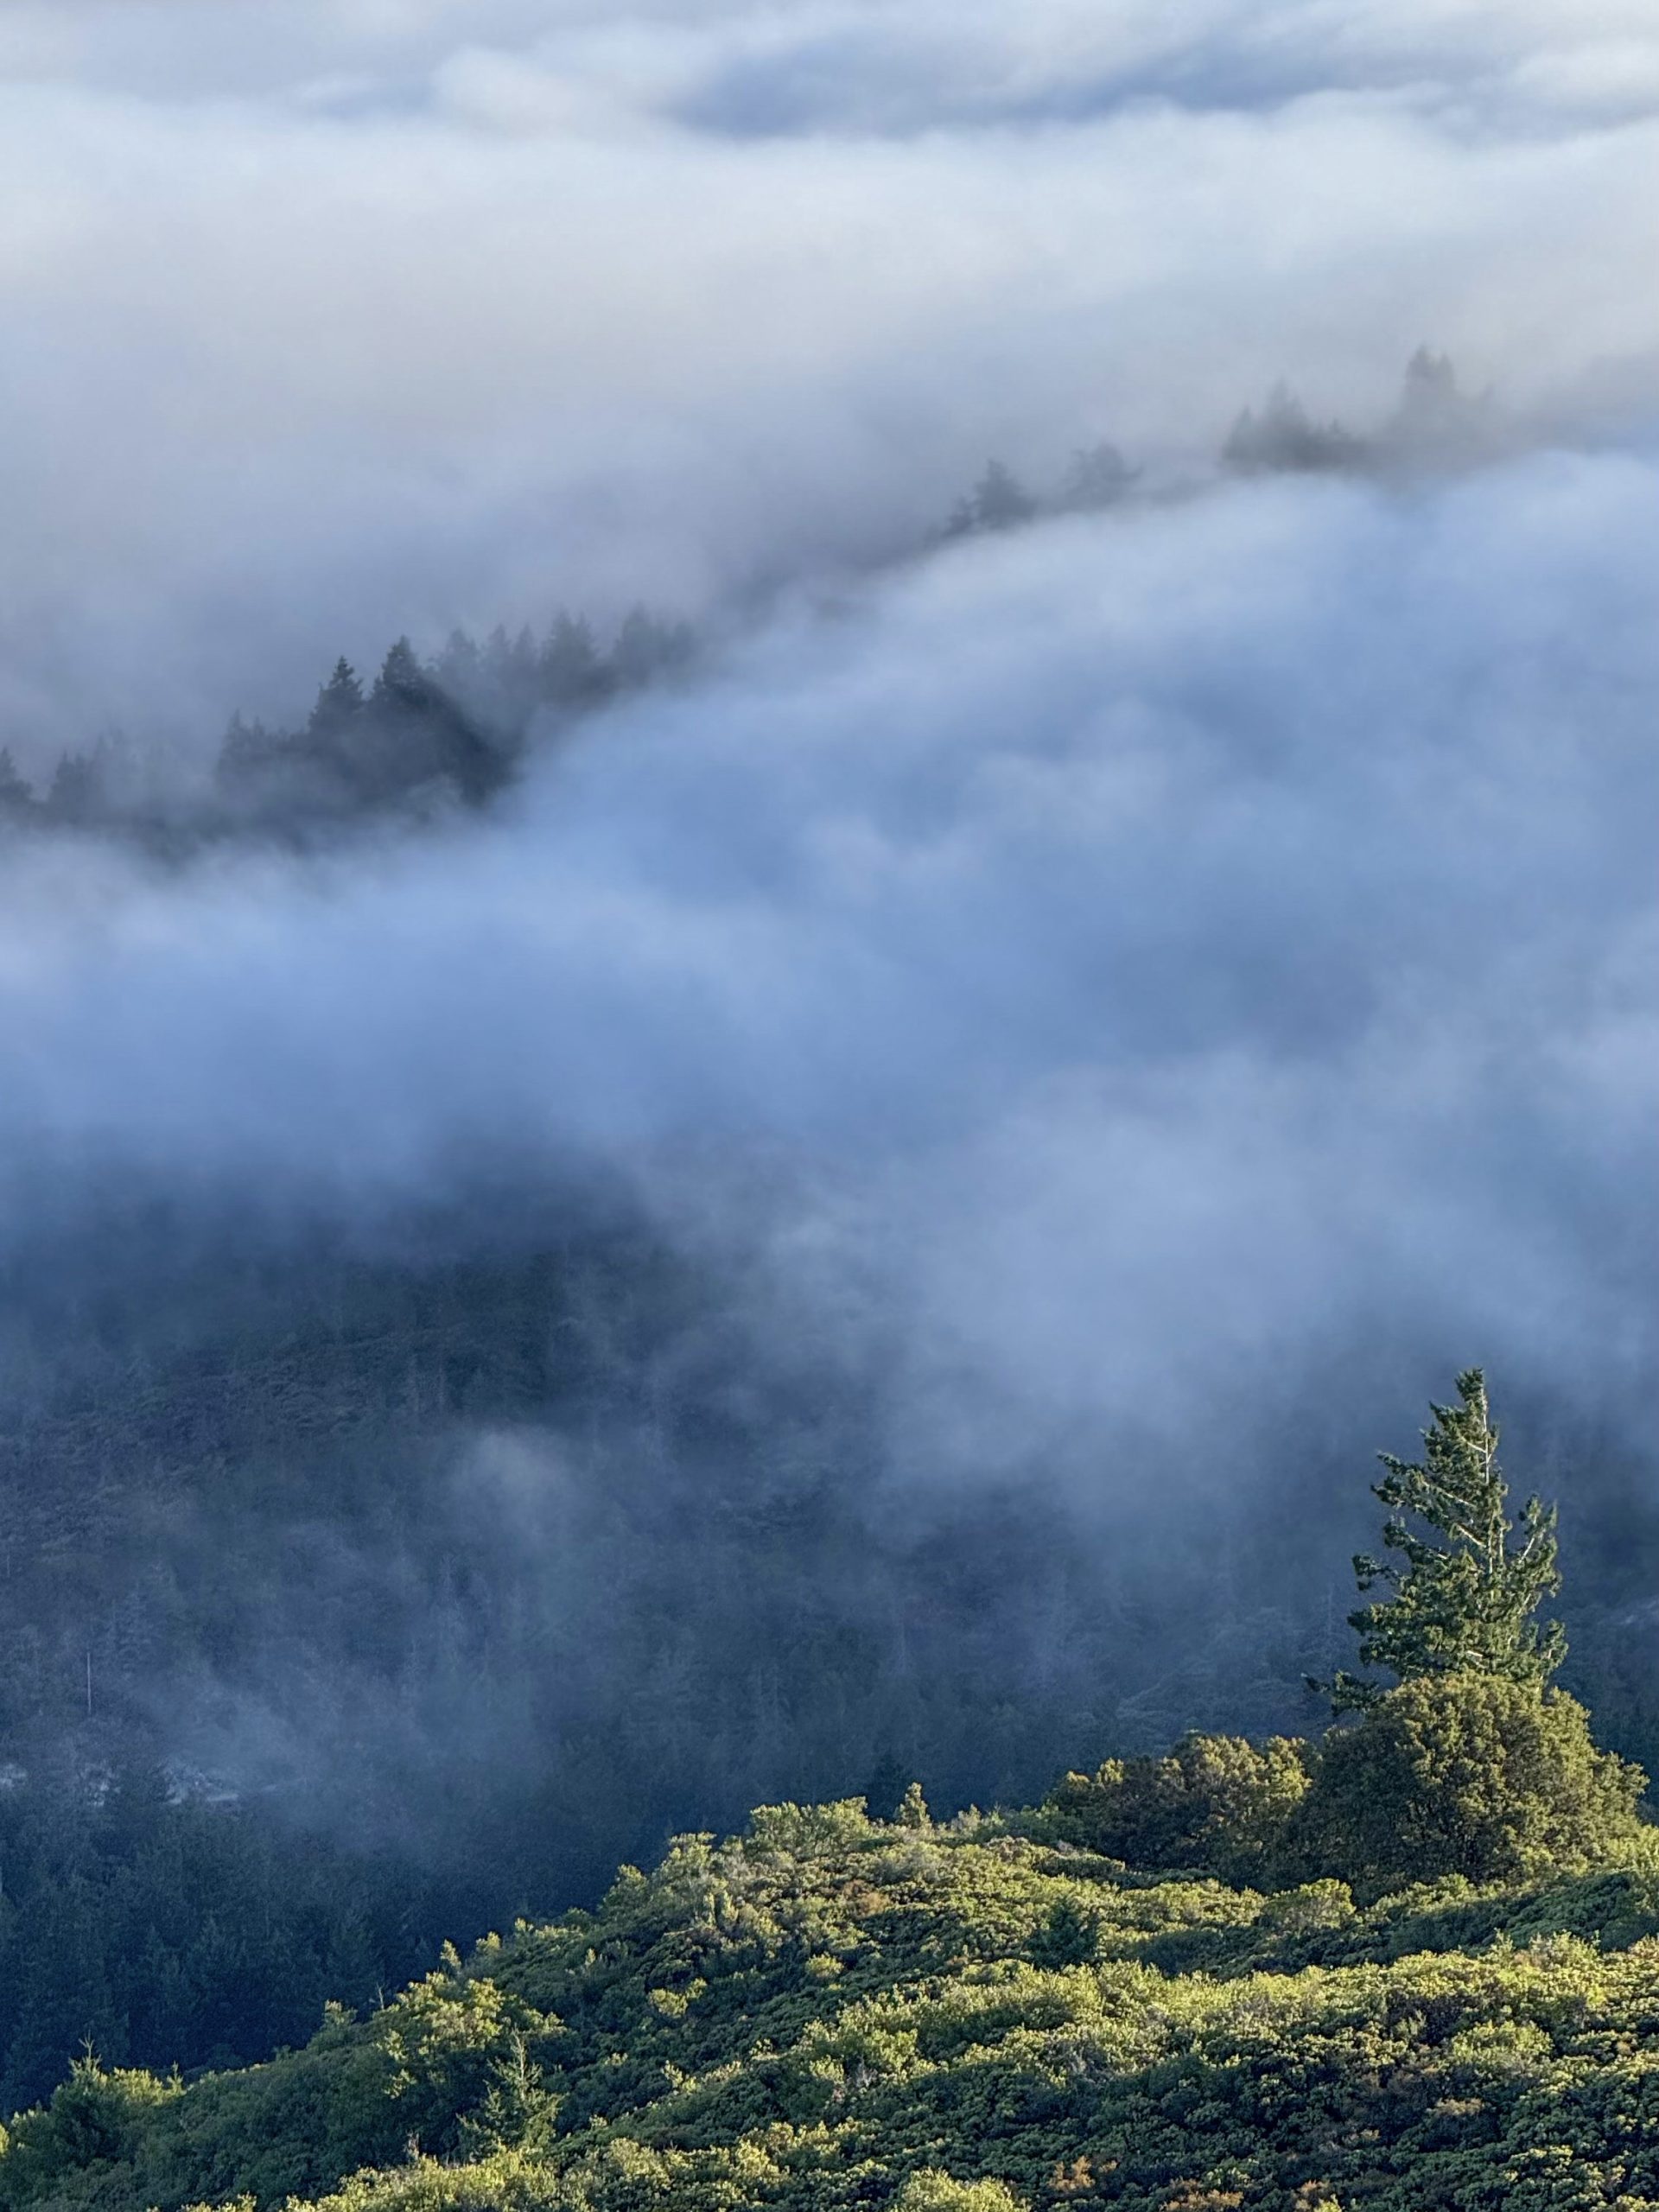
Scenic drives around Mount Tamalpais
Time required: 1 hour
After the hike, we continued our journey by driving through the heart of Mount Tamalpais. We made our way along the winding mountain roads—Panoramic Highway, Pantoll Road, and Ridgecrest Boulevard—and the views were stunning.
By then, the coastal fog had begun to roll in, and the drive felt like something out of a dream. Trees stood like silhouettes in the mist, and the road twisted through fog-draped hills. We took our time, stopping at a few viewpoints along the way to soak in the otherworldly atmosphere and snap some photos.
This stretch of the day wasn’t about rushing—it was about slowing down, breathing in the cool mountain air, and watching the landscape shift as the fog moved across the hills.
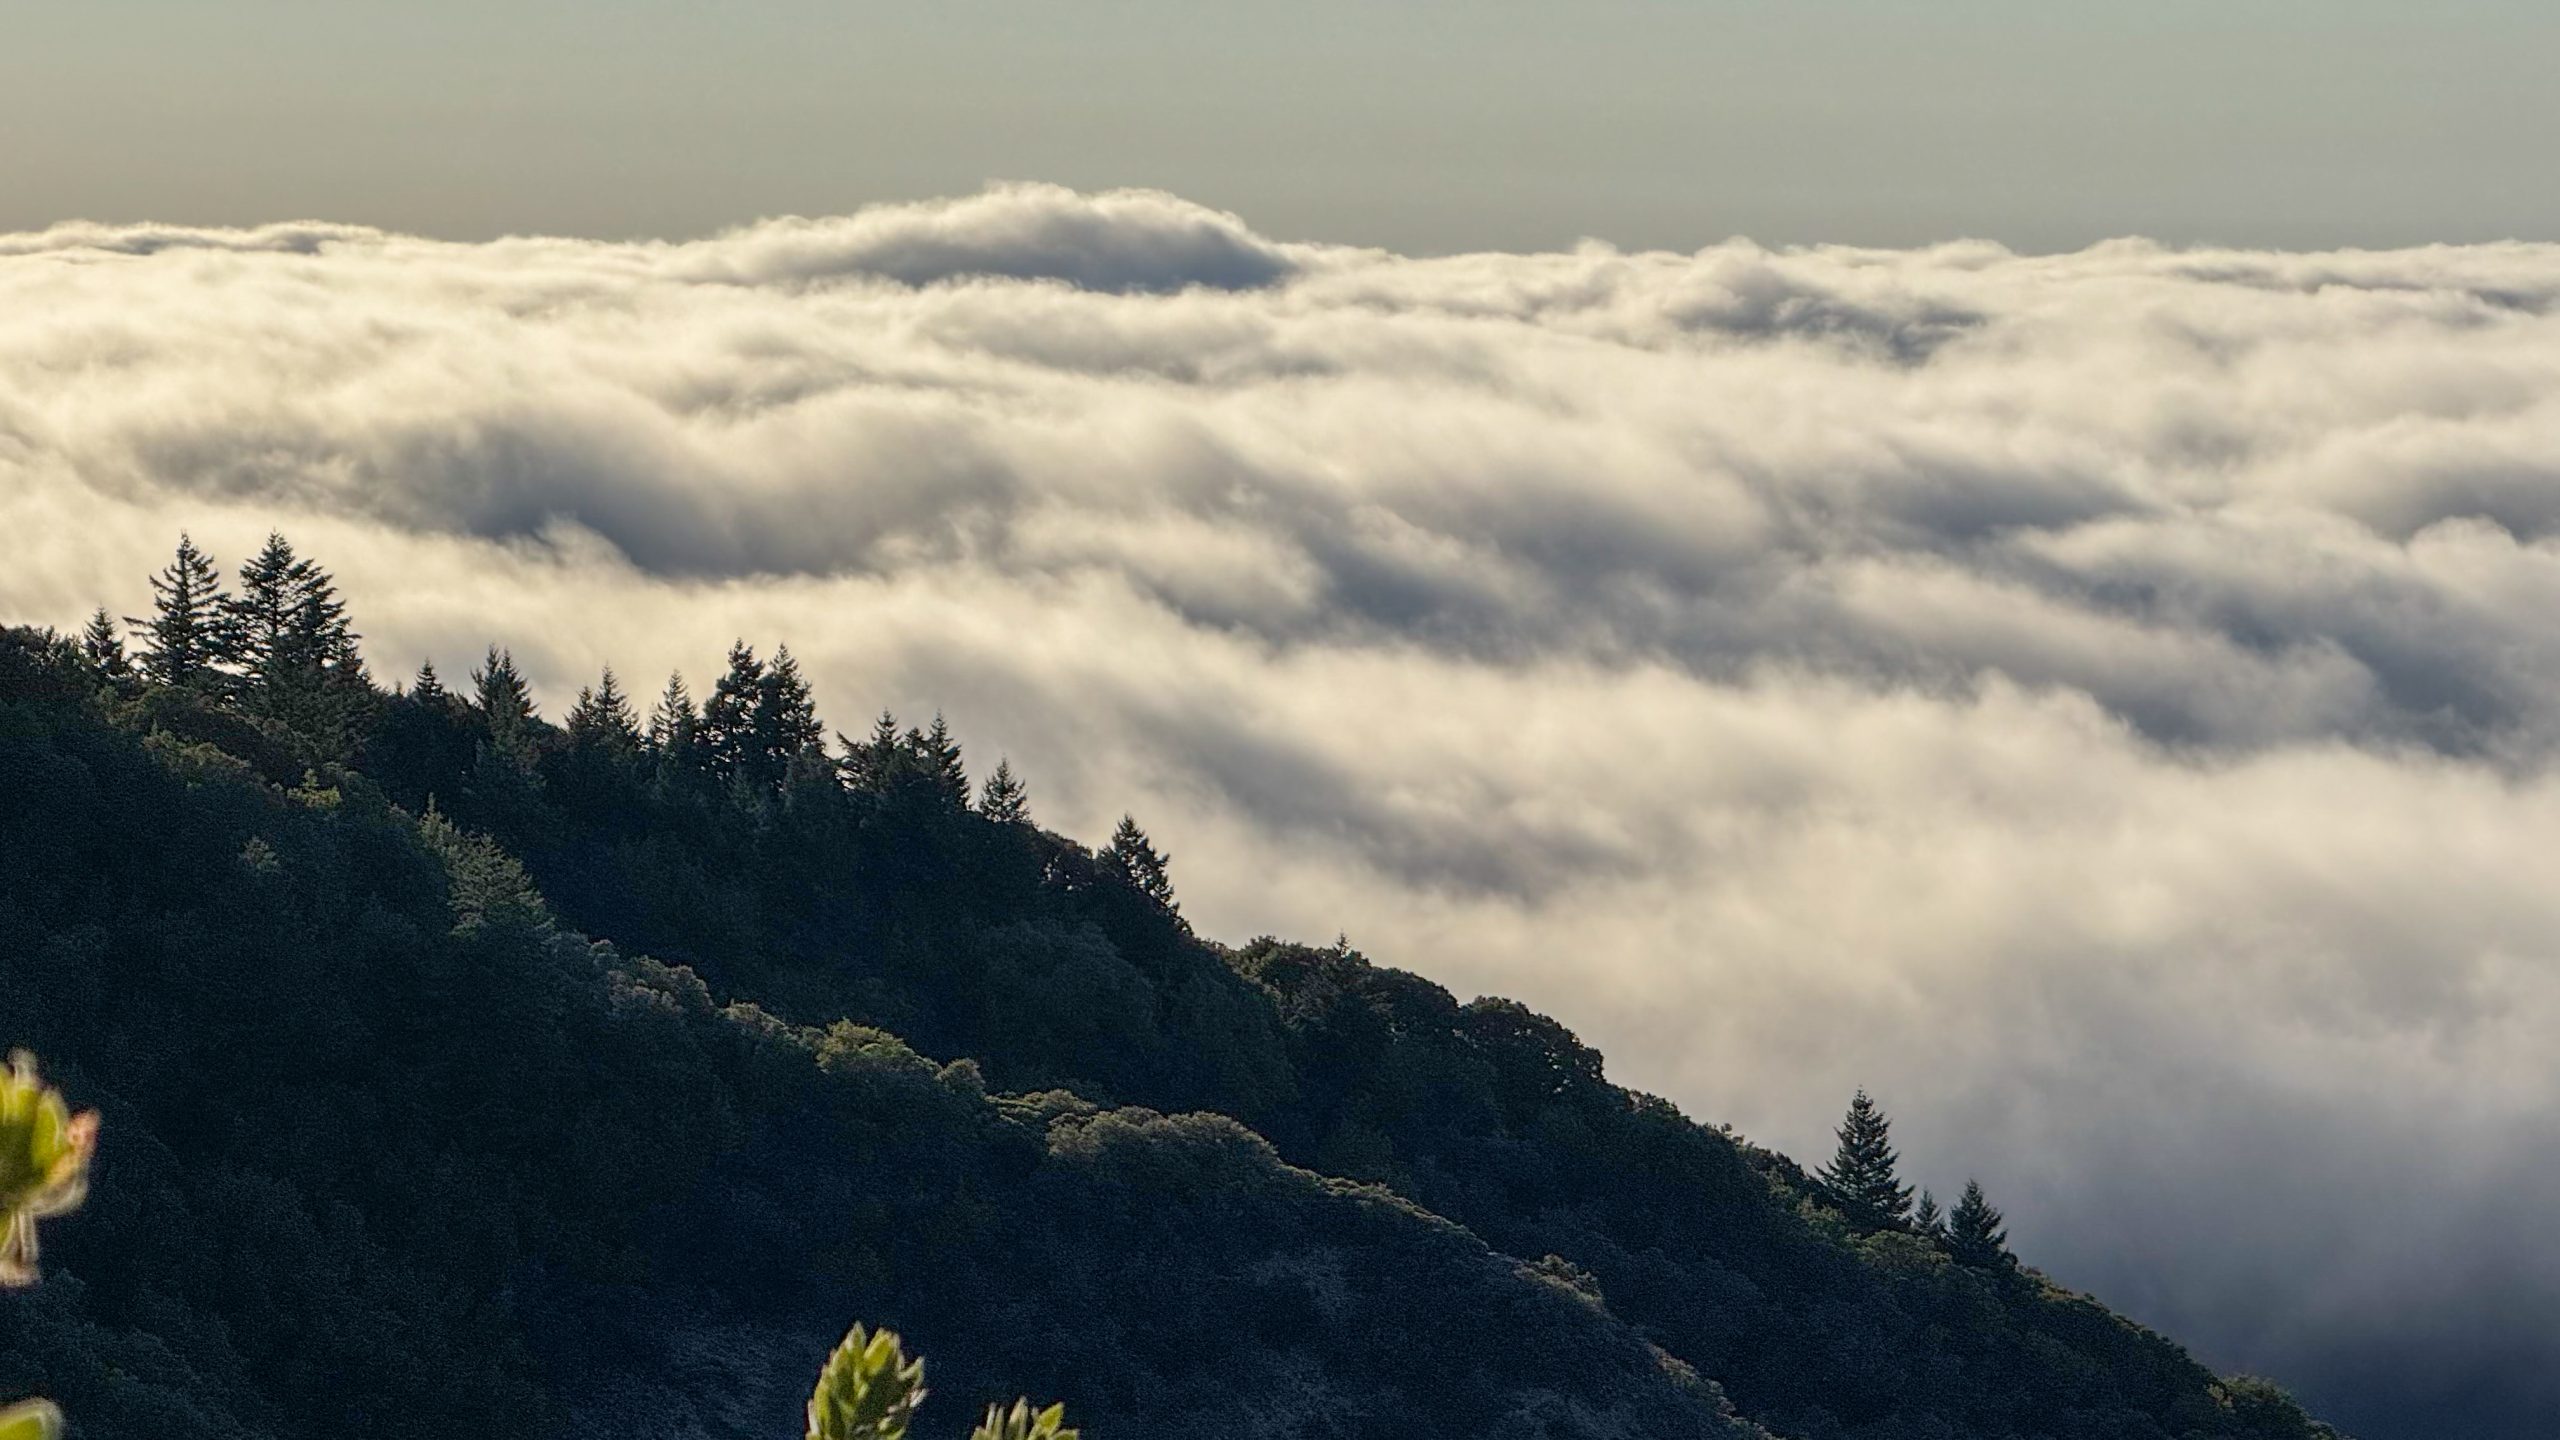
Witnessing Cloud Inversion at Mount Tamalpais
Time required: 1.5 hours
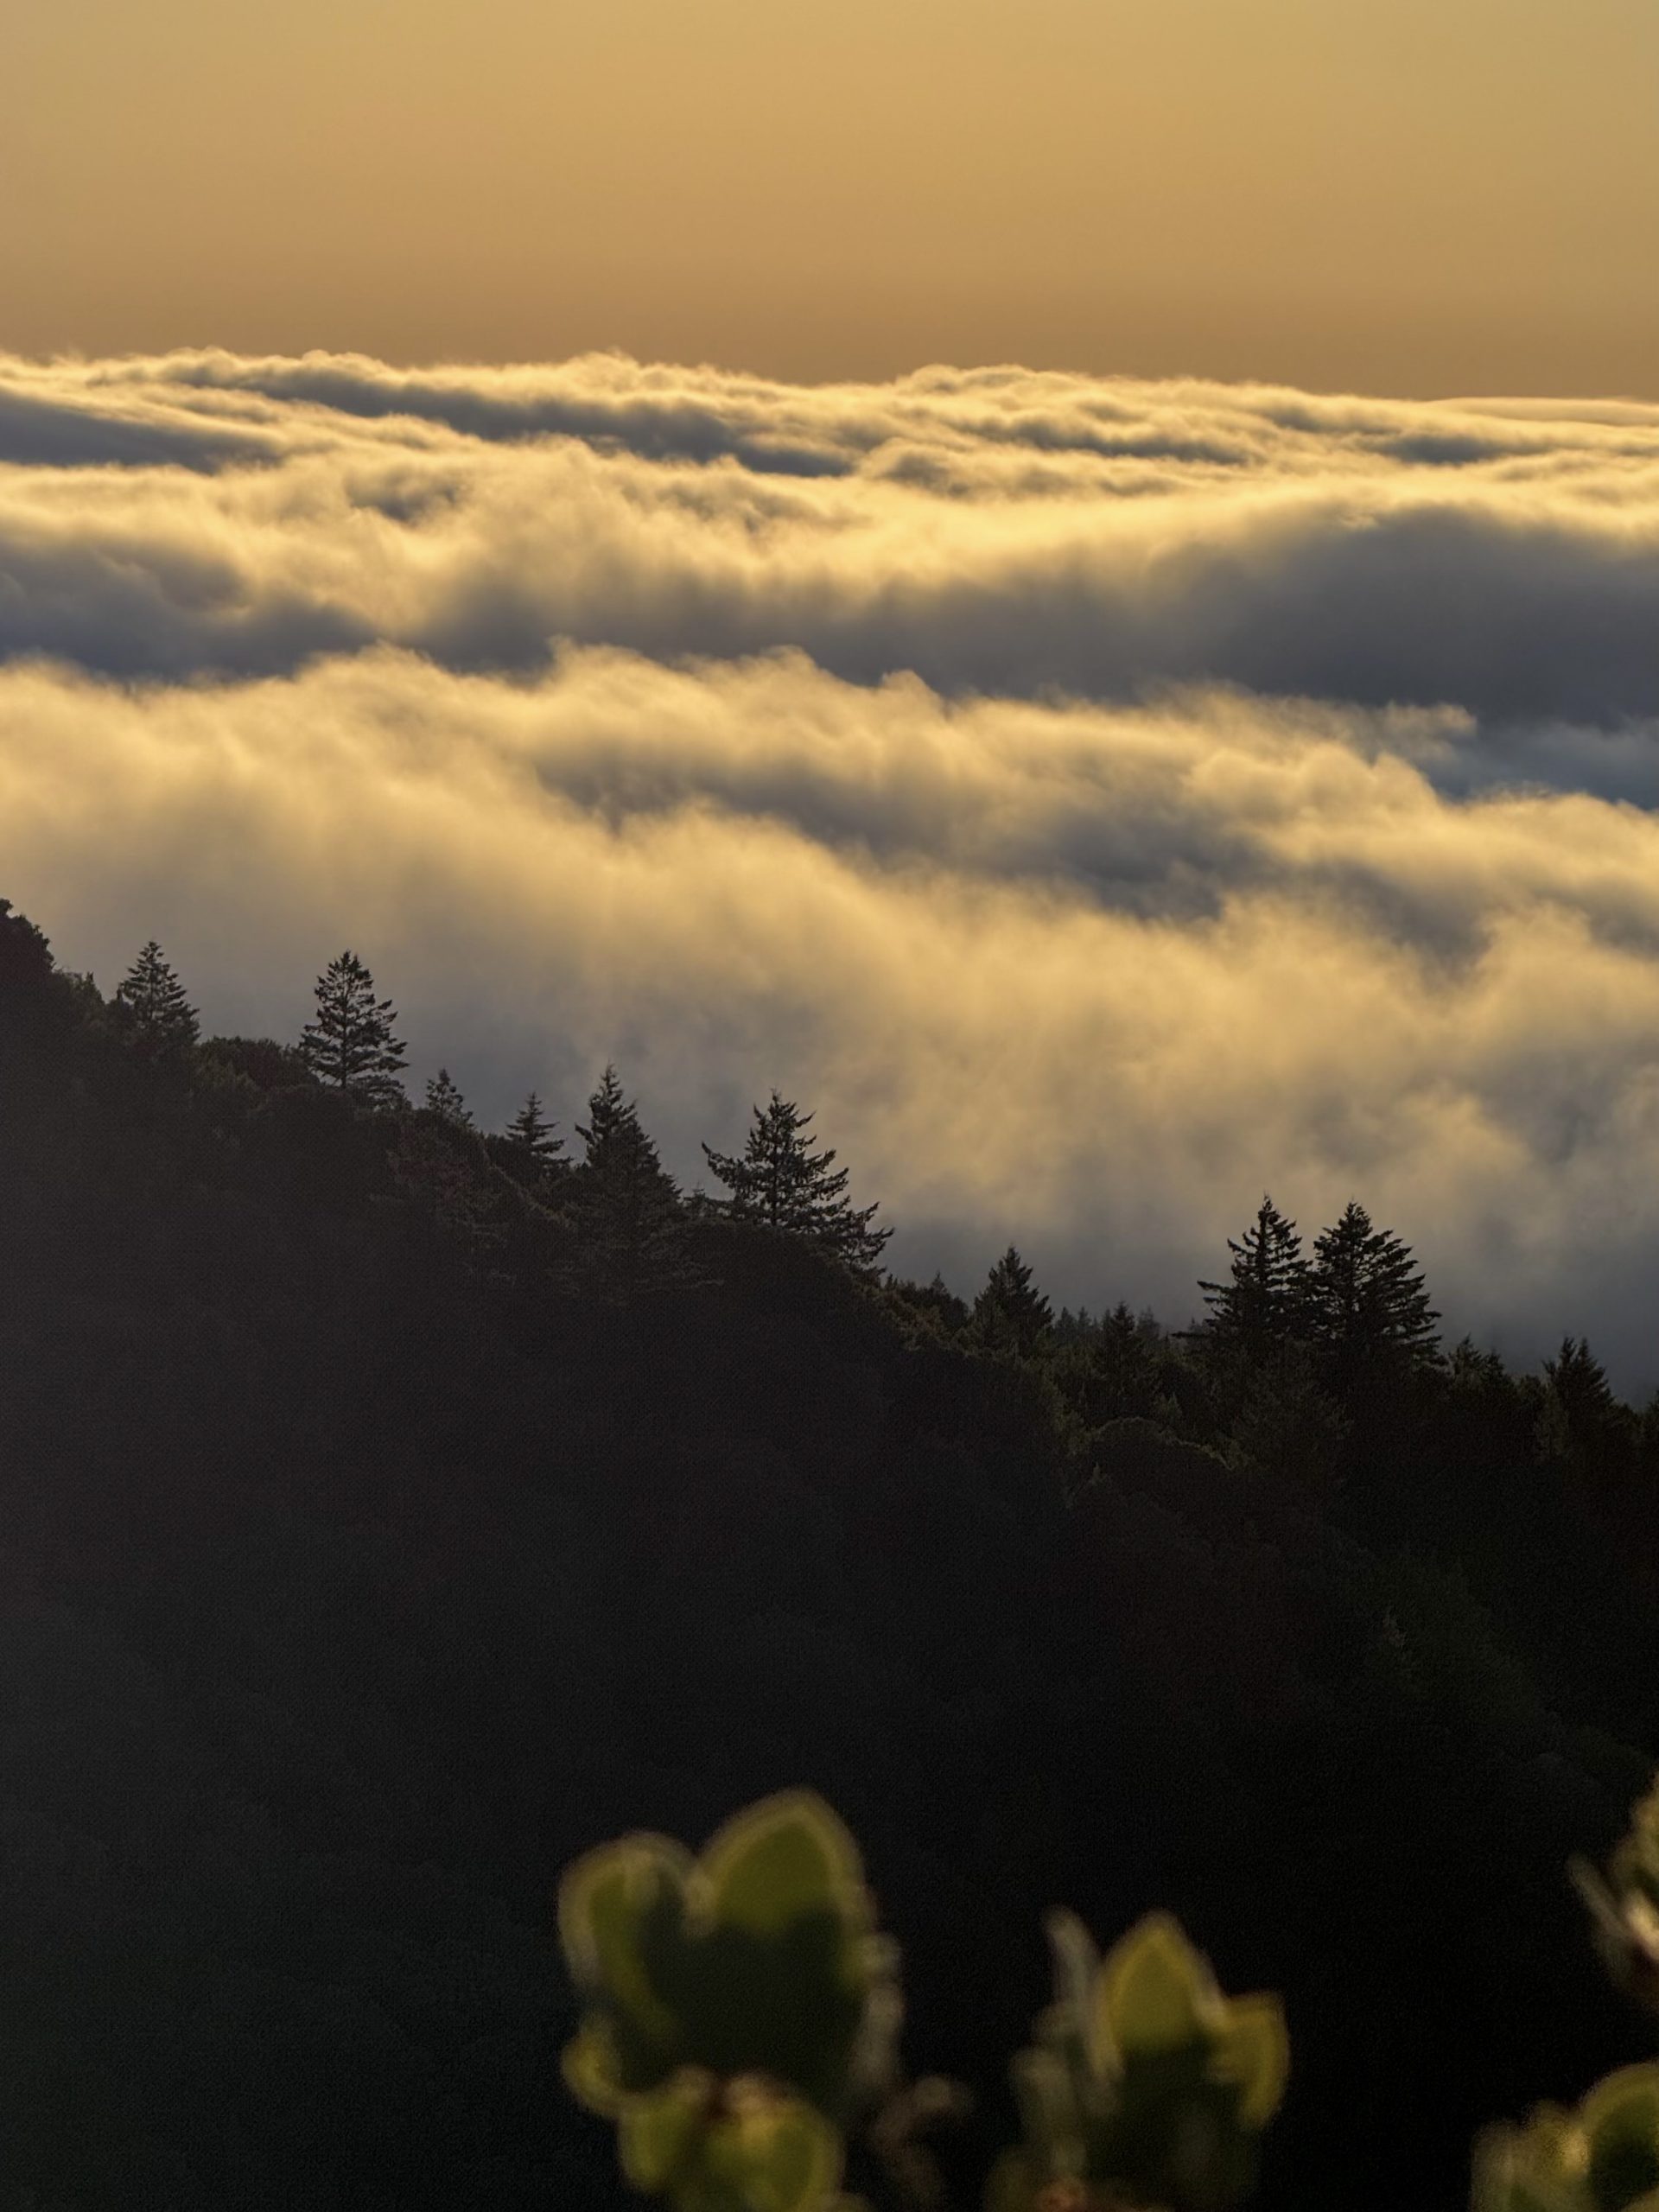
After our scenic drive through the misty ridgeline, we made our way all the way up to East Peak, the highest point on Mount Tam that you can drive to. At some point on Ridgecrest Boulevard, we broke through the fog — and that moment was pure magic. One second you’re in this moody, fog-covered forest, and the next, you’re above the clouds in full sunshine, looking out at a soft, rolling sea of fog below you.
Once you’re at the top, you’ve got two short and beautiful trails to choose from — or do both if you have time!
- Verna Dunshee Trail is a super easy, paved loop (about 0.8 miles) that circles the peak and gives you sweeping views in every direction.
- Fire Lookout Trail is a bit more uphill, but not too hard — and honestly, the views along the way are so stunning, you won’t even notice the climb. At the top, you’ll reach the fire lookout tower where you get a jaw-dropping 360° view.
If you’re lucky (and we were!), you’ll get to see the cloud inversion in full glory — the entire coast blanketed in fog, while the sun starts to set above it. It feels like you’re standing on top of the world.
Other things to do around Mount Tamalpais
If you’ve got a little extra time, here are some fun add-ons to your Mt. Tam day.
- Mill Valley Public Library. Tucked into the redwoods — it’s peaceful, cozy, and honestly feels like something out of a storybook.
- Stinson Beach. Chill vibes, soft sand, and great for a post-hike walk or beach nap.
- Cascade falls or Dawn falls. Both are short, pretty hikes through the forest to small waterfalls. Perfect if you’re in the mood for more nature.
- Le Marais Bakery. Cute French bakery in Mill Valley with great pastries and coffee — perfect snack stop!
Mount Tamalpais is pure magic. If you’re planning a trip, I hope this guide helps you time it right, pick the best stops, and soak it all in. There’s so much beauty packed into just a few miles — and always more to explore. We already can’t wait to go back.
Find more blog posts about California adventures here. And follow us on Instagram where I share more outdoor adventures, travel tips, and behind-the-scenes from our wanderings! See you on trails!